Thursday, May 27, 2010

Chris Despos on Caraceni

For those who may have missed it, Chris Despos left an interesting comment on the Caraceni post that I am going to reprint. Those outside the U.S. may not know that Despos is considered one of the top bespoke tailors over here, so his input is greatly appreciated. Even more appreciated is his direct insight on the subject which is why I am reposting his comment here.

Jeffery,
Interesting post. I worked 3 years with a tailor from this shop. We would blunt the corners on sleeves and vents even for the basted try on. The process after the try on was to make the lower pockets then turn the front edges, sew them down then baste on the facings. After the lapels were done we would position and make the breast pocket, cutting thru the canvass, haircloth and flannel. This is a nice method and accommodates a pocket square quite well. Because the pocket is put thru the canvass to the inside, the bulk of the square is between the canvass and the lining rather than between the canvass and the cloth. We would cut the haircloth for the chest in two pieces. from midpoint of the chest up it was cut in the normal way. We would cut the bottom piece on the bias and attach it to the other piece. This gave a firm shoulder and a soft chest. This was the last 3 years of 9 years apprenticing. Great experience and opportunity to make clothes in this way. Most of these techniques have been abandoned.


Cutting the breast welt through the canvas is pretty old-school. Frank Shattuck was telling me last week that he still does it this way as well. Caraceni's method seems to have changed slightly in the meantime, from what Chris described.

Here is a view of the inside of the breast welt, which is more often now made before applying the canvas and as such is sandwiched between the cloth and the canvas. Chris is right to point out that it makes a cleaner chest to cut it through the canvas. I'm not a fan of cutting through the haircloth, but we will see that in this coat, that was not done. Nor was it sewn through the felt, which, in this case, has been applied by hand and trimmed around the pocket.

chest with felt

With the felt gone, we can see that the chest piece was split just below the breast line, and another piece of wool canvas butted to it. The breast welt was sewn through two layers of wool canvas, rather than canvas and haircloth. We can see that an additional piece of wool canvas, on the bias, was added to the shoulder for additional support, and the whole is heavily padded by blindstitch machine.

chest no felt

Oh and Chris' thoughts on the mezzaluna tacks:

Mezzaluna tacks hold the interior pipes in place and help support the stress on the pocket pipes. It binds the pipes to the cloth. Much stronger than a hand bar tack that is more decorative than functional. Actually I do bar tacks with a buttonhole stitch on trouser pockets.
Despos


Thanks, Chris.

StumbleUpon.com

Wednesday, May 26, 2010

Twice in one week

Sometimes I hear about things being done that I find a little hard to fathom; pad stitching a chest with a blindstitch machine is one of those things. I had heard rumors of it, but I had never seen it before. Until now.

And twice in one week.

Don't get me wrong. I am not against the idea of machining a chest- with the right equipment you can do a great job of it. A blindstitch machine, however, does not afford the kind of control necessary to get a good shape, and I was afraid that you couldn't handle the layers properly without it shifting too much during sewing.

So when I opened up the Caraceni I was rather dismayed to see that they had done the chest with a blindstitch machine, and the sort of thing that I was worried about is, in fact, a problem. This is the side that sits toward the cloth- it has been stitched from the inside. The canvas has shifted during sewing and there are little bubbles of fullness, just as I had expected there to be; these are much more obvious when you handle the chest than in the photo.

IMG_2650

Then this weekend I saw a vintage garment that Dominik Kufner has in his collection.
This, too has been done with the blinstitch machine, but from the outside of the chest. Not good for shaping the shoulder, IMO.

IMG_2361

Anyways, something to think about. I am not a fan, and am even less of a fan now that I have seen it up close and personal.

StumbleUpon.com

Monday, May 17, 2010

A. Caraceni

Label3

It finally came!!

SF member Vaux le Vicompte kindly donated our latest specimen, a DB he had made by A. Caraceni in Milan- you can see images from some of his sartorial adventures at his lovely blog here- legrimod.blogspot.com. (merci, Monsieur le Vicompte!) The following is excerpted from Wikipedia;

Caraceni was founded in Rome in 1913 by the father of Italian tailoring, Domenico Caraceni. At one point in the 1930s, Domenico and his family operated ateliers in Rome, Milan and Paris. The Paris atelier was operated by Domenico's brother, Augusto, who closed his atelier when Mussolini declared war on France.
Today, there are several businesses going by the name "Caraceni" in operation. The original shop operates out of a small location in Rome with a very small workforce. This is run by Tommy and Giulio Caraceni, nephews of Domenico. There are three branches in Milan, all founded by offshoots of the clan, one even claiming to be the "real Caraceni." However, the cognoscenti consider A. Caraceni, currently operated by Mario Caraceni (son of Augusto) to be the best of the Milan branches. These suits are what is known as "bench bespoke," meaning they are made one at a time, by hand, to a pattern specifically drawn for each individual customer.
The various Caraceni "sartorias" have crafted handmade suits for various celebrities over the years, including Tyrone Power, Humphrey Bogart, Gary Cooper, Cary Grant, Yves Saint Laurent, Gianni Agnelli, Sophia Loren and fashion designer Valentino Garavani. The Caraceni label is also famous for dressing generations of The Kings of Greece and Italy, The Prince of Wales, Prince Rainier of Monaco, Italian Prime MinisterSilvio Berlusconi and Aristotle Onassis.

It is worth noting that Domenico Caraceni regularly obtained King Edward VII’s castoffs (which had been made by Henry Poole) which he dissected and studied, so in a sense he is the spiritual grandfather of this blog. Or parts of it, anyway. He also wrote an essay in 1933, compiling his thoughts on the trade which I have yet to find; if anyone knows of a copy of Orientamenti nuovi nella tecnica e nell'arte del sarto, I would very much appreciate knowing about it.

From the outside are all the hallmarks of a very well-made bespoke suit- entirely respectable hand-made buttonholes, hand pick stitching, hand-sewn besom pockets with mezzaluna tacks, and a very nice curved, hand-made barchetta breast pocket.


Buttonhole2

Lapel outside13

Besom inside12

taschino barchetta

Under the lapel is the “cugno Martello” (I don’t know how to call it in English) a type of dart we don’t see much anymore.
Martello14


The lining has been inserted entirely by hand, and it looks as though the facings may have been applied by hand, though I will have to get it open to know for sure.

Lining9

Gorges which have been drawn on by hand can usually be spotted from ten meters away, but this one has been done so neatly and expertly that I almost believed it had been done by machine, even on very close inspection it was hard to tell. Easily the best finishing work I have ever seen.

Collar7

One notable feature is the blunting of the corners; I was taught to do this but it is hardly ever seen anymore. The points of the collar, the pocket , the vents, the sleeve vent, the bottom of the front edge have all been blunted with a few well-placed hand stitches. A subtle distinction of the hand-made suit.


Vent
Vent11

Sleeve vent

Sleeve vent10

Breast welt

Taschino6


The lapel has been padded rather exuberantly by machine, which is a bit surprising considering the amount of handwork everywhere else. In fact, now that I have it open, I am able to say for sure that the facings were applied by hand, a step which Frank Shattuck tells me takes him a full day to do. One wonders why, then, they would choose to pad the lapels by machine- perhaps they do not see any added value to it. Similarly, the collar has been padded by machine.

Lapel8

It doesn’t show up very well in photos due to the dark colour, but the shoulder seam has been sewn by hand and the sleeves have been set by hand.

Shoulder seam

Shoulder seam5

Armhole

Armhole4

There is a monstrous amount of padding in the shoulder, but this may have been a personal preference or a way of concealing overly sloping or hunched shoulders.

Pad15

The suit was made in a slightly softer cloth than I have seen coming from some of the English tailors, and it gives the garment a bit of fluidity which is typically Italian. Despite the more challenging cloth, it has been made up very neatly, and expertly- it really is a tremendous garment which I will be continuing to study so there will likely be some updates to this post shortly.

StumbleUpon.com

Saturday, May 1, 2010

Sleeves on an overcoat

full
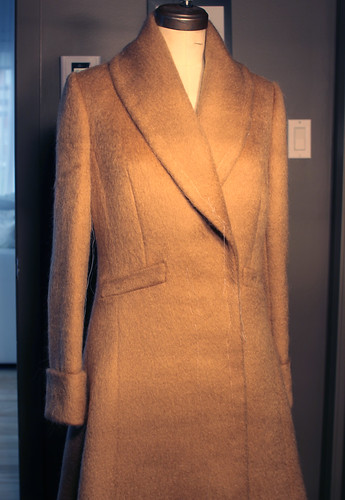
I didn't get a chance to photograph the blazer before shipping it, sorry. To make it up to some of you (well, at least to Kim who has been begging for this for a while) some thoughts on setting sleeves. Not a full tutorial, but just a few pointers, this time a woman's overcoat. (Cheating, she says- those sleeves are easy!) This will appeal mostly to homesewers, so if that's not you, check back soon when I will be opening up a Caraceni that is somewhere in the postal system (I hope it's not lost!)

The first thing I will mention is the importance of stabilizing your armhole- if you distort it by even 1/8" in some areas you can have sleeve trouble and will have to adjust the pattern. The most common way of doing it is to stay the armhole with 1/8" cotton india tape, drawing in slightly in the sharply curved area of the lower part of the armhole. By drawing in, I mean to pull slightly on the tape to shrink that area a bit.
armhole

With very full sleeves or difficult cloth I will pre-shir (gather) the sleeve. In the factory we have programmable machines that will shir different amounts around the sleeve cap; at home I will just use a long stitch on the plain machine, run two rows, and draw them, easing the cap into a nice shape. Make sure that the shirring is smooth and that there are no areas that are puckery or lumpy- also, no easing for about 3/4" on either side of the shoulder seam notch.

shirring

If you haven't altered the armhole and are working from a commercial pattern, then you are good to go, matching notches- if you have eased the cap you shouldn't have much trouble basting it in; any puckering that shows up should be redistributed. Don't be tempted to fill in a puckery sleeve with a bunch of wadding- it may hide the puckers now, but they will come back. The wadding is just to help the sleeve, not to cover bad sleeve setting. But let's say you HAVE changed the armhole a bit during fittings, or, like this one, it's a new pattern that hasn't been tested yet. Then you may have to adjust a little.

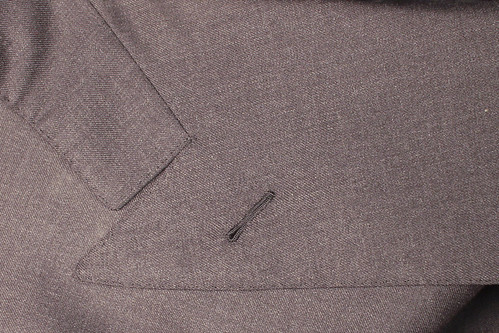
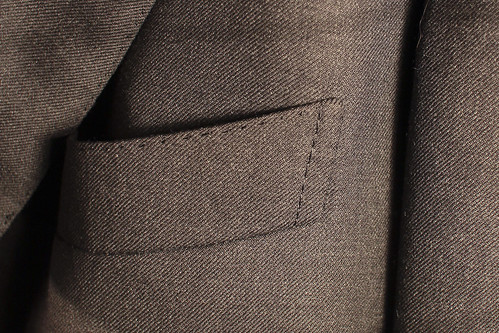
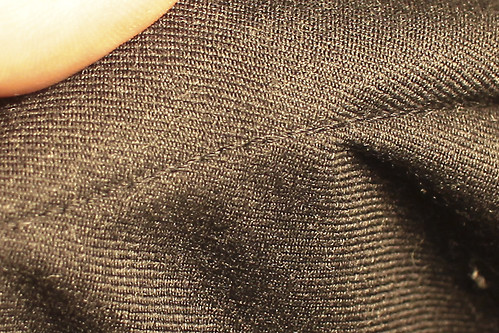
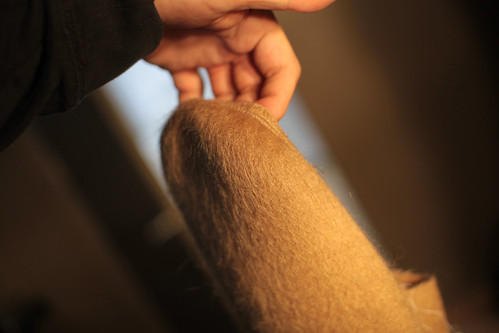
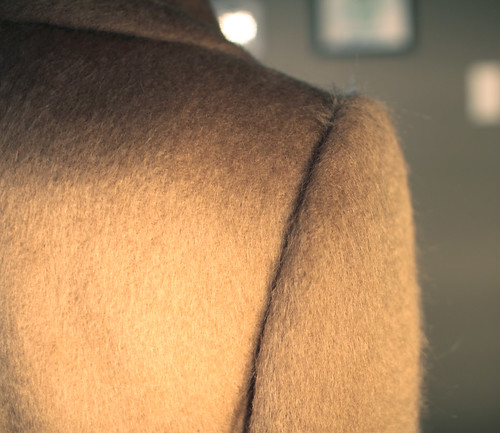
There should generally be more fullness toward the front of the sleeve, near the front of the shoulder bone, than in the back. I have basted my sleeve in, and the back looks good,

back before

But the front is too full- I don't want that much of a rope. Maybe you have puckering because the sleeve is too full or the cloth is difficult.

front too full

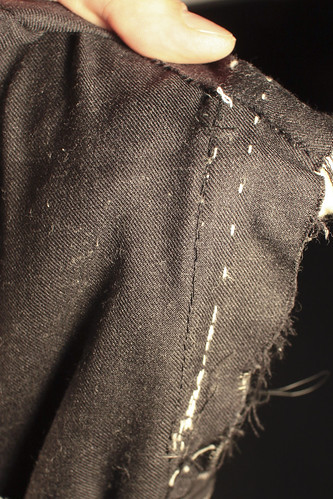
I take the sleeve out, remove the shirring stitches, and rip the elbow seam. Then I trim the top sleeve a bit (or a lot, in this case) like this

remove

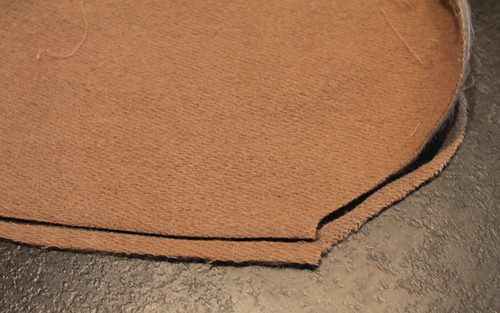
Then I re-sew the elbow seam, redo the shirring, re-baste the sleeve, and hope for the best. Lather, rinse, repeat, if necessary. The result is much better.

front after

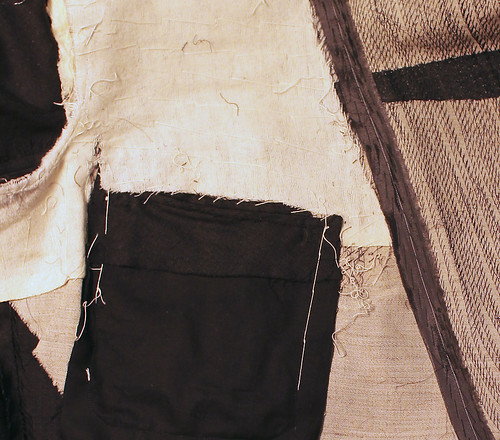
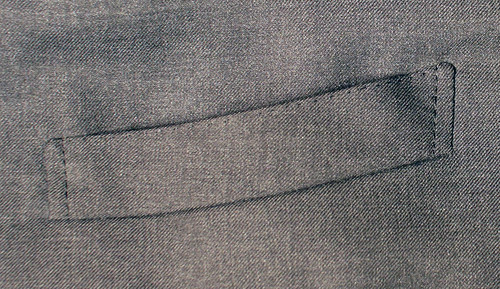
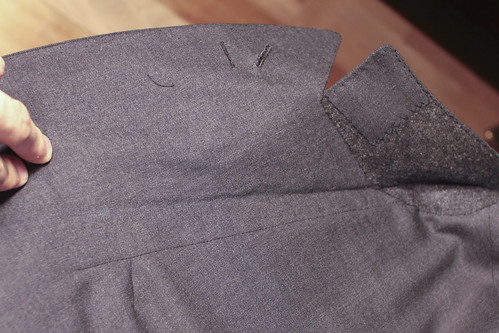
Then I will cut some wadding and canvas for the sleeve head, which will look like this-

slvhead

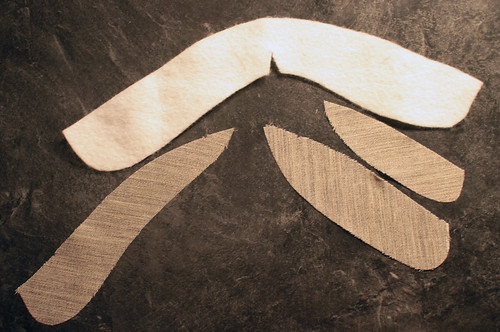
The two pieces of canvas go on the front, with the smaller piece underneath- note how the hairline reverses on the pieces- very important. At some point I wrote an article on designing sleeve heads so I will try to dig that up rather than going into too much detail now.

EDIT

Here's the post

ot about shoulders in tailored clothing. One important element in defining the look of the shoulder is the sleeve treatment; first, the seam can be put toward the sleeve for a rope, it can be opened for a continental shoulder (one with a defined crown but no rope) or a natural shoulder, or it can be put toward the coat for a neapolitan shoulder.

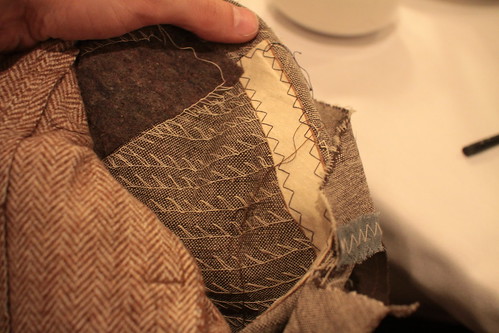
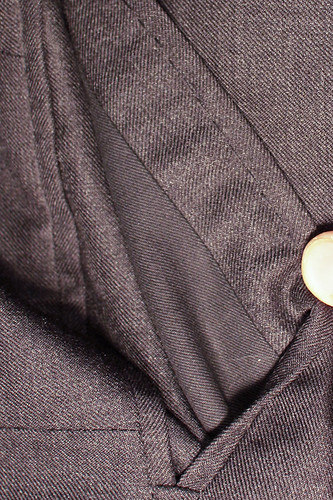
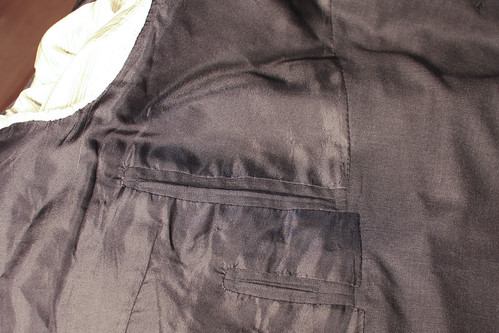
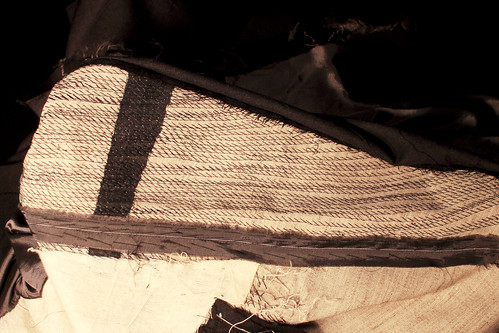
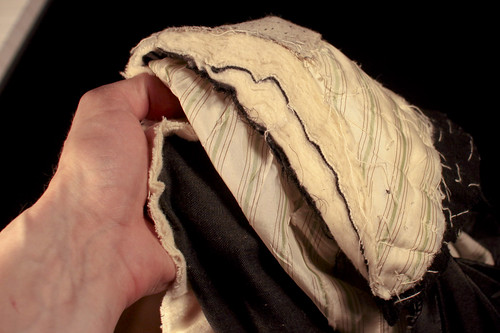
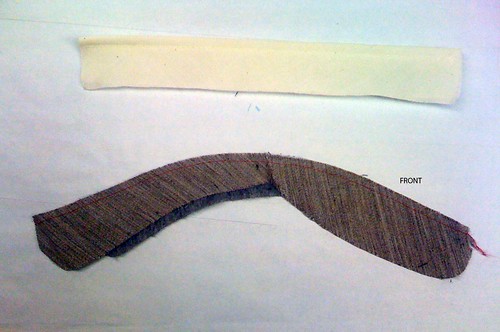
Second element is the type of wadding used. The traditional wadding was usually a piece of lambswool with a bias-cut cotton folded over it (see photo, item on top of crappy iphone photo). The disadvantages are that this can be a bit lumpy, it is limiting in the style of shoulder you can achieve (it tends to be ropy) and it tends to break down over time. We hear a lot about traditionally-made coats “settling” over time; I, personally, would rather deliver a garment which will keep its shape over time, rather than one that changes. But that’s me.

The wadding shown in the lower part of the photo is more common in RTW garments now because it affords more control to the designer and will keep its shape. It also helps with the dreaded “hanger appeal”, which bespoke tailors don’t have to worry about.

sleevehead 005


Two types of felt are commonly used- one is a basic needle-punch felt with a foam backing which is quite lofty and good for rope-style shoulders, the other is a needle-punch felt with a scrim (net) backing which is lighter and softer. I, personally, prefer the scrim felt for all applications over the foam but the foam keeps its shape better.

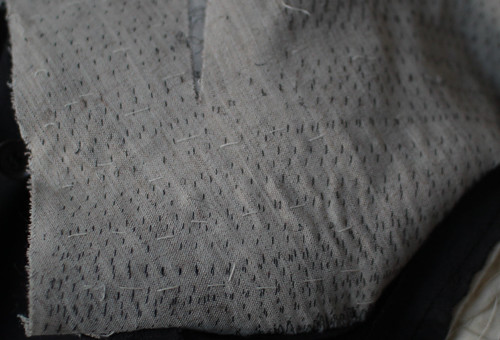
The canvas used is a special weave designed especially for, and only for, sleeve heads. It is a broken twill weave and is denser and has more roll to it than regular canvas. It is easy to tell the difference when you look at the back of the canvas. The canvas helps support the sleeve not only on a hanger, but on the wearer, and prevents disasters happening if the wearer should inadvisedly steam his suit


The pattern for the sleeve head will depend on the type of shoulder you want. It starts with the sleeve pattern; start shaping the sleeve head as shown in figure 1. The degree of curve from this point will determine how much bulk you introduce into the sleeve cap- for a rope shoulder or one with a very defined crown, make a straighter shape, as in figure 2. For a natural shoulder (and by this I mean of the J Press/Southwick/Paul Stuart type) make a much more curved shape (figure 3), which will make a flatter profile with less bulk. From this basic shape you can develop your pieces.

SLV1


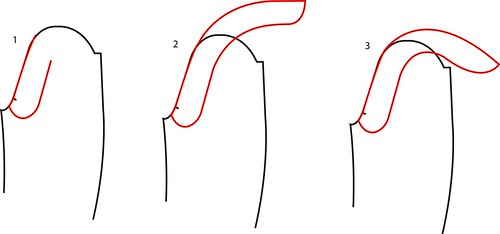
For the felt piece, I don’t run it all the way down the front, though some do- it’s up to you. The first piece of canvas that you make will support the sleeve and define the crown (or not)- for a rope or continental shoulder, start the canvas about 2” down from the shoulder point. Be very careful to observe the HAIRLINE indicated on figure 1. I indicate the hairline and not the grainline because the canvas is streaky in the direction of the hair line and is easy to identify visually (the hairline is the crosswise grain). The large piece must be cut on the bias with the hairline RUNNING DOWN or you will get a dimple on the cap. A second, smaller piece is usual, as shown in green on figure 2. The hairline is also bias but the opposite to the large piece- this will ensure a nice forward roll on the front of the sleeve. A third piece can be cut, as shown in orange, on figure 2. Note the direction of the hairline.

Web

A natural shoulder requires less canvas. The scye seam should be opened as much as 4” to either side of the shoulder point, and there should be no canvas in this area. It’s not as clean on a hanger, but is nice on the wearer. Start the canvas 4” down from the shoulder point as shown in figure 3. There should be no canvas in the top of the sleeve, and a third (sometimes fourth) piece is added to the back, as shown in orange.

A certain amount of experimentation will help you develop a sense of how the shape and size of each piece affects the final contour of the sleeve cap.


Now back to watching my mail box for that Caraceni....

StumbleUpon.com