Showing posts with label trousers. Show all posts

Tuesday, March 5, 2013

On gaping pockets

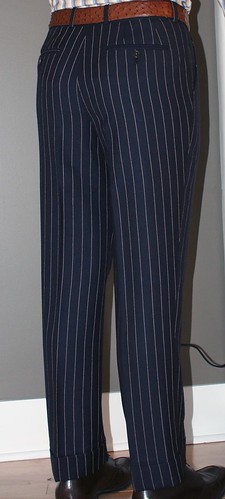
Gaping pockets are a common affliction on plain-front trousers, and are almost always caused by tightness in the hips- the tightness causes the pocket to pull open and form what some say look like dog's ears on the side of your hips. Never an attractive feature.

When selecting a coat size, we advise to fit the shoulders first, then worry about the rest; when fitting trousers, it is best to find a size that fits correctly in the seat and adjust the waist to suit. This is one of the reasons. There is a possible fix, however.

Tightness in the front of the thigh is often a cause of this and can be remedied by dismantling the waistband and working about 3/8" of fullness across the front of the trouser, taken from the outlet at center back, shifting everything forward. An extra dart above the back pocket (there is usually only one) is helpful for prominent seats (but difficult to add to a finished garment), and a dart in the front helps with very muscular thighs.

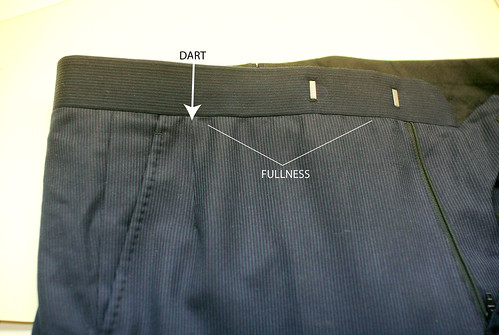
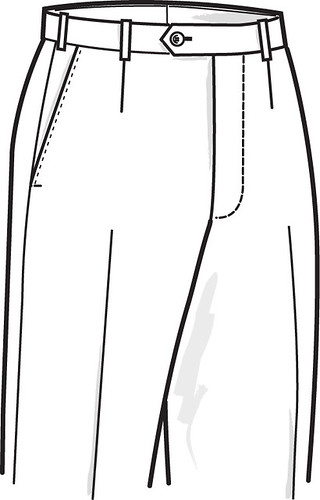
We don't often see this front dart on ready-to-wear, and when we do, it is usually in the wrong place. The most aesthetically pleasing spot for this dart would be right under the belt loop where the crease would intersect the waistband were we to extend the crease all the way up the front, as illustrated.

749


Anatomically, however, this placement is incorrect. The hip is somewhat hollow at that point, and the fullest part is toward the side. By placing the dart next to the offending pocket we can add some extra room for the thigh and correct the problem.

The fullness and extra dart can be seen on this outstanding trouser, part of a suit made by Leonard Logsdail for an evidently athletic client who donated it to this blog. You can see the proper dart placement (some prefer to approximate the angle of the pocket for aesthetic reasons) as well as the slight puckering along the waistband where the fullness has been worked in. Bespoke tailors will be aware of this but some alterations tailors may not so if you are a former (or current) hockey player who has trouble with trouser fit, you may want to bring this up with your alterations person.

Web

StumbleUpon.com

Friday, September 25, 2009

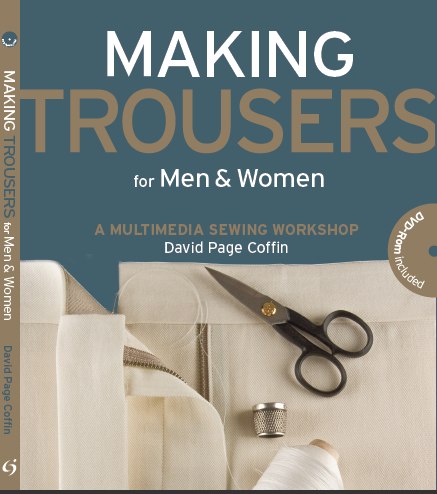
Making Trousers

Pants_cover_031709.pdf

My copy finally came this week!

It's very common for us in the garment trade to examine garments, analyze their construction and adapt what we find to our industrialized settings; in this excellent book, David Page Coffin has done the same but with the home sewer in mind. Those who have enjoyed the "Look under the hood" series will love this book, as the first chapter is devoted to the same exercise with 11 pairs of trousers, and the accompanying DVD has many more photos, and a few bonus trousers that didn't make it into the book. GOLD!

Though intended for the home tailor, the book can be useful for professionals who are looking for inspiration, ideas, or who just want to break out of the factory box since it is not limited, as we often are, to our segment, sex, or quality level.

Well written, well photographed, and and well illustrated, this book and DVD is a must have for anyone interested in trouser construction. BUY THIS BOOK!

StumbleUpon.com

Tuesday, September 8, 2009

The trouser- fitting & completion

If you're just joining us, back up one post first. We were discussing the ironwork involved in making trousers.

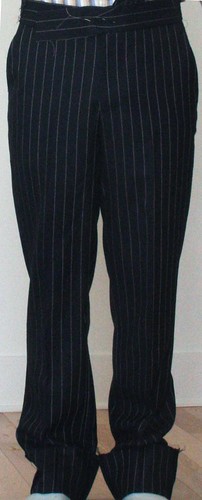
David asked what the difference would be between a trousers done with this ironwork and one done without. So the first fitting I sewed the seams straight with no manipulation, no fullness, no stretching, no shrinking, and the result was this. Not a very nice line. The hem is turned up at the bottom so it puddles around my ankles, but look more at how it hangs around my knees. Not clean

trouser fitting

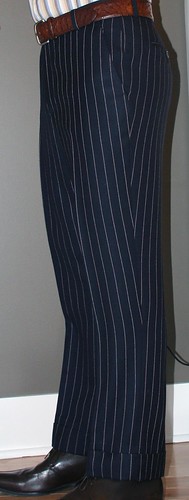
Then I ripped them down to show the ironwork in the previous post, and put them back together again. This is the result, which I much prefer.

trouser side front

Trouser rear

While David is right, some of the shaping will be lost with wear, but I can put it back with a careful pressing. Those who steam their pants are ruining all this shaping and will have pants that puddle around their legs; by pressing them with a good iron and observing the shape illustrated in the T&C thread you can have a marked improvement in the fit of the leg.


UPDATE

To answer a few questions, the first thing that will help getting a better press on your trousers is a wider ironing board; normal household ironing boards are too narrow to fit the entire leg so you not only have a hard time visualizing the correct shape, but you also tend to do the front only and then shift the pant and then do the back (or vice versa) when you should really be doing the entire leg at once. The Rowenta board that I have at home (in the pictures) is great for this and has a much better pad than most domestic boards. I know that some department stores have followed their lead and started producing wider boards as well.

Next, some puddling around the legs can be from bad fit and can't be rectified by pressing; hip-forward posture or flat seats will cause cloth to puddle around the knees in a horse-shoe shape and no amount of pressing will fix that. But assuming you have a trouser that fits adequately, it also helps if the manufacturer has made provisions for this kind of shaping. As I mentioned, the knee notch is shifted so that when the seam is sewn the back thigh is sewn on tight to the front which has some fullness, and there is some fullness in the back calf area. This allows us to stretch the panel opposite the fullness, like when constructing the inseam of the two-piece sleeve, and work the trouser up when busting the seams (industry jargon for pressing the seams open). If this was not done (for expedience during production) you won't be able to get the full shape out of the trouser, but you will be able to help it a little. When pressing your trousers, always keep this shape in mind and your results will be much better.

Like any part of any garment, it helps to visualize the shape of the body which is being covered. The trouser is not really two straight creases- the leg makes a bit of an "s" shape so we will recreate this shape in the pant. Whenever we want to create a curve in a garment without a seam, we have to stretch the outer arc and shrink the inner one, so if you are dealing with misfigures, keep the person's shape in mind when shaping the garment. Refer to the diagram below- stretch over the front of the thigh, stretch the seam into a forward curve, and shrink the excess under the back of the thigh. Do the opposite on the lower half, working the curve into the shape of the calf. Notice that the creases are not straight and that the hem of the trouser will dip lower in the back than the front.

If and when I can get my hand on a video camera I will post video of the process with and without a vacuum table (which is a godsend).

Trousers_dressurZSK002

StumbleUpon.com

Sunday, September 6, 2009

Cutting trousers- a cultural divide

We've been discussing trousers on the T&C forum & it occurred to me that I haven't really looked at trousers on my blog. Largely because I feel that there is a lot less room for individual expression and nuance in trousers than in jackets, which I, of all people, should know is not really true. I explain.

Working in the RTW industry in Canada gives me an interesting perspective in that I sell garments in Canada, the United States, and sometimes central America, Europe and Asia; regional variations in taste and fit are more obvious to me than someone who only sells into one market. But let me focus on Canada and the U.S. who share a similar history and culture but have very distinct tastes in trousers. I can sell basically the same cut of jacket into the States as I do in Canada, though generally a little easier in the U.S., but the trousers are a deal-breaker. It has always been a basic truth in our trade that (despite the fashion cutomer whose preferences bounce around quite a bit) Americans like a big, roomy, pleated, high-waisted trouser and Canadian prefer the opposite, namely a trim, plain-front, low-rise trouser. We had some leftover suits hanging in stock that had been cut for the States and no matter what kind of promotional price we might offer in order to get rid of them here, nobody wanted to touch a pleated, easy trouser so we had to cut them down to slimmer, plain front versions in order to liquidate them in Canada. A major expense (and royal pain) but we had to do it.

The British and the Neapolitans have different cultures and sartorial traditions so it is understandable that their preferences in cut should differ, but why would we find such a disparity between Canada and the U.S.? I've never really thought much about it until now.

Which brings me back to my next project. Bigger, easier trousers are more forgiving in their fit and require a bit less shaping in order to get a good fit; close-fitting trousers, like those that I cut for myself, need a bit more help. I just got a nice, sturdy piece of English cloth from which I'm going to make a suit and we'll look a bit at the shaping that goes into a traditionally-made trouser. Some of it is at construction level, but the shaping that I do in pressing can be used by anyone who is pressing their trousers at home to refine the fit a bit.

My next suit- a navy twill with a soft pink stripe.
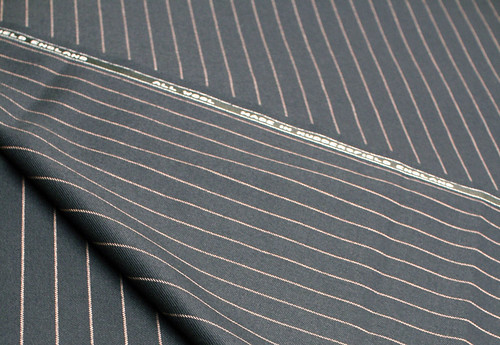
Cloth

Having typed this, I wandered over to T&C to see that Sator had posted this article on shaping the trousers. which saves me the work of having to illustrate it. I don't have much to add except that in a factory setting in order to control the amount of stretching and shrinking, we shift the knee notch up by 1/4" to 3/8" on the back panel- this has the effect of introducing fullness into the calf area and shortness in the back of the thigh. When we press the seams open and crease the trouser we then stretch the back thigh and front calf, eliminating any ripples of fullness in the seam and doing the same shaping.

The waistband should also be shaped, which is not illustrated so I will do that. To allow for that shaping, we ease some fullness on the front panels onto the waistband when sewing it on ( which is alluded to in the German text).

So here's a bit of a recap of the German text on ironwork, but with an explanation of WHY we are doing it. Note that normally I construct the fly before joining the front to the back but it would be difficult to see the result of the shaping so I am putting them together in the wrong order for the sake of this demonstration.

When the two panels are creased along their center line and placed next to each other, we see a gap at the thigh and the knee. Trousers which are narrower at the knee will have a greater gap and require more shaping than ones which are a little looser, as will trousers which are cut closer at the thigh. These are not really flared bottom trousers- the camera distortion makes it look like that.
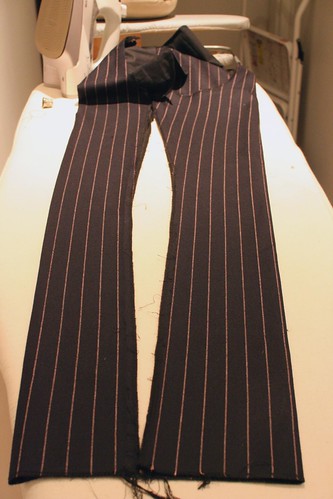
trouser open

If we shift the back panel to meet the front as if the seams were joined, we can see the excess length this creates at the back of the trouser, which often puddles around the wearer (not to be confused with a garment which has not been cut properly for forward hip posture, which will also puddle around the calves)
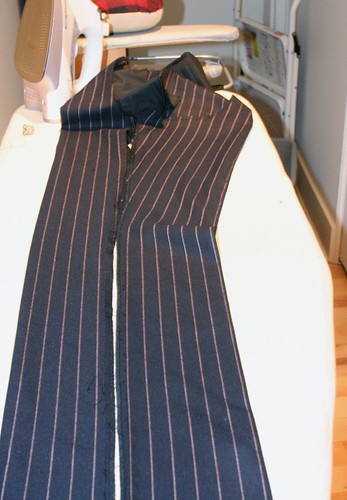
troouser together

To make up for this extra length in the back we will use a combination of stretching the seam around the thigh and the knee, and shrinking a bit of the length out at the back. As David rightly pointed out in the T&C discussion, the trouser is subject to strain during wear so some shaping is bound to be lost- this is true of some of the shrinking so I prefer to do more stretching than shrinking. Notice the stripe line in the back panel.
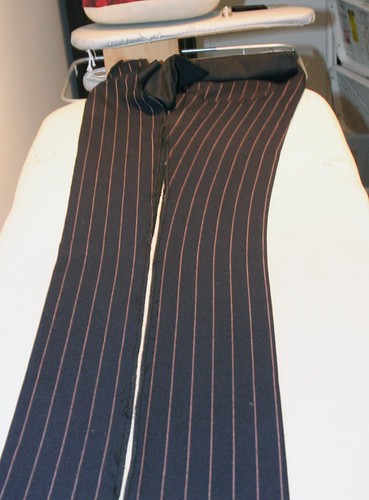
trouser shaped

The panels are then joined and the back of the calf given some additional shaping.
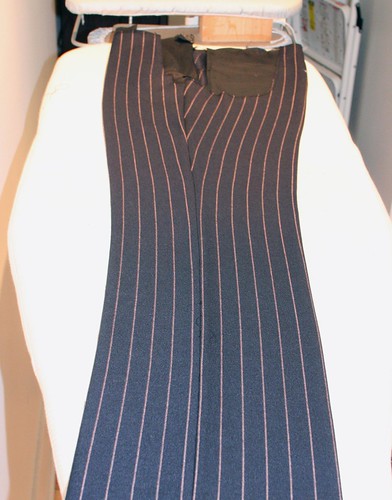
trouser pressed

Here is the waistband which has been pressed into a curve to conform better to the waistline. Lower-waisted trousers need more shaping than higher-waisted ones.

StumbleUpon.com