Friday, December 18, 2009

Huntsman, Ripped and smoothed, part two

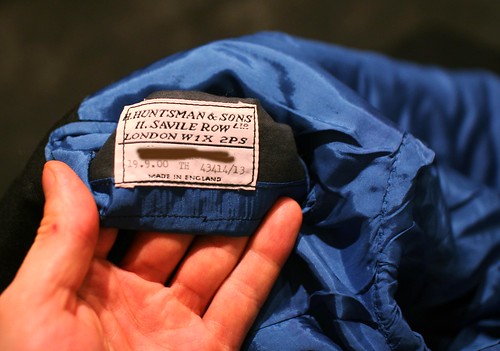
Since my last post, a reader emailed me to tell me that the initials of the cutter would be found on the label, those initials being "TH". I assume this must mean Terry Haste, former MD of Huntsman, but was he there in 2000? I'll have to go back and read the book again. Or do some more homework. But in any case, we're not evaluating the cutting here, only the sewing. It's just fun to know a bit about the suit.

Another thing I have been thinking about; there was a mass exodus from Huntsman during that period so anything not quite up to par may be a result of them losing their best people. Or it may not. More to think about. Meanwhile, let's get ripping.

The finishing inside is quite neat; the felling is so neatly done that you have to look close to see it in spots. There is no pleat in the bottom of the lining and to tell the truth, I'm not sure one is really needed, looking at this suit. Hmm.
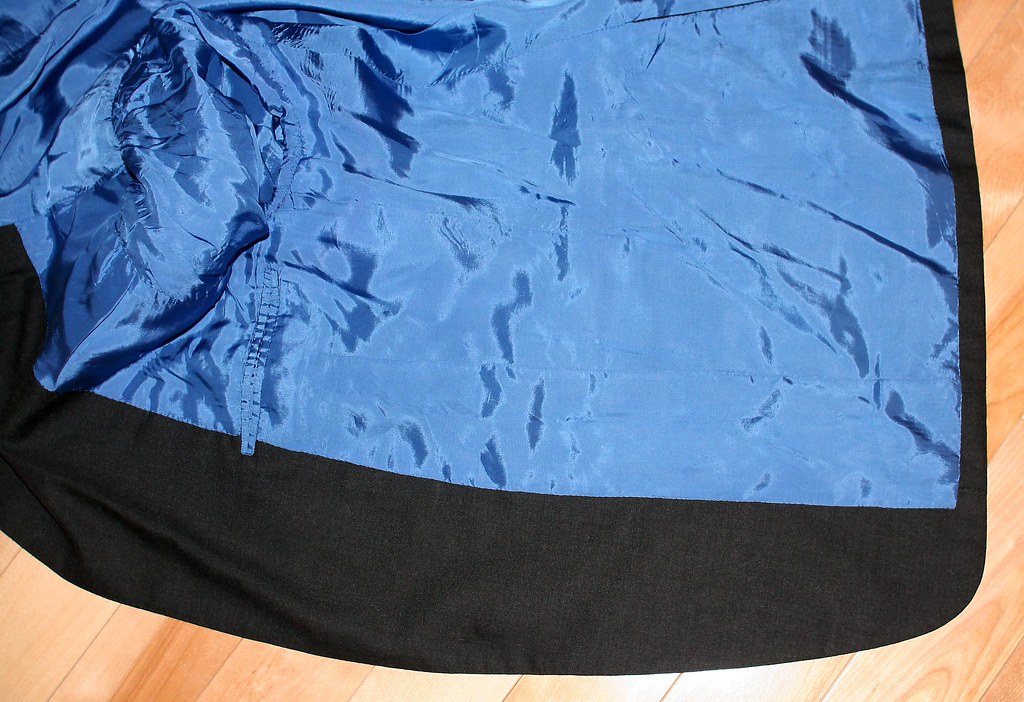
Inside1

The neck is neatly done as well. The facing/collar seam has actually been opened and drawn on the whole way, rather than clipping and working the facing over the top collar around the neck which creates some bulk. Extra work, but I like it and will use it.
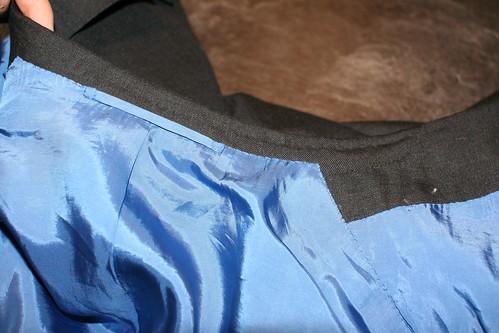
collar

Two pockets on the left, one on the right, neither with any kind of closure.

pockets2

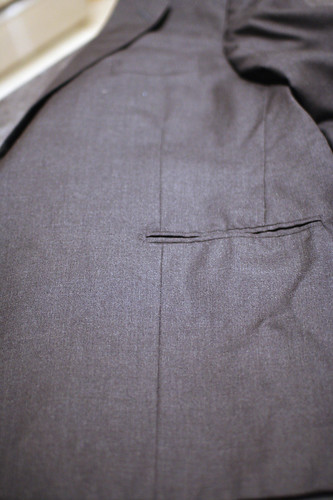
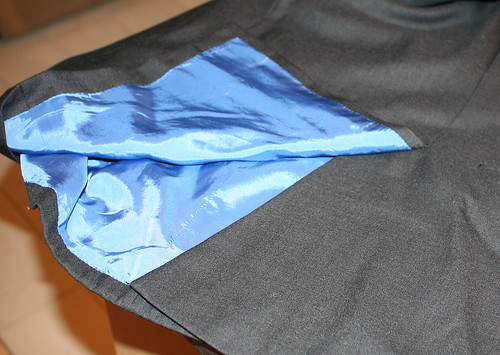
While I was surfing Ebay listings I found the pockets odd, as they seemed to have been worked onto the lining, the way manufactured suits are done, and like this one-
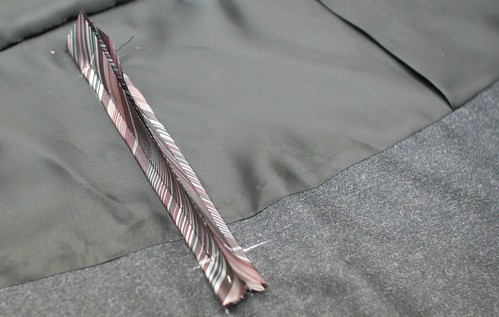
IMG 063

I prefer to set the pockets onto a cloth facing which will carry the weight better. It also makes relining much easier- if the pocket has been cut through the lining and goes onto the facing, as in the picture, it's a bit of a beast to reline neatly since you have to work the new pocket exactly over the hole in the facing- margins of error no more than 1/32" or so. Not a job for your average alterations tailor. Well, I should have known better. I didn't notice that the lining was a bit crooked at the pocket- this would have given it away. The pocket is not actually worked through the lining (though the smaller one just below it is)- the pocket is worked through a cloth facing and the lining is felled to conceal the work. It is common for most Italian tailors to leave this facing exposed in a bit of a decorative manner, like in this shot from a Zegna Couture coat (notice also the hand-felled lining with a backstitch instead of a felling stitch- we also saw this on the Brioni dinner jacket I dissected)
Photobucket

but Huntsman has chosen to conceal it entirely; naturally, it has all been done by hand.
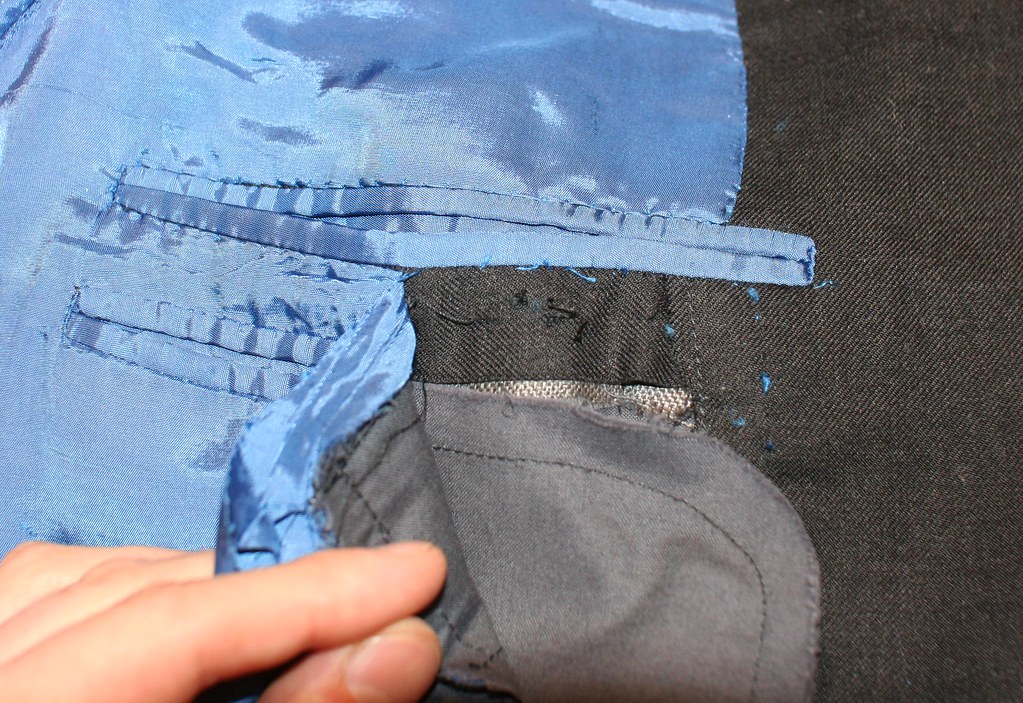
pockets peel


pocket open

Now on to some of what gives the suit its shape.

The bridle has been taped with lining instead of the cotton tape which is more common, and the lapel has been sparingly pad stitched. Remember that a lot of the stitching poked through- it is probable that the padding was done by an apprentice. I personally feel that denser pad stitching on the lapel will give a richer roll, and the results that I get would seem to support that theory, but I haven't properly tested it yet so I can't state it as fact, only as received wisdom. Which can sometimes be false. The undercollar (not shown) has been padded by hand, something that I HAVE tested extensively and found that it is not necessary to do by hand- the machine does just as adequate a job, in my opinion.

bridle

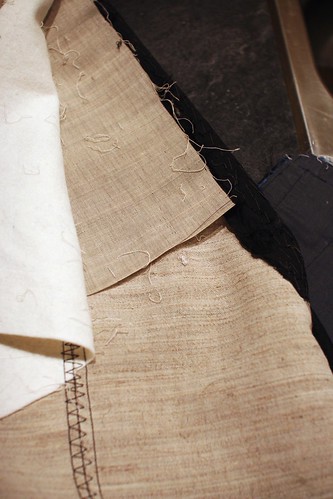
The canvas front is a lovely, dense hair canvas which has not been singed. I need to find out where this canvas comes from. Huntsman has a reputation for being a firm coat so I expected to find more in the chest. Instead, there is only one piece of haircloth, on a partial bias, and a rather thick piece of chest felt.
canvas

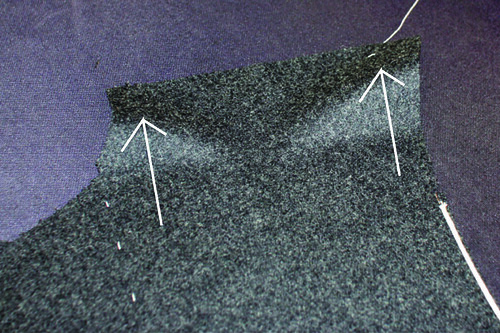
The direction of the hairline is surprising since this won't support the upper shoulder as well and there is no additional shoulder support piece.

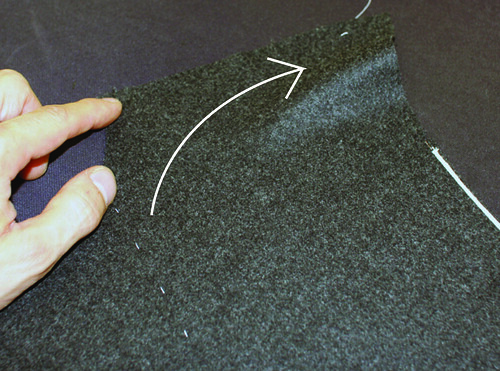
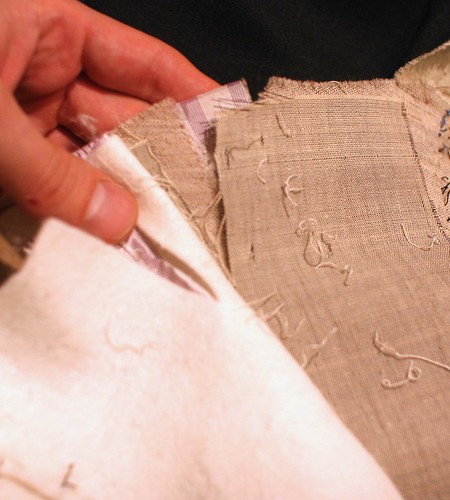
The "vees" or shoulder cuts are left open rather than being fixed. I'm not sure how I feel about this yet. Readers who survived my pagoda shoulders will remember that these vees are opened and fixed in place to provide the shape to the shoulder and without them being fixed in place they can shift around so the shoulder shape will not be constant. This could possibly be a good thing since there is perhaps more movement allowed, but I think this would be very dangerous in lighter cloth- the hollow created by the open vees would make a very visible dent in the shoulder which would be very obvious in light cloth- the only thing covering them is the piece of striped lining on the top and bottom. I need to think about this for a while.
vees

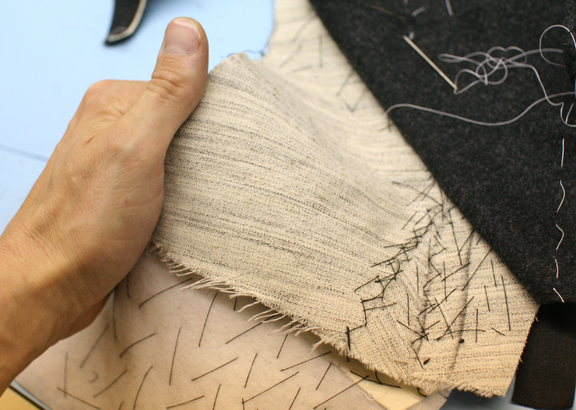
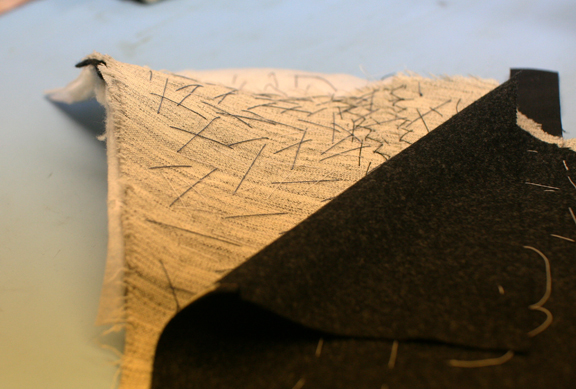
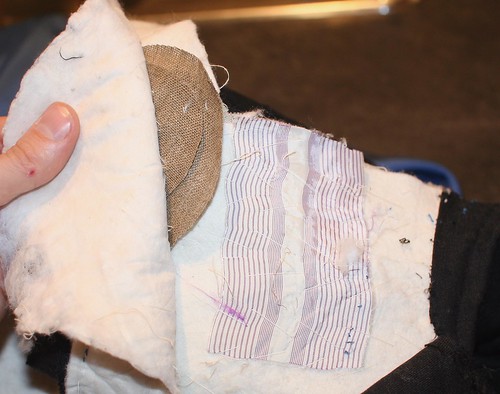
There is a moderate amount of wadding in the shoulder and two small pieces of collar linen. This is certainly a lot less than either Oxxford or Brioni put in their shoulders, again a surprise, since I expected a firmer shoulder from Huntsman.
shoulder

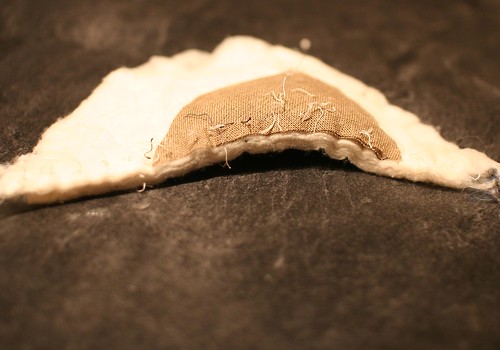
Here is the pad removed

pad

In the sleeve head, FOUR layers of heavy felt. This is a lot, even for me who likes a good, healthy rope. The effect is not bad, but its a bit chunky and lumpy since it's put in straight rather than shaped, which is now the norm (sometimes tradition should give way to innovation).
sleeve head

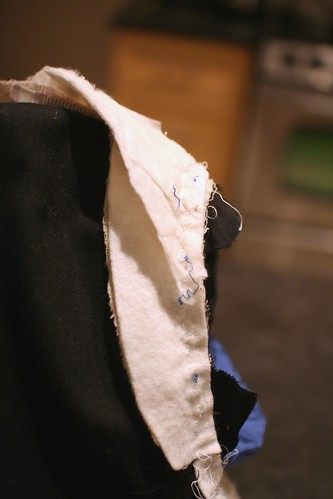
The back of the scye (as well as the underarm) has been padded with cotton and chest felt. This was common in the days of body coats (Sator will love it) but I haven't seen much of it lately; I'm not sure if this is common practice for them or if this gentleman had very hunched shoulders which needed some help. Judging by the, um, proportions of the suit, I am guessing the latter.
scyepad

EDIT
I went plowing along without mentioning that the shoulder seam was sewn by hand and that the sleeve has been sewn in by hand. More on that later.


So far so good, the only major surprises being how LITTLE stuff there was inside. I was expecting much more. As some of my other garments begin to arrive, we'll have a better basis of comparison, though. Need to find an A&S......... But before that, the trousers, which seem to have changed little in the last 100 years.

StumbleUpon.com

Thursday, December 10, 2009

Hunstman, Ripped and Smoothed

I just finished reading Richard Anderson's recent book, Bespoke: Savile Row Ripped and Smoothed. It tells of his apprenticeship and work as a cutter at H. Huntsman, widely regarded as the Row's best and most expensive tailor, and how a change of ownership and some questionable practices led him to leave and start his own bespoke house, Richard Anderson, Ltd. I rather enjoyed the book and recommend it to anyone who has an interest in Savile Row and the business of tailoring.

Having read the book, I thought it only fitting that my next dissection should be a Huntsman bespoke garment dated 2000, right around the time of his departure from the house. I don't think we'll ever know who cut it or if it was off an earlier pattern, but that's not really relevant to us right now.

Label

There's a lot to show so I will do this in several installments. I also now realize that I need some better lighting and a macro lens (thanks NOBD); I hate what flash does to these shots and daylight is in short supply these days......

To see bigger versions of the photos, click on them which will bring you to my Flickr site. Click on "All sizes" above the photo, which should give you the full size, or the ability to select it.
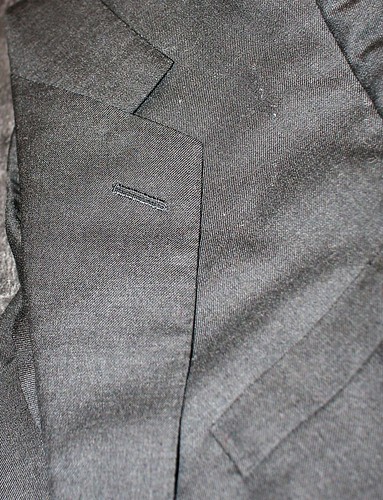
The coat is their typical one button, with a notch (or step) lapel.
Lapel

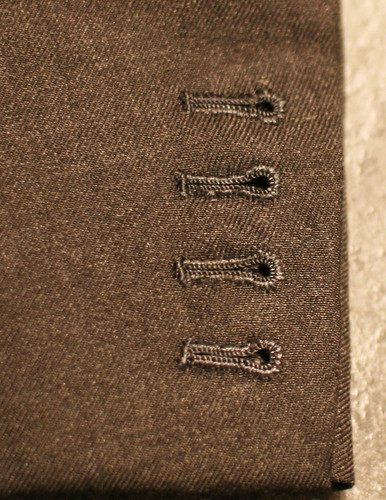
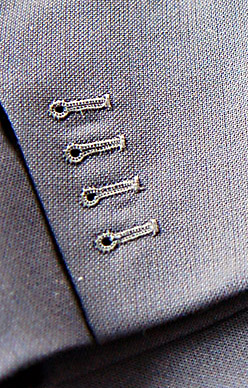
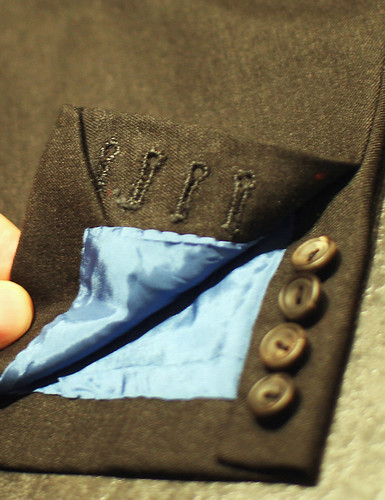
Functional sleeves buttonholes (the quality of which are just ok) are a little close to the hem, suggesting alterations. Strangely, one sleeve has four functioning buttonholes, the other has three functioning buttonholes and one sham hole.

sleeve

Here's a shot of another coat. This was made for Voxsartoria by Steed Bespoke Tailors.
steed

Now a trick question. If I hadn't told you which was which, but instead told you one was from the house reputed to be the absolute best and most expensive, and the other was from a much less-expensive off-Row tailor, would you have guessed right? If you guessed wrong, go get Edwin to make you a suit. Not that we should judge the merits of a suit on buttonholes alone, but Edwin's seem just a little neater, and it should be the other way around.

Back to Huntsman.

Now notice the two-hole buttons and the fold-up hem. Most RTW and MTM is not done like this as it is quite bulky BUT it allows alterations to the sleeve length after the holes have been cut. Ebay scroungers take note.

slv underside

The front buttonhole. Notice the off-coloured pad stitching peeking through under the lapel.

front hole

Underside of the lapel, where you see more of the padstitching peeking through.

lapel underside

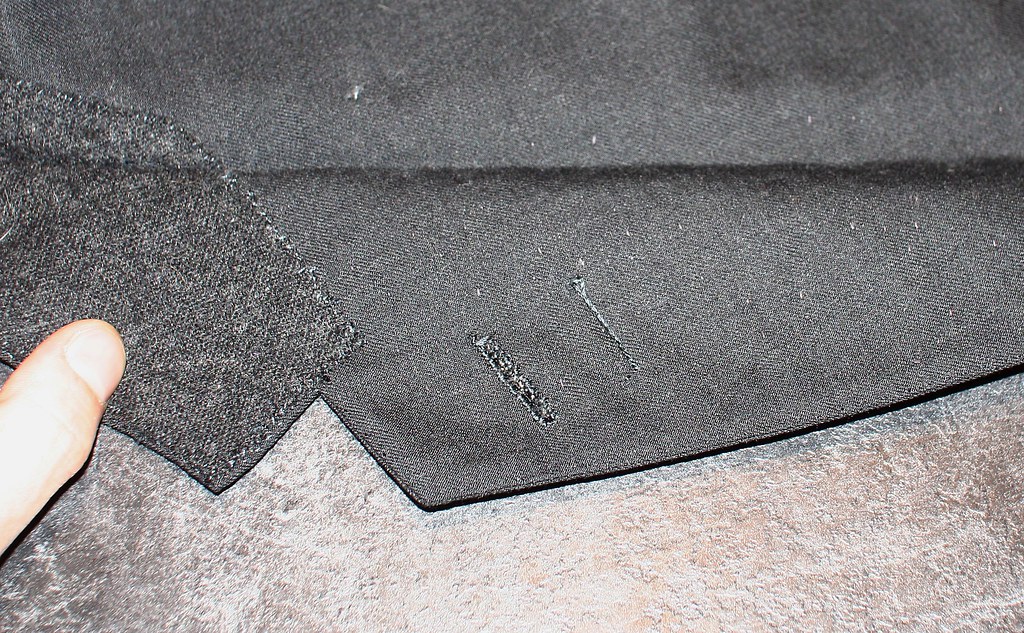
Notice the font configuration- unlike most modern garments there is no separate side body so the underarm seam stops at the pocket. The front dart, however, extends to the hem, a detail often associated with drape cuts.
front dart

And finally, for today, the side vent, with an extra-wide underlay. Notice how the finishing of the lining is done.
vent

Check back soon for more, as there are more interesting details in the coat, and tons in the trouser. There's also a Henry Poole sportcoat coming so SR fans stay tuned.

StumbleUpon.com

Saturday, December 5, 2009

Hand Made Buttonholes- UPDATE

threads


I got an email from my Gutermann rep; Germany, it seems, has relented and will now allow me to order my gimp by the spool instead of by the box per colour- a box containing 5 spools of 100m of gimp which would make, I guess, about thirteen thousand buttonholes. That's too much. Now if only they would relent on the silk twist as well.

UPDATE If you are located in North America and are interested in the Agreman gimp, a group buy is being organized on the C&T forum. Or you can contact me directly at jeffery_d at ymail dot com for more info.

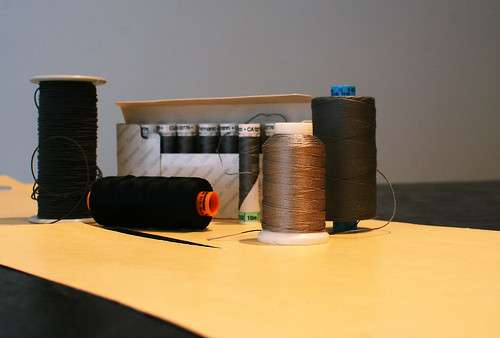
In the photo above, on the far left, the large spool is my gimp of choice. I have always used this type of gimp but when Gutermann made it hard to get I tried a few different varieties and none even came close. Made in Spain, the article is called Agreman and is a wrapped core gimp which comes in spools of 100 meters. Richard James Weldon stocks this but shipping gimp from London to North America can be very expensive.

To the right of the gimp is my buttonhole twist of choice, Gutermann's silk R753, which is a size 40/3 long staple thread. More on this in a bit. It comes in 400m spools (like the one with the orange cob) and can be found at Ely Yawitz or Bergen Tailor Supply in the US. The box standing behind it is the same thread but in small cobs of 10m each; this is the retail format which is available from RJW (they told me they didn't have the bigger format) and is not really worth the money; a cone of 400m from Bergen is about $15 US, while the box of 10 cobs of 10m costs around $20 from RJW. Yawitz sells the individual cobs for about $2 or $3 so if you have a weird colour to do and don't want 400m of it, then the individual cobs are good for a two piece suit.

Second from the right is a one ounce spool of size F (Mara 30) long staple thread that I got from Bergen for about the same price a the 400m of R753. To far right is Gutermann's S1003 wihch is the same size but is a spun thread. Again, more on this in a second. This cone came from Dugdale and I haven't seen any of it in North America but is fairly common in Europe and comes in 300m spools; it is also available in size 40/3 (like the R753 but Dugdlae does not have it. Despite its being spun, it is about the same price as the long filament thread.

Not pictured is some continuous filament thread from Amann which Schneidergott sent me- it is the same size (40/3) but a shade more lustrous than the R753. He says it's hard to find over there (it's impossible to find over here). Maybe someone knows of a good source?

So which one to use?

First the difference between the spun thread and the long staple. When the silk cocoons are soaked to separate the fibers, the beginning and ends are shorter in length and are spun together to create the thread. Because they are shorter, the are more fiber ends which makes a fuzzier, duller texture. The long staple threads are made from the longer silk fibers from the middle part of the cocoon- the longer fiber means less ends and thus a shinier, stronger, and more lustrous thread.

The advantage of using a heavier thread, like the size F or the S1003 is that less stitches are required to cover the buttonhole, meaning less time and less thread. It is also easier to do a neat job using heavier thread. The buttonholes look a bit chunky compared to those using finer thread, so I prefer the finer. This is personal preference and one is not better than the other.

Examples of both size can be seen below; in each case I used the Agreman gimp.

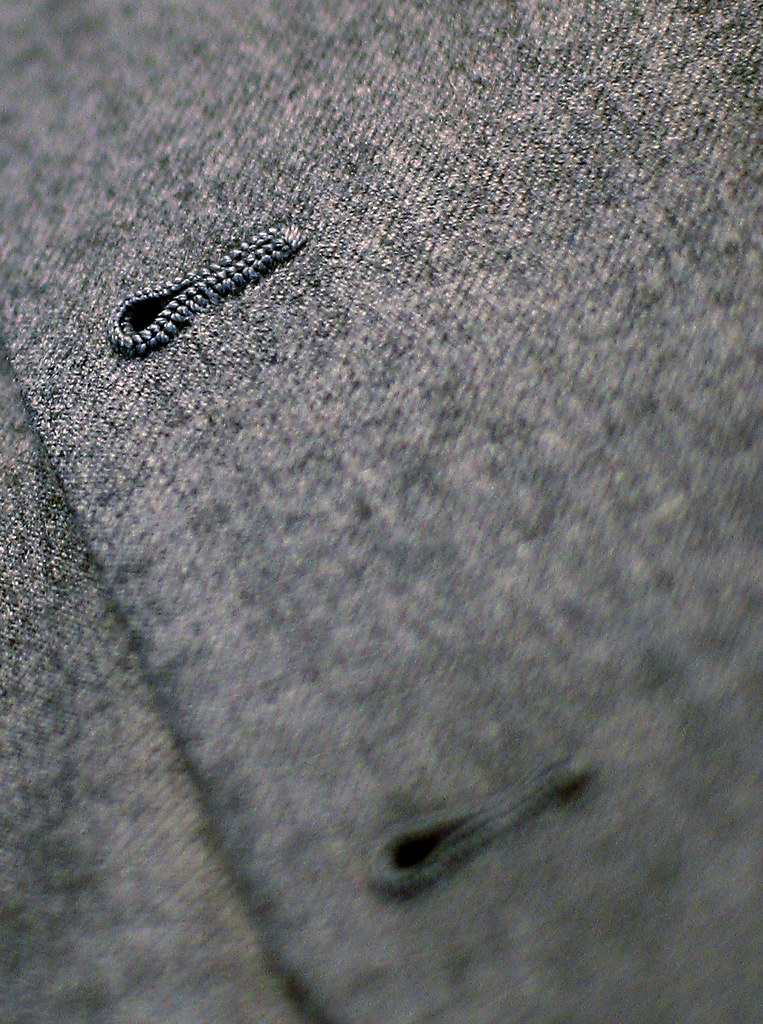
This is the Gutermann S1003- the heavy spun silk. The size F thread would look the same, only shinier. This is a small buttonhole for a 24L button on a vest.

S1003


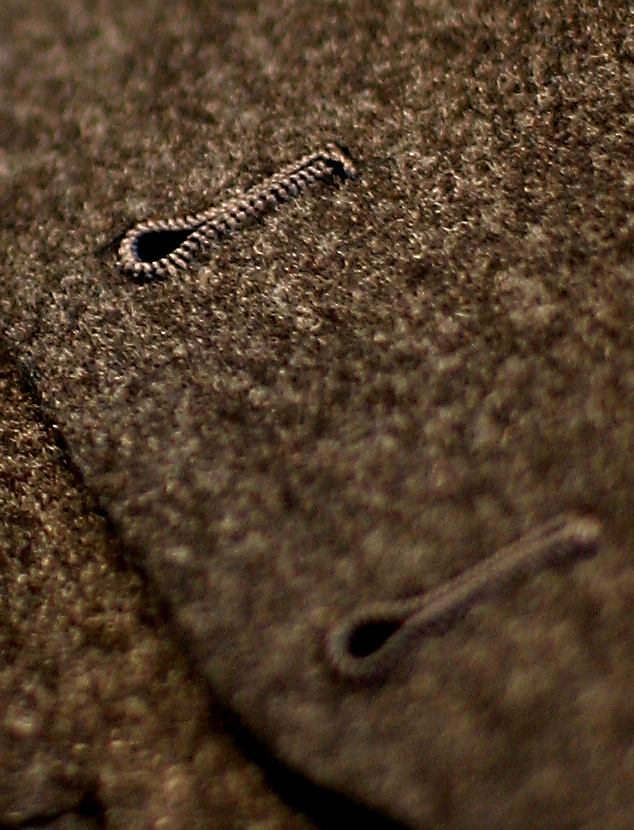
This is Gutermann R753 with the contrast punched up a bit so you can see some detail. This is also a small buttonhole for a 24L button on a vest.

R753

And finally, the Amann 40/3 thread.

Amann

For details on how to make hand made buttonholes, see this thread

StumbleUpon.com

Thursday, November 19, 2009

Different shoulder types

Since my next suit will have a softer shoulder than I usually wear, Lynn has asked for some details.

The drafting of the shoulder seam itself will depend on the amount of padding, if any, used. I have sloping shoulders so I will use some padding and structure, but it will be a much more commercial shoulder than the usual pagoda and rope.

For a pagoda shoulder I will start with a straighter line and work the shape in with the iron. For a softer shoulder, I draw a straight line for the front seam, then divide that line into thirds. The third closest to the neck will have a concave curve of about 2mm below the line, then I curve upward about 2mm above the line, and finish with a slight downward dip to ward the end of the line. The shape will be adjusted in the fitting so I don't get too crazy when drafting. More important is the sleeve draft.

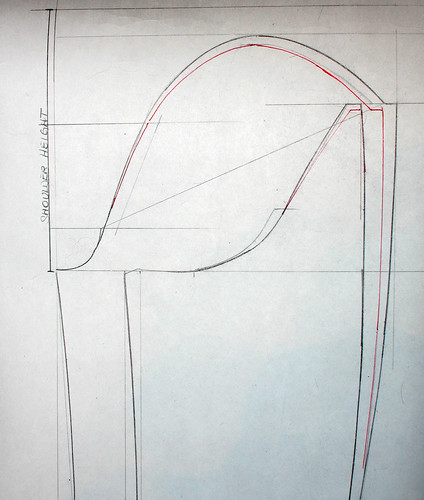
One of the first calculations I make when drafting the sleeve is the cap height. To get this, I measure the shoulder height on the pattern from the breast line- right to the tip of both shoulder seams where they join the armhole. I measure both, add them, then divide by two to get an average height. From this I will subtract a variable amount to get the cap height- for a rope shoulder with moderate padding I will subtract 7/8", for a softer shoulder I will subtract 1 1/8", for a shirt-type shoulder I will subtract up to 1 3/8". The cap height is absolutely crucial to a good fit- too long and you will get dimples or divots, too short and you will get vertical drag lines. Fortunately it is easy to fix in the fitting so I would err on the long side and adjust during the fitting- it's easier to remove than to add.

The following image shows what a rope draft might look like and a softer shoulder in red. Not only is the cap height lower but the top sleeve is narrower by about 3/8" as well. A soft shoulder requires less fullness and a smaller sleeve. If I wanted the Neapolitan "waterfall" effect I would shorten the cap without narrowing it- the extra width gets worked in as the fluting or pleating.

draft

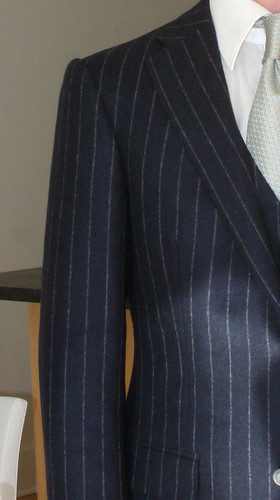
The dark pencil line in the draft will give this kind of rope sleeve, which is very full

rope

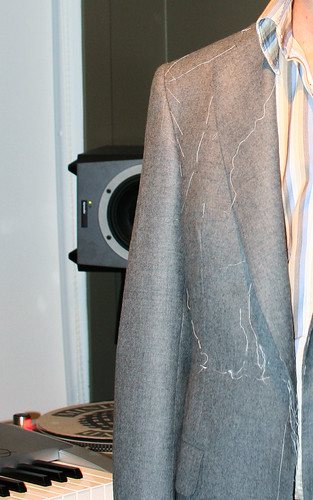
while the red line will give a much flatter appearance, not only in height, but also in the crown of the sleeve. The few inches forward of the shoulder seam are pressed open and flat, whereas there is a prominent ridge formed in the rope shoulder. I've started pulling the basting to give a better idea, but the coat has not been finished or pressed yet.

softer shoulder

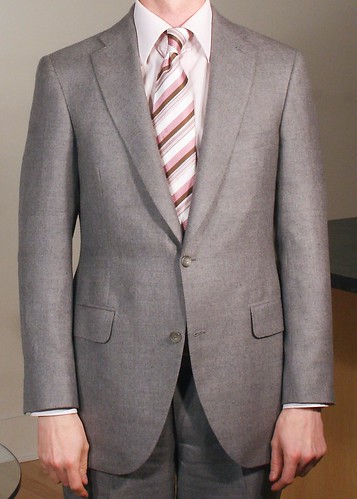
Ok- here it is after having been worn and travelled in but not repressed yet so you can see how the cloth performs.

grey dugdale

ABOUT THE CLOTH
The grey is from Dugdale Brothers' English & Town Classics book, number 9437.

StumbleUpon.com

Monday, November 16, 2009

Dugdale Brothers

A parcel came this morning.

Dugdale

I decided to try out another English cloth merchant, Dugdale Brothers. From what I gather they are a smallish, private cloth merchant in Huddersfield who will deal directly with tailors selling cut lengths. Their prices are very good (for English cloth, mind you) and they stock a range of trimmings as well, trimmings which are getting very hard to find over here. They have an attractive website here

I initiated discussions with them and had the samples I requested very quickly so I placed a little order last week to try them out. They were nice to deal with and quick to respond, and the order arrived within days so full marks on service. One thing that surprised me was that the Gutermann S1003 silk thread I ordered is quite a bit heavier than the R753 that I usually use for buttonholes, though that may be a good thing; it's not quite as heavy as the F size thread that's more readily available over here but that I find just too thick and clumsy looking. It's only available in 7 colours but they are the standard menswear colours.

Now I have to decide what to make first. Life is full of tough decisions.


EDIT

Decision made. I have a meeting coming up with one of our retail accounts in the US. If I showed up in one of my severe, rope-pagoda shouldered numbers they would probably vomit (the US is all about soft shoulders) so I'll have to make something much more demure and soft-shouldered for this meeting. In the light grey, I think.

StumbleUpon.com

Sunday, November 8, 2009

Two cloth merchants, two drafting systems

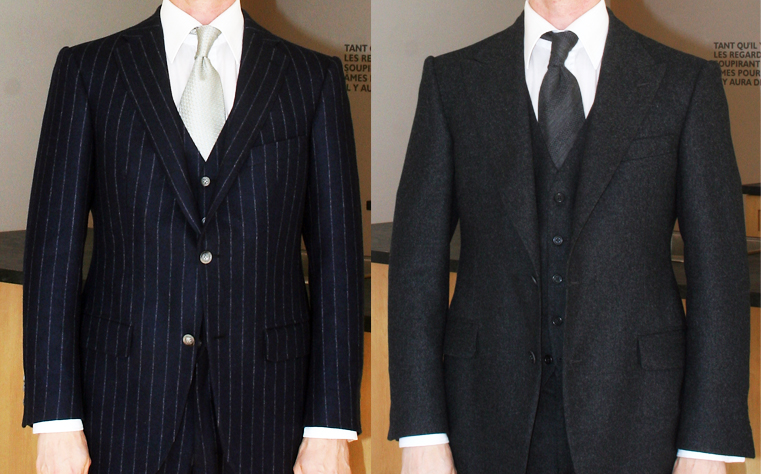
OK so here are the finished garments. The navy is Harrisons and the charcoal is J&J Minnis. Aside from the differences in lapel, the Minnis was drafted using Whife, with no side body (which I think contributes to that wobbliness on the front) and the Harrisons was drafted using the Mitchell system. Each system has its strengths and weaknesses, but I definitely vote for separate side body- it's far easier to get a good fit with it. I used my own sleeve system adapted to each draft, which worked out better on the Mitchell system than on Whife.

Thoughts?


two flannels

Thank you, all, for your comments.

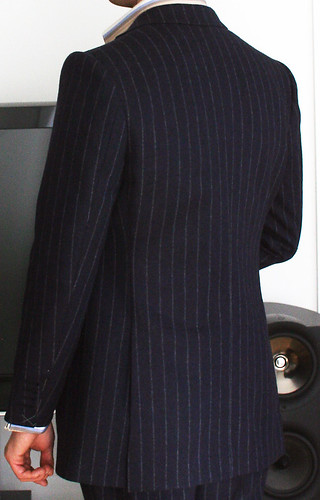
Karen, here is a partial backview of the Harrisons, taken before it was finished. I'll get better shots of both of them soon.
Har flannel back
And you are quite right, a donlon wedge at the level of the pocket would have fixed the front or the Minnis, but a separate side body is required for that, which was why I expressed that preference. That's the thing about experiments; sometimes they don't turn out the way you would have wanted them to. That's why I make so many suits for myself- I wouldn't want to experiment on a client's suit and the best way to learn is to try new things out and make mistakes. So it's all good

Superfluidity? You have taught me a new term, Jordan. But what do you mean by it? They are both pickstitched by hand, ever so discretely, to keep the edge crisp and flat. Perhaps you would have liked a swelled edge or a more decorative stitch?

Regarding the drafts, Whife was the editor of the Modern Tailor, Outfitter and Clothier, a massive 3-volume encyclopedia of tailoring last published, I think, in 1951. It's now something of a collector's item.

The Mitchell System was published by Frank C. Doblin in the 1950s as the New Mitchell System, and then in the 70s as the Modern Mitchell system- I believe that they are still available, and a few pages of the New Mitchell System are available oon the Cutter and Tailor forum. I originally learned a system very close to this, and later studied this system, but abandoned them for what I thought were systems which made more sense to me, since the drafts need to be "straightened" after cutting them out- that is to say, the main construction lines are not parallel to the grain lines, which is a pain when grading or trying to cut directly to cloth. I was speaking recently with a tailor who uses and speaks highly of the system so I decided to give it another go. He likes the sleeve draft, so long as you don't change the scye- I am particular about the scye fit and so used my own sleeve system for this draft. It should also be noted that neither of these garments fit like this "out of the box" (from the first draft) several fittings were necessary, as usualy, to get them to a point where I was somewhat satisfied with the fit so anyone using these systems should not feel discouraged if their first attempt at a draft does not fit as well as they expect. It should also reinforce the notion that fitting skills are more important than drafting systems- there is no magical system which is always perfect, and so long as your fitting skills are strong, you will get decent results no matter the system used.

A last note about these systems- they were published as guides for trained cutters and not as a step-by-step manual to teach how to cut patterns; it was assumed that one already had a firm understanding of drafting or was under the guidance of someone who did. If you are just starting out it is very easy to make all sorts of mistakes, and very hard to spot those mistakes; I would advise anyone who is just learning drafting to find someone who is familiar with the systems to give them some guidance for their first few drafts or to be prepared for a bit of frustration at first.

StumbleUpon.com

Monday, October 26, 2009

Rundschau trousers

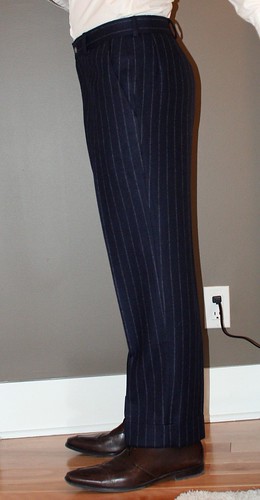
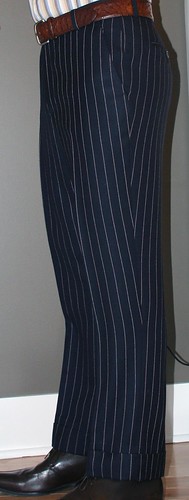
On this latest suit, I decided to try a German draft that Schneidergott translated for me from the Rundschau. I made a few minor changes to the draft itself, had quite a bit of fitting in the seat to do, but otherwise a rather painless fitting process. The balance of the rear of the leg is different from my usual draft and I find it hangs straighter with less fuss and manipulation. Observe the stripes along the side seam between this trouser and the previous one- you will notice some of the difference in the cut. But this is draft definitely a keeper. Thanks SG!

A little clarification- by draft, I do not mean a pre-made pattern, but a set of instructions for drafting according to one's measurements. It is understood that the cutter will adjust the instructions according to the customer's posture and stylistic choices.

At Jordan's suggestion (IIRC) I did away with the rear pockets, but I'm not crazy about the look of it, even though it saves me time.

Tomorrow I'll try to find buttons, press the vest and coat, and get some more photos up.

har pant back

Rundschau side seam

Har pant side

"My" side seam

trouser side front

Now to answer a few questions-

Dukemati- Thank you! Actually, the draft dates to 1954. So recent More recent than some but less recent than others.....

Karen-

And thank you, as well. The knee is a little fuller than my usual draft, in the back only (about 3/4") but that's it. It's the way the seat angle is pitched relative to the rest of the leg that is a little different, as evidenced by the stripes being more straight down the outside of the leg but continuing to taper to the hem. I cut this knee more tapered than the original Rundschau draft, which is quite straight- the draft provides an almost straight line from fork to hem; I prefer to taper from the fork to the knee and then almost straight from the knee to the hem but that requires more ironwork than the original draft would.

In response to Jem's questions, I am pleased that you enjoy the blog and you can find a tutorial on making the flannel flower here. Unfortunately my schedule does not permit me to take on new clients right now, however the occasional flower is not out of the question :)

StumbleUpon.com

Sunday, October 25, 2009

A tale of two cloth merchants

Fun thing about blogging- I get to rant every once in a while. Well, rant and praise.

I have been flirting with English cloth for a little while, with some interesting results. Since I don't buy significant quantities of it (I buy Italian usually) I am going through an agent who represents a number of English mills. I bought a piece of flannel from his own stock- a charcoal flannel from J & J Minnis; Minnis is one of the stable of mills, including John Hardy, which come under the umbrella of Huddersfield Fine Worsteds, and has a very good reputation, as well as a few royal warrants. The suit made up nicely and I should really get around to posting some photos. Before cutting I asked Andrew (the agent) about sponging and he asked the mill; the mill had previously given a rather snarky answer to another person on the same subject but I let that one go. However the mill never did answer me.

Encouraged by the results of the suit (but not the service), I found another lovely swatch from John Hardy (HFW again) and placed an order. Temporarily out of stock. Well, these things happen. Since this is a winter-only swatch, I asked when they though the cloth might be back in stock- if it were only to come available in January or February, I would pick something else. A week went by with no response from the mill. I would have liked a simple- we are a little busy moving or getting our nails done or whatever and we will answer you shortly, but nothing.

So I picked another swatch from another English mill, Harrisons of Edinburgh. The navy suit with the pink stripe and the pagoda shoulder is Harrisons cloth. A Sunday afternoon I picked the swatch, with a few trouser lengths as well, and put an email in to Andrew. Monday I had a response that one of the numbers was out of stock so I gave them instructions on what to do. This would have been Monday afternoon in the UK. An hour later I had a tracking number but they could have just taken the number off a shipping label so I didn't think much of it. But no, Wednesday I got a parcel with my cloth (I remind readers that I am in Canada). Within an hour of receiving instructions my parcel was shipped, and HFW still hasn't answered any of my questions.

I have to say that the Minnis flannel makes up better than the Harrisons flannel. So next time I am in the market for some flannel will I buy Minnis or Hardy? NO WAY. It's Harrisons for me. I would even pay a premium for it, just for the service.

Sadly, Andrew is stopping his business soon so if you are interested in some nice, sturdy English cloth, I STRONGLY recommend you look through his stuff. And buy Harrisons, not HFW.

Rant over.

Soon the next suit will be finished and I will get some photos of both of them up. Doing a last fitting on the Harrisons flannel and I don't have good mirrors at home so I resort to taking photos from different angles- I wasn't able to spot the pulling at the waist until I took a photo. I'll fix that before finishing completely.

Har flannel back

StumbleUpon.com

Thursday, October 8, 2009

Modern suit factory

One of the members of the Cutter & Tailor forum posted a link to his company's website, a modern suit factory in Turkey, which had this video as well as some photos of their factory. It might be interesting for those who have never seen a modular engineered suit factory at work (and this is a well-equipped one), but since most operation may look unfamiliar, I'll give a play-by-play below.

Cruzzo Fabrika 2 from hubego on Vimeo.


1.Pick stitch machine
2. Lining pockets. The operator places the lining front on the machine, an arm comes forward on which she places a flat piece of lining and a stay, which the machine folds into jets, stitches and cuts the pocket all in one shot. Homesewers will scream when they see this.
3.Flap jig. Specially-shaped jig molds clamp two pieces of cloth together in order to give fullness to the outer piece, then they are sewn and cut in one shot.
4. Flap press. The flaps are turned and stretched over a form which is then inserted into the press.
5. Welt tacking. The breast welt is zig-zagged in place.
6. Side seam. This is the side seam with a side vent being closed.
7. Shoulder seam. A top-feed machine is programmed to feed the fullness onto the shoulder automatically.
8. Sleeve setting. Again, home sewers will scream. A computerized fullness-feeding machine to set sleeves with the sleeve head already attached. The machine can be fully automated for the amount of fullness in the various parts of the sleeve cap or the operator can control the fullness with a foot pedal and knee lever.
9. Sleeve buttons. Self explanatory.
10. Joining sleeve head. The elbow seam has been joined and the sleeve head is attached before closing the inseam. Most machines of this sort will also shirr (full or ease) the sleeve cap at the same time, making setting the sleeve easier.
11. Buttonholes. Sew and cut buttonholes.
12. Shoulder press
13. Sleeve outseam (elbow seam) press
14. Front panel press. This machine has a shape for the chest and shoulder which is not visible from this angle. The suit designer usually designs the shape of the buck with the press manufacturer.
15. Lapel press
16. Touch up. Don't try this at home, kids.
17. Final examination.

StumbleUpon.com

Tuesday, October 6, 2009

Tommy Nutter's Edward Sexton

Once upon a time, Savile Row had a bit of street cred. Edward Sexton was the technical half of Tommy Nutter, the envelope-pushing, rock and roll side of the row, and in this video he brings Tom Stubbs (of Finch's Quarterly Review) back to the sixties.....

StumbleUpon.com

Monday, October 5, 2009

Pagoda shoulders- putting the pieces together

We’ve seen the shaping that goes into the canvas. We’ve seen the shaping that goes into the pad. Everything that was done to these bits has to be done to the cloth too, but we don’t have the luxury of cuts or darts to impart the shape. This is the part that freaks out some novices, and the thing that makes this kind of shoulder really bad news for factories.

To get the kind of forward pitch and concavity, the neck area has to be stretched (think about the little wedge inserted in the perk) and the scye has to be stretched. How much? Well, that’s a tough one to answer. Enough. Not too much. Start by stretching the neck area, about ¼ to 3/8”, then do the same at the scye area. This should give two distinct ripples of length and a hollow area near the center. Look familiar? It should. Once they have been stretched with the iron, work the fullness toward the shoulder and give the neck another press to set it; the shape must match that of the canvas.

Print
Print
The thing is, when you are stretching all this, you are lengthening the front a bit and thus throwing the balance slightly which will be adjusted during a fitting; you are also changing the scye measurement so the sleeve has to be adjusted accordingly, and refitted by basting, checking, adjusting, rebasting…… just the sort of thing that is anathema to a factory. That’s why you almost never see this type of shoulder except on the highest-end RTW.

So once you are ready to baste the front to the canvas, the first line of basting starts with a little pinch of fullness at the top- it is crucial that there be enough length for the cloth to be worked over the shoulder- if it is tight, the shoulder will kick backwards a bit.

bubble

Once the front is basted to the canvas, place the pad in position, flat on a table, lining up the shoulder seams. Baste in a semi-circle along the outer edge of the pad.

first baste

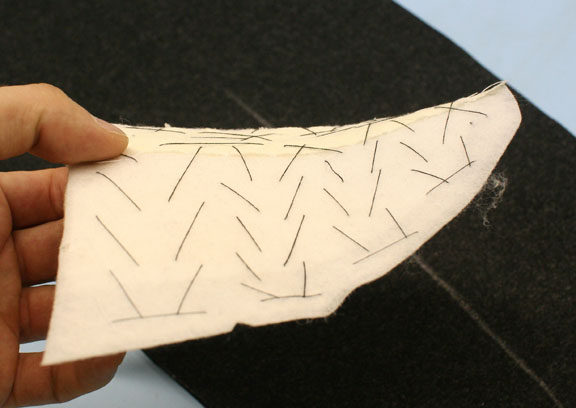
Now reach under and give the pad a yank- this will open up the cut we made in the chest piece, and give the concavity we want. Holding this shape, pad stitch through all layers from the outer edge of the pad toward the top of the shoulder. Keep this shape carefully because by pad stitching we are permanently setting the shape, the same was the lapel is rolled using the pad stitch.

pad stitch

When it’s finished, you will have the concavity of the pagoda shape and the natural forward pitch of the shoulder.

finished inserted

Still with us, Karen?

StumbleUpon.com

Friday, October 2, 2009

Pagoda shoulders- making the pad

In this step we will make the shoulder pad for our pagoda shoulder, and this is where we start to see the beauty of the contours of this shoulder come to life.

SADDLE


Shoulder pads are another controversial subject mainly due to the excesses of the eighties but they can play an important role. The high, square-shouldered figure should avoid them, while the sloping-shouldered figure will benefit from a bit of enhancement (the wonder-bra for the male shoulder). Whether you choose to wad the pad or not is up to you, but a cover at least should always be inserted; if nothing else, it protects the back of the shoulder from stretching while it is on a hanger.

My choice, for my body, is to pad the back of the shoulder, since the slope is considerable, and there is a hollow produced as the shoulder curves forward, away from the blade. A lot of manipulation goes into creating a pocket for the blade and to shortening the back scye, but the area could usually benefit from a little wadding to clean it up; most customers are unaware of the appearance of the back of the scye, not being in the habit of checking 3-way mirrors regularly, but most people could use at least a little bit. Keep in mind that the space we are creating in the front of the shoulder is for comfort and should not be stuffed full of cotton either.

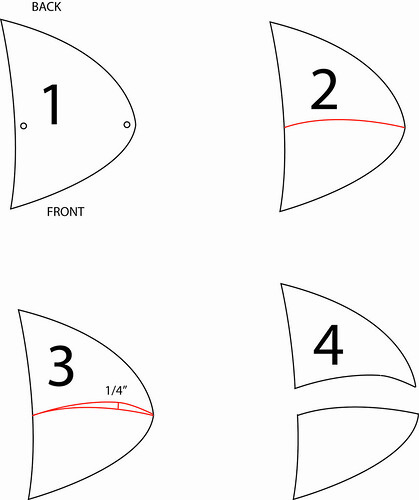
The easiest way to make a good pad is to take apart a commercial one, which is usually pretty straight. There are often holes or notches on the pad to help you locate the approximate shoulder seam location, but you can also tell from the shape- the front being smaller than the back. Take the pad apart completely, then along the center of the pad, draw an arc from one end to the other, approximating the forward curve of the shoulder; one third from the neck on this line, draw up a line ¼” long- this can be longer or shorter, depending on the amount of shape you want. ¼” is usually plenty. Cut the top of the pad part along these lines (if there is a canvas piece under the cover and about the wadding, cut this piece as well).

Print

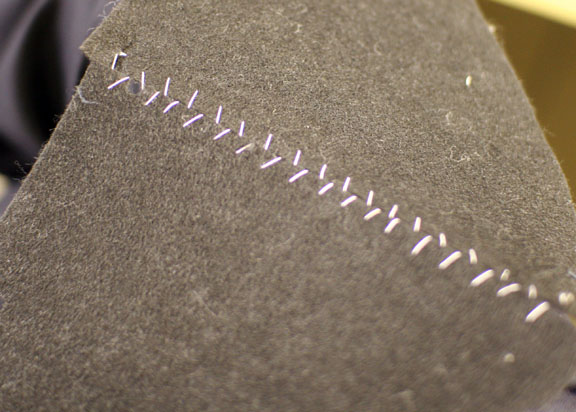
Using a feather stitch (some call it a baseball stitch), join the two cover pieces (if there was a canvas piece, baste it to the underside of the cover and stitch all layers together).

FEATHER

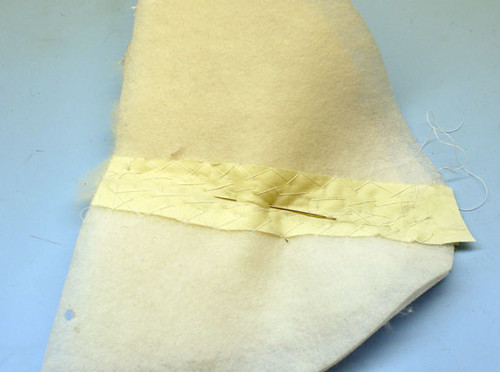
Cut a bias strip of pocketing and pad stitch it through all layers to cover the seam, cross stitch the edges flat.

TAPED

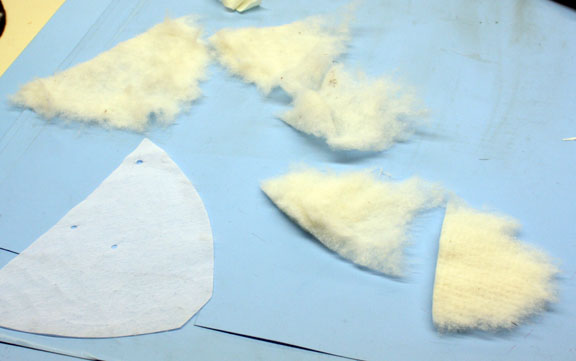
Separate all the wadding that was in the pad.

WADDING

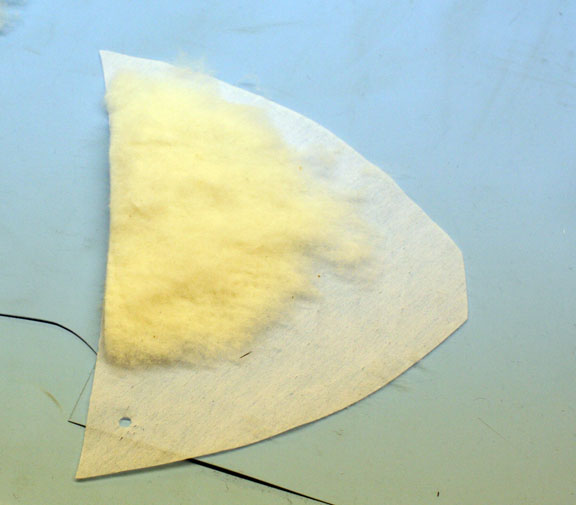
Build up the wadding with thin layers, according to the amount that you want; do not feel the need to use all the wadding- a little goes a long way. Note that the wadding for my pad is concentrated at the back.

WADDING2

Place the cover over the wadding and baste down the center with a long, loose running stitch

RUNNING

Now the shaping.

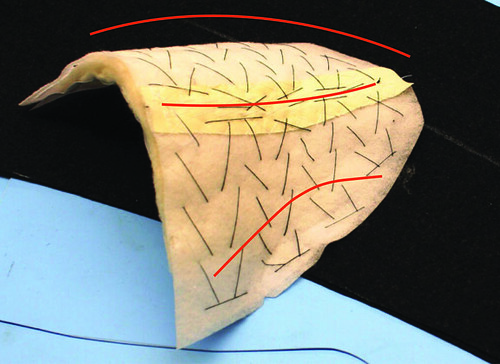
Keep the shape of the shoulder in mind as you pad stitch with fairly loose stitches to prevent lumpiness. There should be an upward curve when looked at from head on, but there should also be a concave curve in the front (curving toward the front) and a convex curve in the back, following the shape of the shoulder. You may need to give a little tug to the front edge, stretching the curve a bit, to get the right amount of concavity. If you do not hold the shape in like this as you are pad stitching the result will not be satisfactory; as you take each stitch make sure you are molding the pad into the desired shape. If at the end the shape does not look right, take it apart and do it again. It will be worth the effort.


Print


EDIT

Jordan makes a good point which I should have mentioned. If you are dealing with a low shoulder (and we usually are) and are making pads, it is far better to pad the low shoulder more than the higher one; it will make matching checks a little easier but, more importantly, will even out the appearance of the customer. Perkins devices were common for measuring shoulder inclination, but they are all but impossible to find now. Instead, grab one of the clinometer apps for the Iphone and turn your phone into a Perkins device.

StumbleUpon.com