A storm blew through town last night which took down some pretty big trees, and with them, the power. Mine finally came back on this morning but the office is still closed so I glanced over at "the pile"; various garments that have been collecting over the last few months waiting to be chopped up, photographed, and analyzed- maybe today I can dig in a bit and get some blogging done. I've been pretty busy so I'm a bit behind in it, but I realize that I think I'm also running out of interesting things to say; it's getting to the point where there's not so much that's new and interesting to show you- we've seen it all before. (Right at that point I got a message notification about a comment from a reader which read "NEW POSTS PLEASE!!!" Talk about timing)
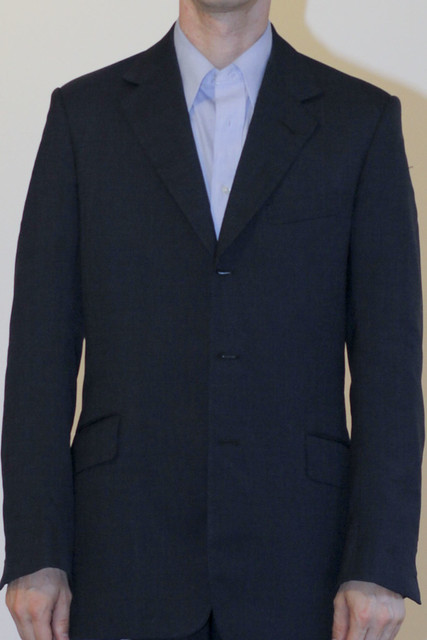
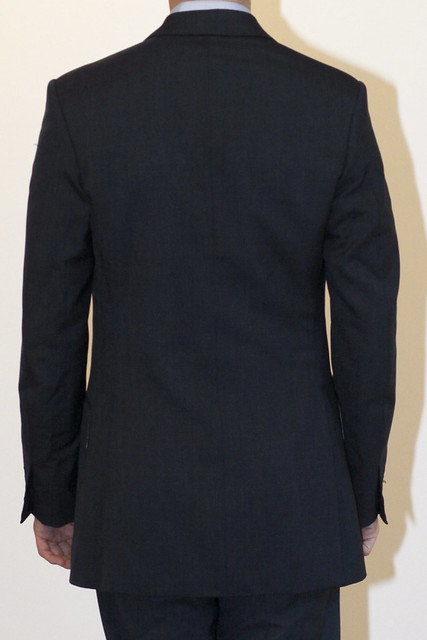
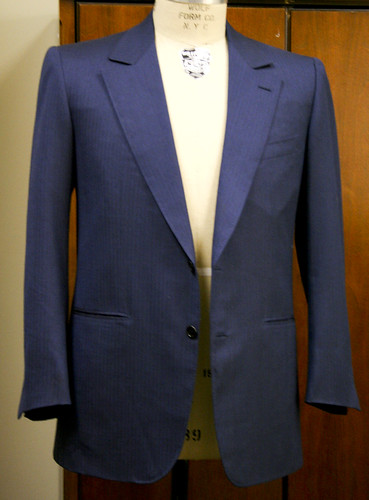
Well, one things we haven't seen, and which people have asked for several times, is an image of one of the dissection victims on a form or a body, to get an idea of the cut or silhouette. Until now the dimensions of most of the garments were such that I wouldn't have been able to, even if I wanted, and I have to caution that it's not a good idea to put a garment which was cut for one specific body onto another because you don't get an accurate picture, but this one was cut for someone very close to my build, though quite a bit taller than I, judging by the sleeve length. So, for a change, we can have a look at the cut of a garment.
It's a proper 3-button garment with a decent amount of waist and a bit of flare to the skirt. The chest feels fairly firm, but this is not surprising as G&H have a history of military tailoring.
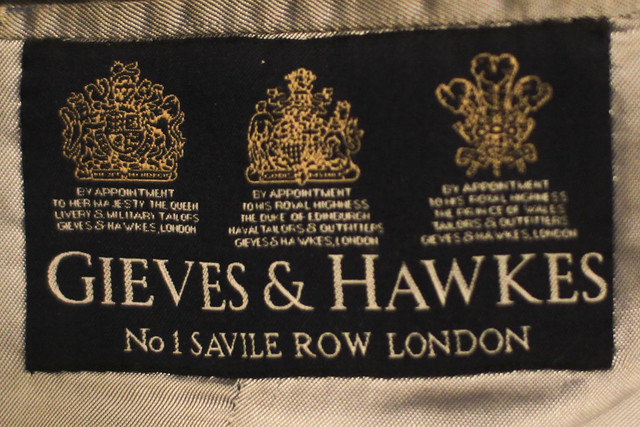
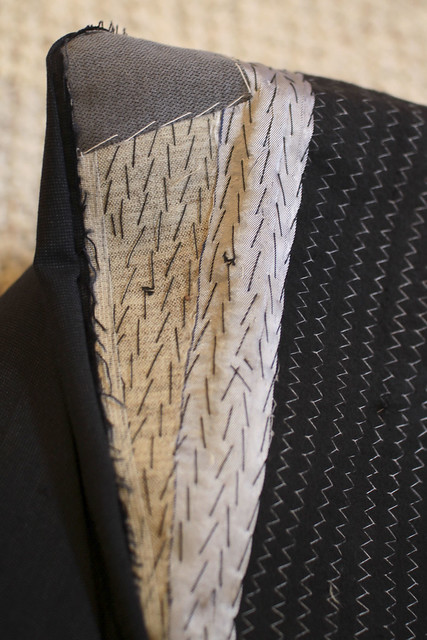
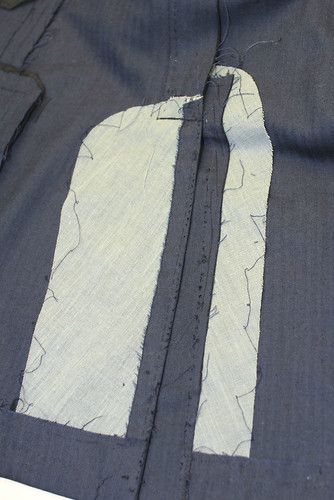
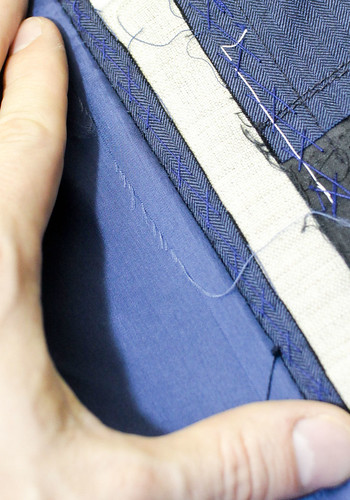
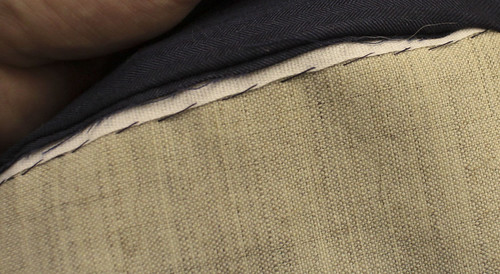
I had heard that G&H use blindstitch machines to pad their lapels so I expected to see that; instead, they were done by hand. There is a liberal sprinkling of fusible in various parts of the garments, but nothing we haven't seen already on other garments from Savile Row so I won't go over them again.
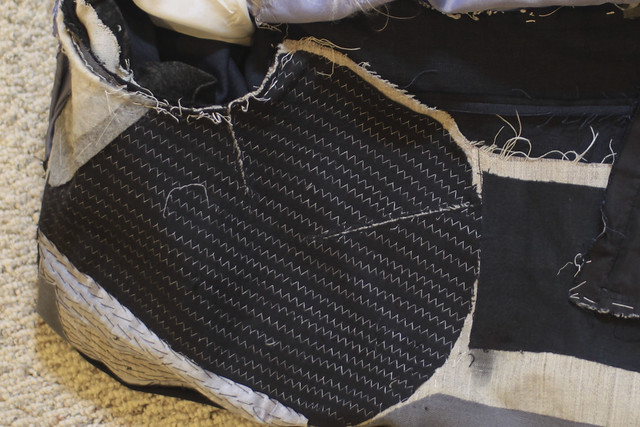
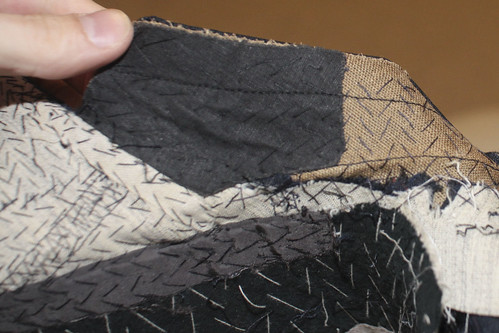
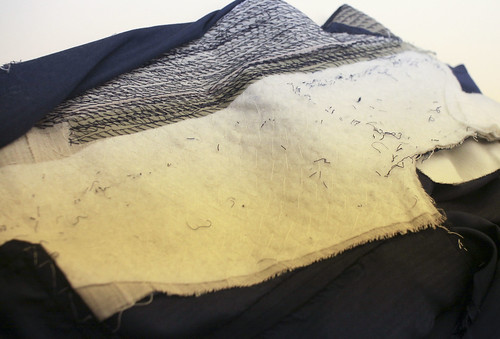
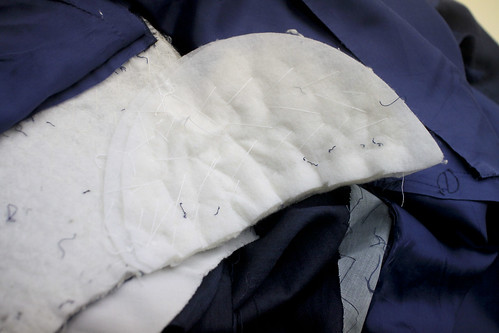
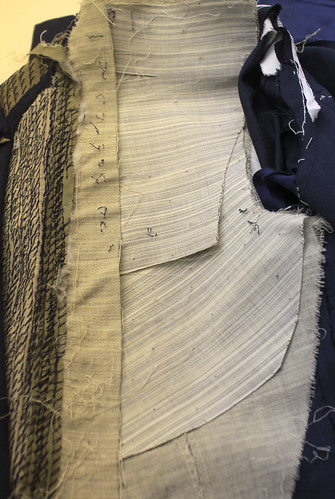
What was a bit surprising was that the chest was padded by zig-zag machine, in a similar fashion to the Saint Andrews garment I cut up, but with a smaller, tighter stitch, which is what gives the firmness to the chest. It would take too long to unpick the whole thing to show you what's inside, but I did just enough to know that the entire chest (the size of the felt) is one big piece of haircloth, with another smaller one in the shoulder. Again, no surprises there.
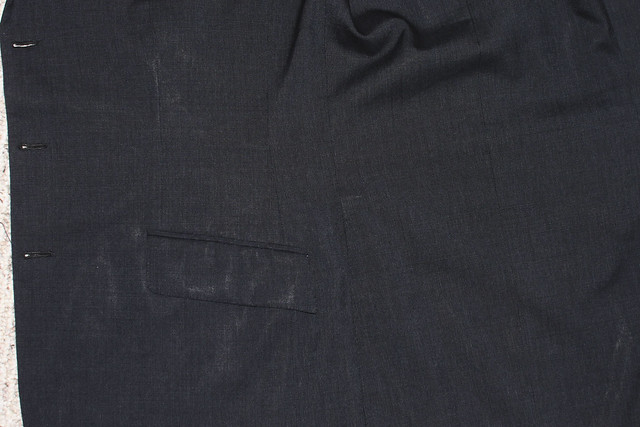
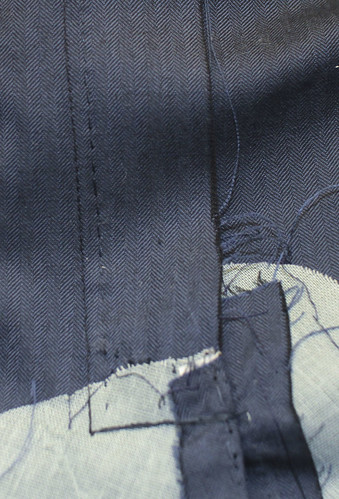
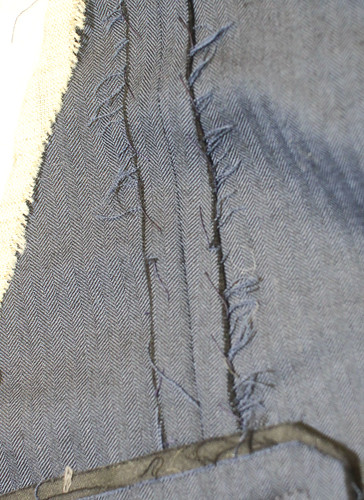
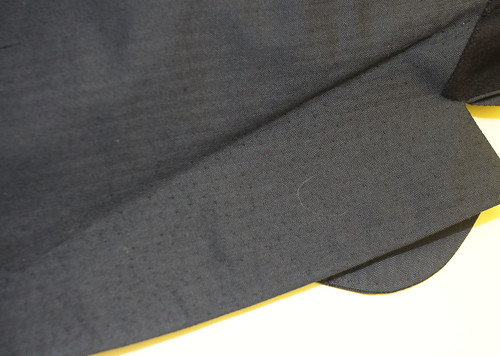
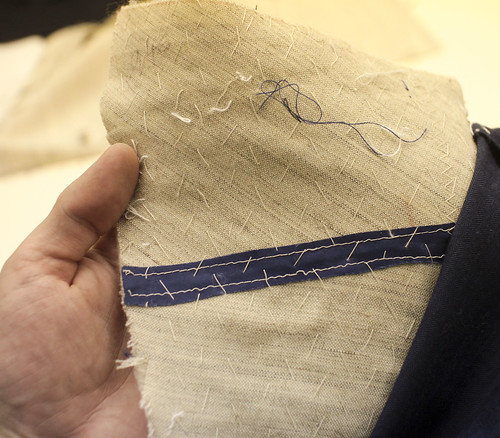
Another thing I found interesting was that the seam joining the side body to the front is shoved way back, making a very narrow side body. This probably makes the shaping of the waist easier- I will have to try it out. I don't know if you can make the seams out in the photo, but FWIW,
As for the rest, it's all stuff that we would expect to see, and have seen, on other Savile Row garments (newer readers are invited to peruse the archives), so I will blame my writer's block on the clothing.
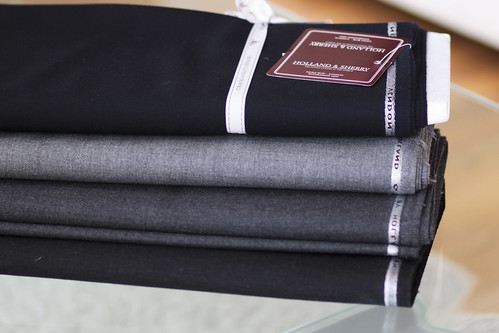
I normally prefer smooth finishes or at least a fine, tight weave; coarser weaves seem, rightly or not, somewhat outmoded and more difficult to work with because they fray easily and don't always take shaping as well. When I first came across this cloth from Holland and Sherry I was a bit skeptical, but it came highly recommended by someone I trust, and had been favorably compared to Minnis' Fresco by others (another cloth I am tepid toward) so I decided to give it a go.
I'm glad I did.
I struggled a bit with the fullness in the sleeves on the first coat I cut and I wasn't happy with the finished results so I ripped out the sleeves, cut them down, and set them back in shirt-sleeve style and was very happy with it so I cut another coat with this kind of shoulder expression in mind. I have to say that I'm really pleased with the way this cloth is making up- it is sturdy and can take a bit of a beating (good for travel) but is soft and fluid enough and breathes fairly well.
Sometimes it's good to step outside of your comfort zone.
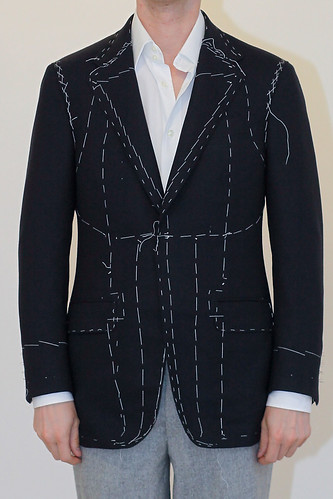
When it's done I'll try to get better shot with better lighting because this doesn't do the coat justice. (See a tutorial on lighting clothing shots here which was helpfully submitted by its author. I will try not take that as a way of saying "dude- your photos suck" LOL)
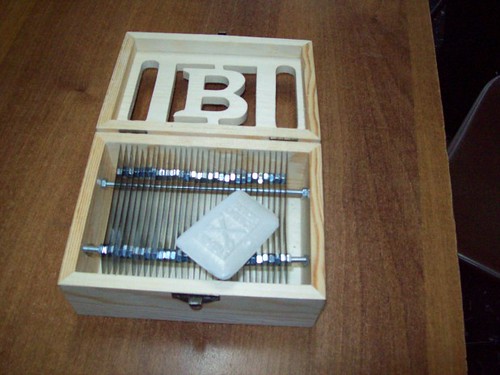
Franca has shared her latest DIY project (or rather, her husband's). Chalk sharpeners are not the easiest things to find and are certainly not cheap when you do so here is her version (if there is demand, perhaps we could encourage her husband to offer "bespoke" chalk sharpeners on Etsy :)
the box € 2.50 4 packs of 10 blades € 1.00 each total € 4 various bolts € 1
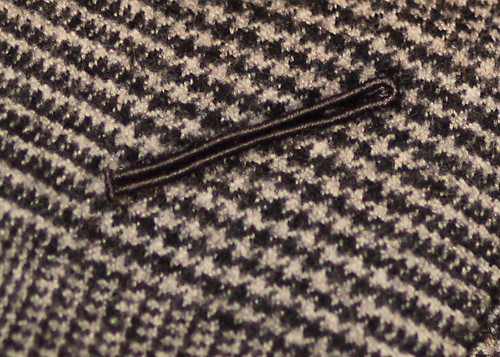
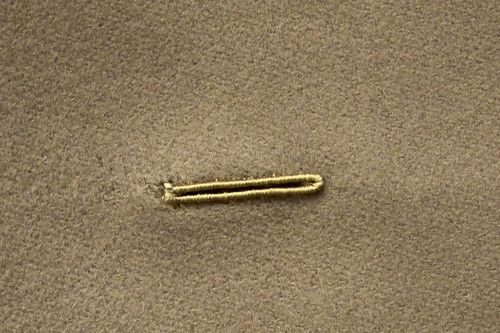
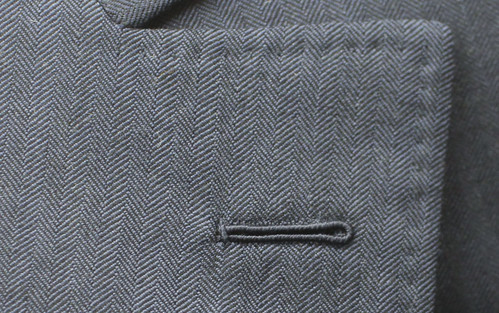
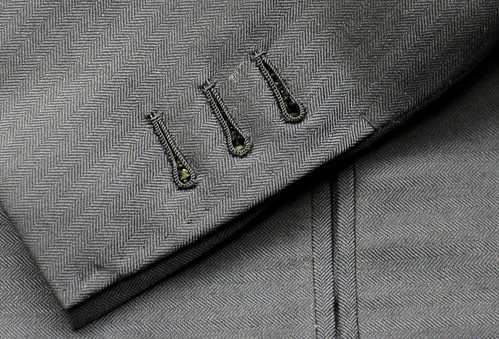
I think the Asolsa Lucida, or glossy buttonhole (the example above being from a Tom Ford garment), originated in the Abruzzi region of Italy as it is most commonly seen on garments made in this area. It is also very common in Paris, where it is known as the boutonnière Milanaise, though likely for the brand of gimp that was commonly used and not the city; it is worth noting that most of the grand tailoring houses of Paris also trace their lineage back to Italy. The gimp itself, which is a key element of the buttonhole, I believe is now only available from Guterman and is known as Agreman; I will be in Italy in June and will dig around to see if there are any other manufacturers still producing the stuff and will report back if I find any (and if anybody else will be at Pitti and feels like meeting up for a drink, drop me a line).
A while back, Matthew was kind enough to share a method he learned at Cifonelli for making these buttonholes, his with a purl underneath the gimp. The ones made by what I shall call the Abruzzi method, for want of a better term, do not have this purl under the gimp and the stitch is made differently- I will attempt to explain it now that I have figured it out.
In addition to the previously mentioned gimp (and do not be tempted to use what most other companies sell as gimp but is really intended for machine-made buttonholes) you will need some fine silk twist- to get a really smooth, glossy finish, a thread finer than the 40 size typically used now, and much finer than the U size that some still use, is needed, and unlike ordinary buttonholes, the twist should not be waxed.
Because this buttonholes is more fragile than the regular knotted one, it is typically only seen on the lapel, not on the lower buttonholes.
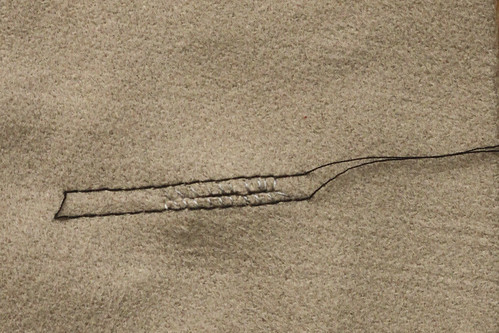
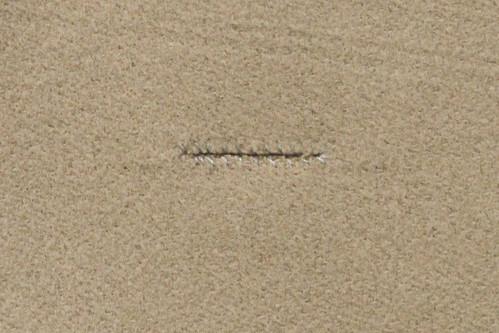
I start by running two rows of machine stitching to hold everything in place while I overcast the edges- it might also be a good idea to stitch even closer to the cut line than I have done and instead of ripping them after overcasting, just work the buttonhole over the stitching. A very narrow bite is required and this helps keep things from shifting, but also means that cloth that frays very easily is unsuitable.
The mechanics of the stitch are actually quite simple but may take some getting used to if you have done lots of traditional buttonholes.
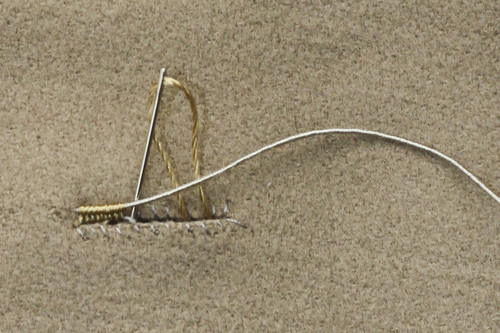
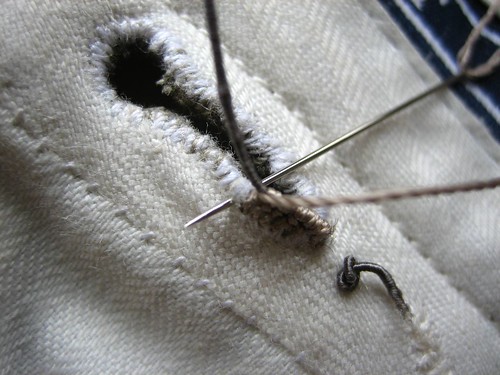
Working from the underside, pass the needle up through the hole- I find it easiest to poke the eye end through to avoid catching anything with the sharp end. I come up through the hole and then work the twist under the gimp, but for the sake of clarity I have shown the needle passing directly under the gimp. Do whatever is easiest for you.
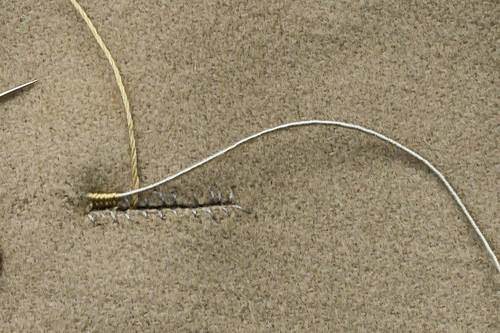
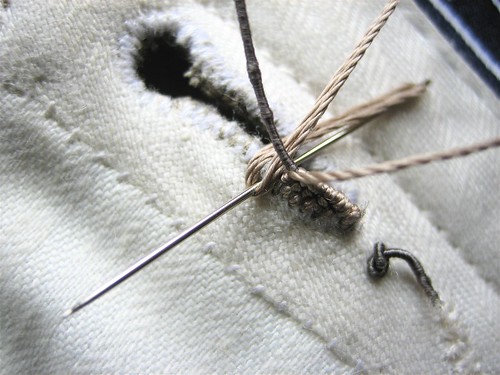
Come up and over the gimp, then insert the needle a millimeter from the edge- tight, close stitching is the key to a smooth appearance. You want the gimp to sit right on top of the stitch to conceal it, and by tightly spacing the stitches you will completely encase the gimp.
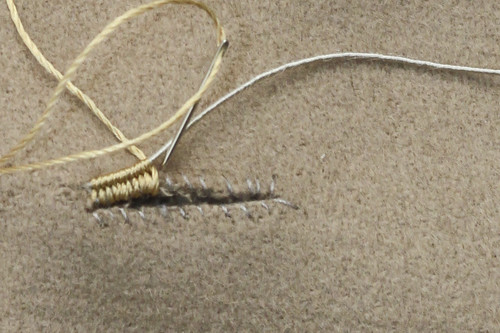
I've pushed everything to one side so you can get an idea of how the stitches are forming.
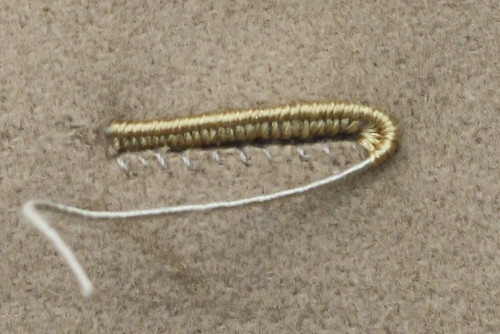
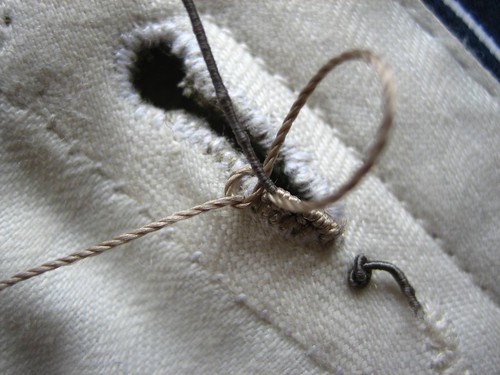
Pinch the gimp before working around the end of it the continue down the other side.
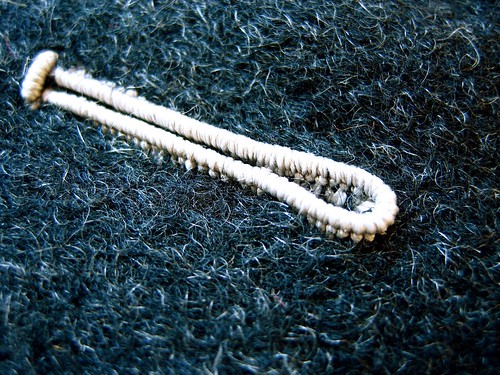
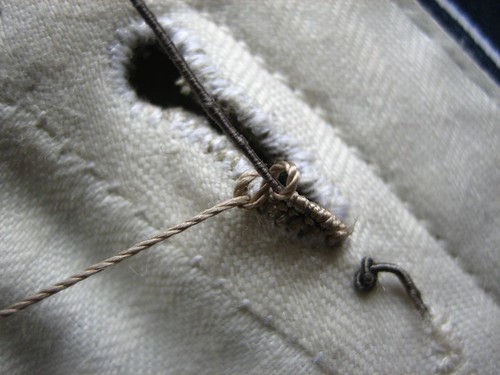
The completed buttonhole. You can see some of the stitches poking through beyond the gimp where my bite was a little too wide- I need to practice some more (and really have to think more seriously about a macro lens...)
And thanks again to Matthew and Franca for inspiring this post.
EDIT- In response to a question, I made a few phone calls. In the U.S. Agreman gimp can be bought from B. Black and Sons (1-800-433-1546), Oshman Brothers (1-212-226-7448) and Ely Yawitz (1-800-325-7915) It is not listed on their websites so you have to call and ask for it.
In the U.K. it can be bought from Richard James Weldon 44 208 300 7878. I know there is at least one store in Paris which stocks it (ask for milanaise), though the name of it now escapes me. It is also available all over Italy (ask for vergolina).
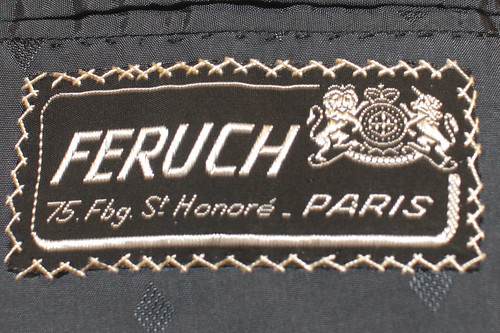
Custom shirtmaker CEGO's Carl Goldberg shared a few garments from his father's wardrobe with us, one of which is a DB jacket (pants long lost) made by Gilbert Feruch, some time in the seventies, I think.
I gather he was something of a futurist, and the V&A museum has a Nehru suit that he made on display. Other than that, I know practically nothing about him. What I find most interesting about this garment is that had he removed the label, I would have sworn it was a Smalto, the garment we recently looked at. There are so many details which are virtually identical that it is impossible that the two were not somehow linked at some point in their careers. I won't speculate on that link but if someone has more information I would love to hear it.
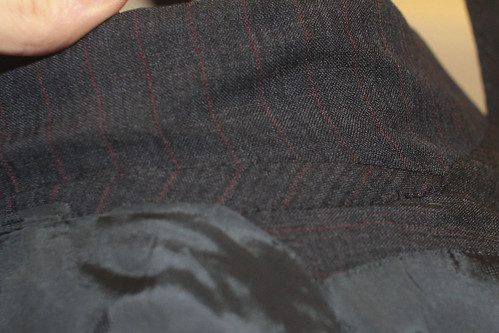
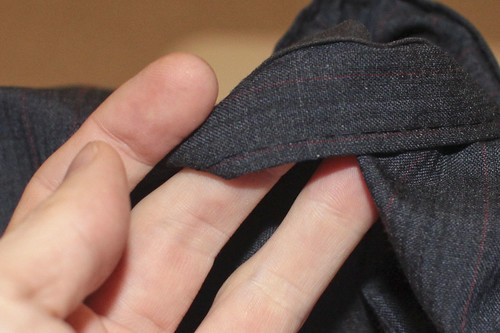
While I was surprised to have seen a two-piece top collar on a piece of bespoke work, here is another one.
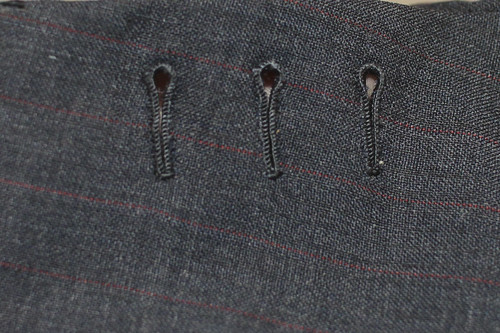
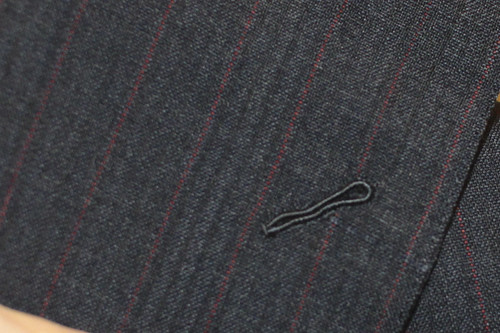
The buttonholes are fairly good, though they may have seen better days, particularly the Milanaise which looks to have had a flower or two through it.
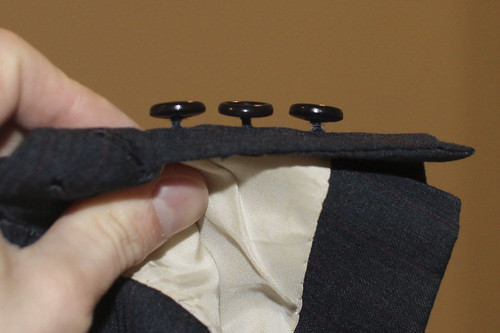
This is how buttons should be sewn on.
Like the Smalto, the pocket jets have been stitched by hand. The breast welt and its facing have also been constructed by hand, and sewn through the chest piece.
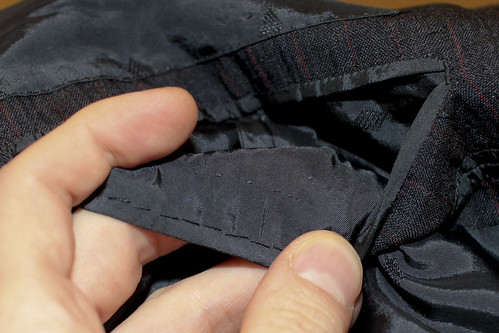
While the interior finishing on many of the coats we have looked at has seemed like an afterthought, Feruch is clearly making a statement here.
While the Smalto had wiggan in the vents, this one has silesia, but cut and inserted identically to the Smalto
The real differentiator between the two is that the Smalto had been padstitched by machine, and this one has been done by hand.
Note how the direction of the stitching was reversed to help with the peak of the lapel
The collar has been padded by hand with a piece of silesia on each end.
The chest and shoulder pad have also been done by hand, and the same kind of cut and reversal of the direction of the grain as I found in the Smalto.
The final detail was that the facings had been drawn on entirely by hand, while the Smalto (like so many others) had been done by machine. And for those who still care, the sleeve was set by machine and the shoulder seam sewn by machine. Absolutely everything else on this coat had been done by hand so clearly they were not looking to save time or cut corners- if they thought there was any benefit to doing these steps by hand they would have been done by hand. But they were not.
Other than the few steps which had been done by machine on the Smalto coat, steps which may have come later to help bring costs down as the Smalto is much more recent than the Feruch, these two coats are so close that they could have been made in the very same workshop.
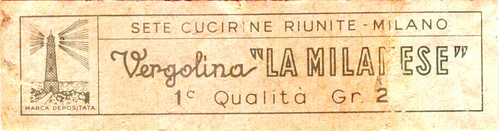
The image above is the wrapper for an old spool of gimp, "vergolina" being the Italian word for gimp, and La Milanese being the brand name. I am guessing that this is how the French came to know gimp as "Milanaise", and thus the Milanese buttonhole would have found its name. Conjecture, but likely.
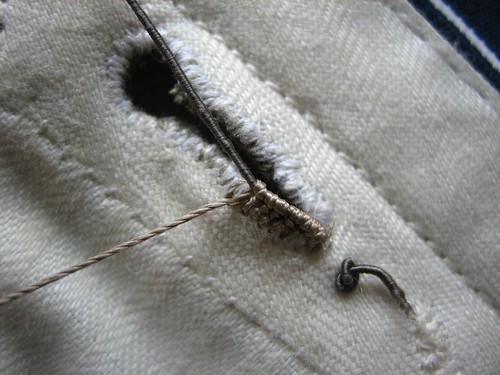
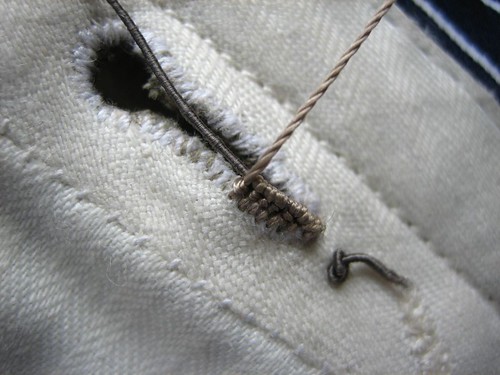
I've discussed this buttonhole a few times, mainly because I didn't know how to do it and that was driving me crazy. The example above is from a coat by Smalto and I had a good look under a magnifying glass and finally figured that stitch out- it is a fairly simple figure-of-eight stitch with no knot or purl. More on that soon. A reader was kind enough to reach out with another method of making them.
Matthew Reed did the CAP Tailleur Homme in Paris (a training program in tailoring) and did his internship at Cifonelli, a famous Parisian house. (If you read French you can find a recent interview with Lorenzo Cifonelli here) Matthew was kind enough to photograph a high-contrast buttonhole sample that he learned at Cifonelli, and the steps involved in making it- you will notice that in this version there is a knot underneath the gimp, which I rather like because it raises the buttonhole higher off the surface and makes it a bit more pronounced (subtletly be damned). So thank you, Matthew.
The gimp has been knotted and inserted between the layers of cloth- it must be lifted out of the way when taking the stitch.
Wrap the tail of the twist around the head of the needle.
Pull through
Pull tight
I've been mumbling about buying a macro lense since my close-ups leave much to be desired, but seeing Matthew's photos I'm leaning toward a point-and-shoot instead, which would be cheaper and more versatile. So double inspiration, thanks to Matthew.
EDIT-
Franca made some interesting observations in the comments section. She has discovered what many have found, namely that many old tailors guard their secrets jealously... She compares the buttonhole above to the buttonholes she sees in her region (Abruzzo) but the buttonhole above has a knot, and the ones made in Abruzzo, particularly Brioni, do not have a knot- it is slightly simpler in certain respects, but require more precision. She has discovered that cloth that frays easily is not suitable, or at least will be difficult to make a stitch that is small enough even though she has overcast before stitching. I will suggest running a machine stitch 1/16" away from the cut location on each side (before cutting) which will help stabilize the area. As for the stitch itself, once I get my macro photography sorted out I will post a series of photos like the ones Matthew submitted, showing the Asola Lucida, al modo di Brioni. And yes, Franca, the only thing to do is to practice and practice some more.
I've linked this video before, but here it is again.
Sometimes promotional material can push the envelope a bit in order to look good, and I admit that a few moments during this video I found myself thinking "Oh, really?"
Well, yes. Really.
Thanks go out to Des Esseintes for donating this coat from Francesco Smalto.
A few posts back I remember lamenting the fact that certain houses get way overhyped and others don't have anywhere near the recognition they deserve. Well, this is another of the latter. Perhaps because they have fallen to the all-too-common over-licensing of their name that they are more known for their scents; one is also tempted to think that the quality may not be the same as it was when this coat was made back in '91, but the video was posted in 2008 and shows identical techniques.
You can find a bit of background info on Smalto here
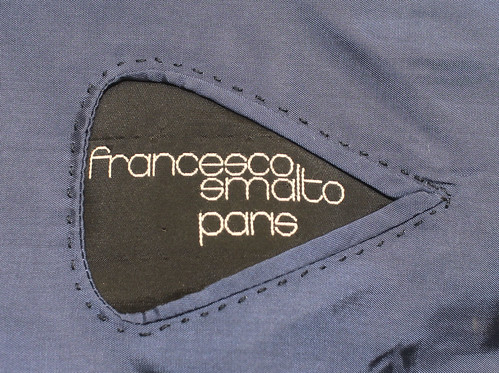
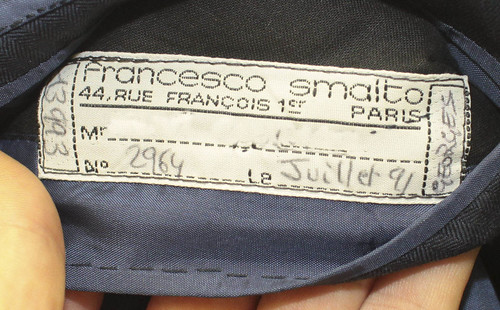
Men's tailoring is often focused on the understated, the invisible, but in this garment the details call attention to themselves; in this sense it is very influenced by haute couture whose finishing and execution are often shows of virtuosity rather than self-effacement. The main label, as shown above, has been incorporated in a clever pocket which would be just about impossible to replicate in a mass-production setting, and is just one of the many indications that this is a very special garment. That said, most of those clues are on the inside, not the outside.
Something less obvious, but which should be pointed out, is that this garment had spent several weeks crammed into a shipping box. It is not a heavy, sturdy cloth but rather something more delicate, and yet this is how it looks straight out of the box, no pressing or steaming-
The shape of the lapel and collar is rarely seen outside of France.
Readers are, by now, aware of my thing for buttonholes and these are very good, worked using finer thread than I have ever been able to find; note the pickstitching along the vent and the little bar tack. Note also that the gimp ends have been worked inside the cloth rather than being concealed under the ends like I do.
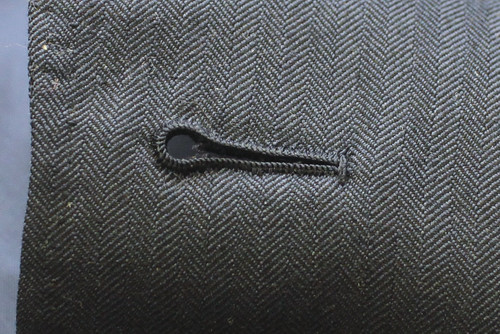
This buttonhole on the front is as close to perfection as I have ever seen
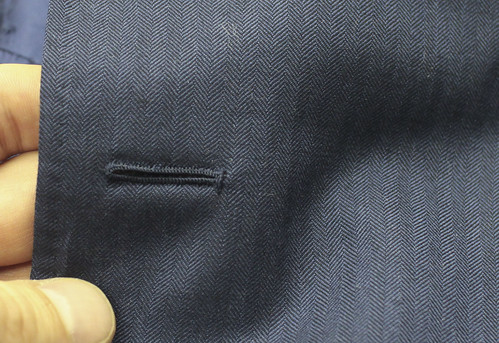
and oddly, the second buttonhole is straight rather than keyhole, an acknowledgement of the fact that this button must never be fastened.
The lapel is sporting the "milanese" buttonhole, the mechanics of which I have finally figured out (it came to me while driving home, of all places).
The pocket jets have been sewn by hand, something that is almost never seen anymore.
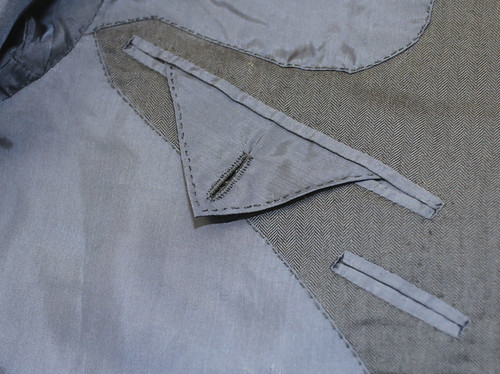
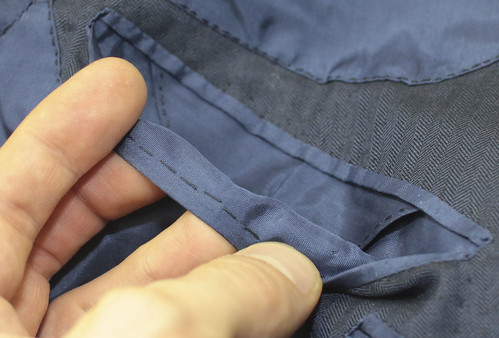
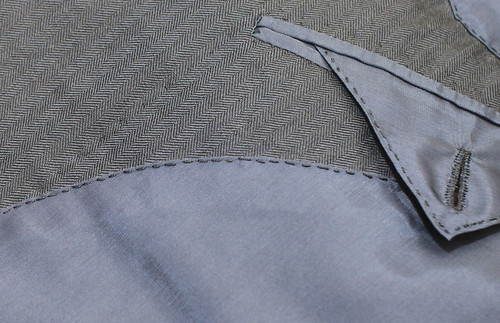
The inside pockets (there are four of them) have also been bound by hand. Notice the hand pick stitching along the edges of the lining and flap, and the hand-made buttonhole on the flap.
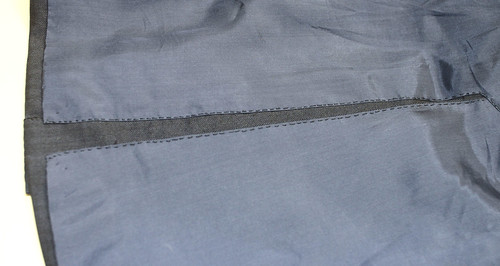
The lining has been inserted entirely by hand. While most English tailors prefer a small, invisible stitch to fell the lining, it is more common in Italy to use a decorative top stitch, like this one, however they are usually much wider in their spacing. These are very tight, another way of saying "we have spared no time nor effort in the creation of this garment". I, personally, prefer a neater, more discrete finishing stitch, but this is actually a more solid stitch.
The vents.
A few diagnol stitches
The pleat at center back has been finsihed with a big S for Smalto
I was astounded to see a two-piece top collar, something which is rarely, if ever, seen on bespoke work because it requires a bit of engineering in the pattern. The blurb I linked to did mention his visiting clothing factories in the U.S. so he may have borrowed a technique.
To the right of the personal label is the name Georges (I obscured the client's name). I imagine that this was either the cutter or the person who created the garment.
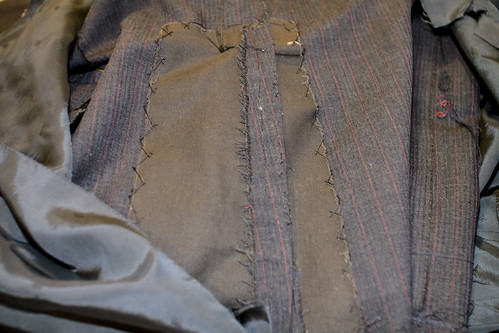
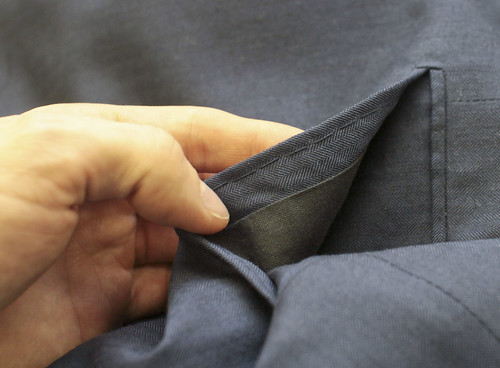
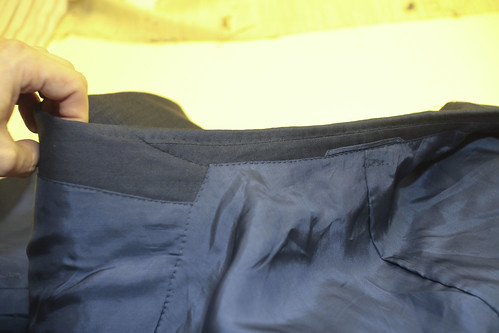
As I get the lining open, we see then vents have been reinforced with wiggan.
The large inlay has been pick stitched to one side
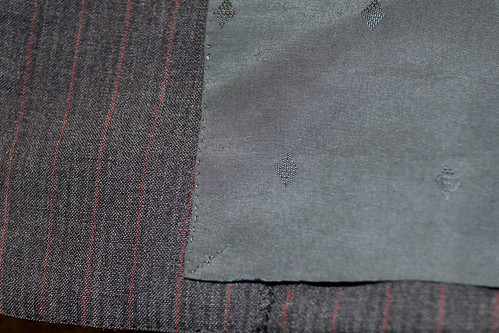
And the smaller seams in the body and sleeve have been lightly overcast by hand to prevent fraying, a detail I have never seen on a men's tailored garment but would be more common in ladies' couture. This is more commonly serged or pinked on men's garments.
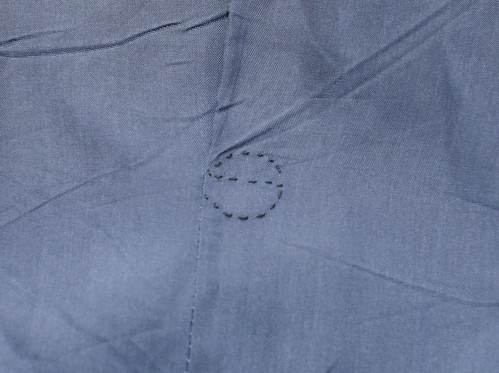
Rather than a loose basting stitch, the facing and pockets have been secured with a cross-stitch.
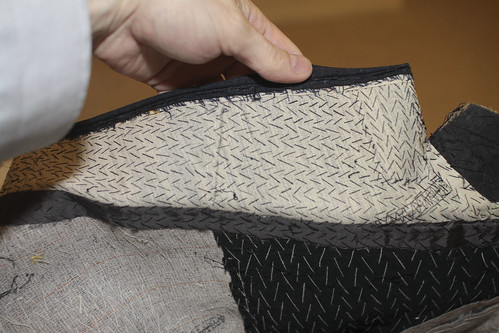
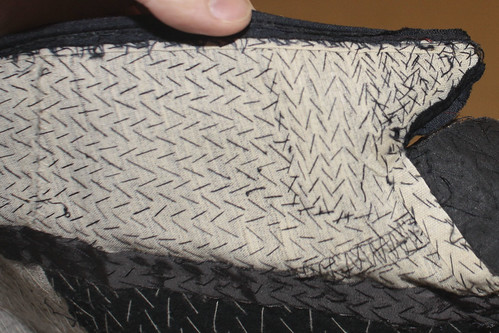
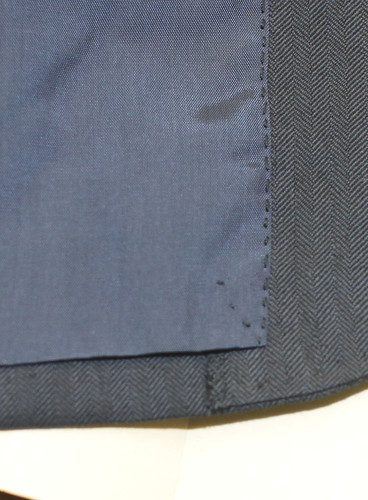
The lapel's underside is heavily dimpled which would indicate hand pad-stitching. And since, until now, virtually everything has been done by hand, one has no reason to suspect otherwise. So I was quite surprised to find that the lapel and collar had been padstitched by machine.
It is perhaps not apparent in the photo, but the chest has been padstitched by hand the entire length of the felt.
Likewise, the shoulder pad is entirely hand made.
The edge tape has been sewn in by hand as well.
Considering the amount of work done by hand everywhere else on the garment, one can assume that they see no added value in padding the lapel and collar by hand. Liekwise the sleeve setting and shoulder seam have been done by machine (have we seen enough proof that this is really not necessary to do by hand yet?)
Here we can see the reverse of the pad stitching of the chest, as well as the seam that was taken to build some shape into the shoulder, instead of teh more common vees. Note the direction of the grain in the upper piece.
I could feel a nice amount of structure in the chest so was not at all surprised to find two layers of haircloth, one on a slight bias (refer back to my drape experiment) and the other cut out of the scye , à-la Anderson and Sheppard. Smalto had clearly seen a lot of things in his carreer.
I can honestly say that it's been a while since I saw a garment with such a personality. One might not agree with all the choices made, but it shows a definite point of view and I can certainly respect that, and find it refreshing for some reason. What was even more fascinating to me in discovering a lot of these very distinctive details was that, a few weeks later, I recieved a garment made by another French tailor which resembled the Smalto in many of them. There is certainly a strong link between the two and I am hoping that readers in Paris (or elsewhere) who may have more knowledge of the history of these two tailors will fill us in on them, once we have had a look at the second garment.







 Posts
Posts



