Thursday, September 17, 2009

Brioni vs. Samuelsohn, Battle of the dinner jackets

So before we go back to the pagoda shoulder, a side-by-side comparison of two dinner jackets, one by Brioni and one by Samuelsohn. This will be done in several parts as I am too lazy to get it all done in one shot. Samuelsohn is on the low price end of the full-canvas makes and Brioni on the higher end (in this case, the Brioni is easily four times the price of the Samuelsohn, if not a little more). So what makes the difference?

Cosmetics- both are one-button, peak lapel DJs. The Sammmy is 100% wool with a center vent, the Brioni is 100% Silk with no vent.

Buttonholes
Brioni- made by hand
Samuelsohn- made by machine
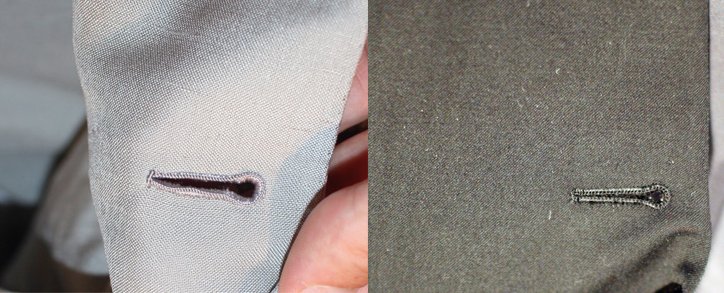
buttonholes

Sleeve finishing
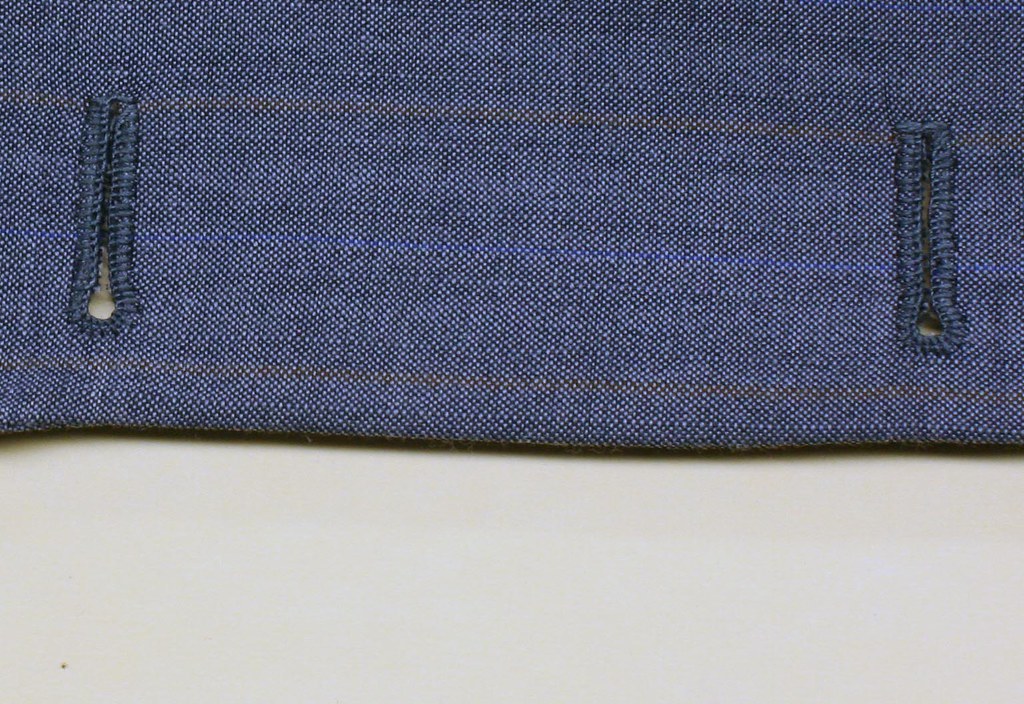
Brioni- hand-made immitation buttonholes
Samuelsohn- machine-made functioning buttonholes, hand-finished sleeve lining
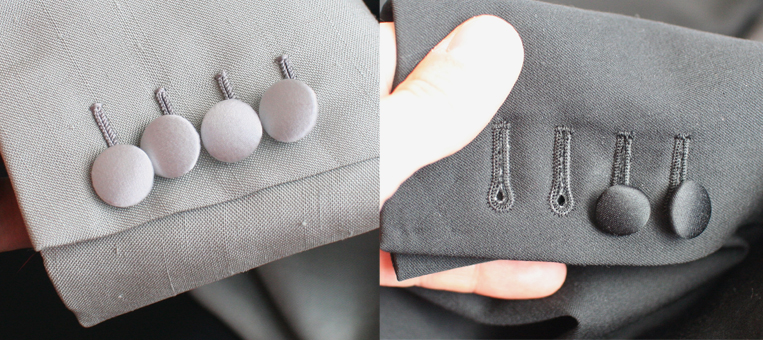
Sleeve finishing

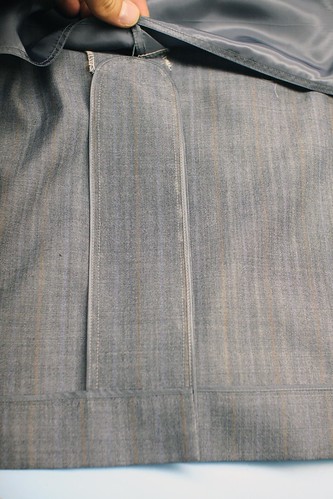
Pockets
Brioni- hand-made, flat construction jetted pocket (nice, soft, flat, discreet) with hand-stitched mezza-luna tack
Samuelsohn- machine-made (ribbed) flap pocket
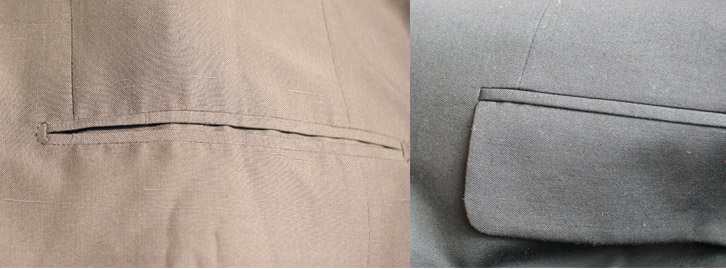
Pockets

Breast Welt

I apologize if it's not clear.
Brioni- hand-made and finished pocket welt, pick stitching also done by hand
Samuelsohn- machine-made welt with tiny zig-zag stitching to fell the edge of the pocket, no pick stitching.
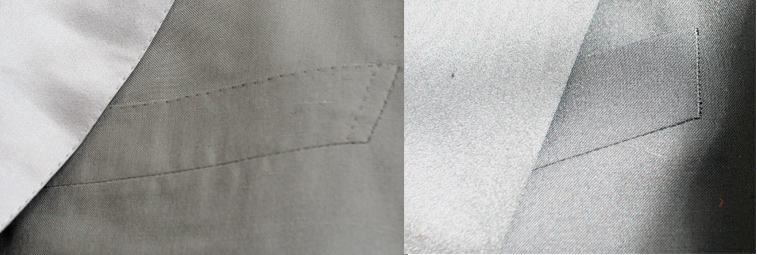
breast welt
Let's pause for a moment.

There is some confusion about pick stitching and what it is or is for. Pick stitching is the tiny little stitches on the edge of some garments- it is placed there to hold the edge crisp and flat, to prevent edges from rolling, but is not structural. As such, a hand stitch is the same structurally as a machine stitch- they both do the same job. Machine pick stitching is not meant to bamboozle anyone- it performs the same function as hand stitching.

HOWEVER

Hand stitching is much smaller and looser and thus more discreet than machine stitching (I'll show both later) and once you're seen the two side-by-side it's easy to tell them apart. Some makers (mostly southern Italians) do their hand stitching with a slightly thicker thread and is just as ornamental as it is functional, but it is still easy to tell them apart by the slight irregularity of the stitches and the tiny prick of the hand stitch.

Hand stitching machines have pretty intense feeders which tend to damage delicate satin, which is why it is not so common to find it on dinner jackets and why there is none on this Samuelsohn garment. It is also much more evident on Satin than on regular cloth and some people find it ostentatious so is often omitted. It was a necessity on the Brioni, for reasons we will get to later.


Boutonniere

Brioni- there is a hand-made buttonhole done with the upside-down buttonhole stitch I was studying in a previous post (and now realize I may have posted the wrong photo) plus a boutonniere loop underneath.
Samuelsohn- no lapel buttonhole

Boutonniere

Facing

Brioni- The facing on the Brioni is a luxurious pure silk which is not common to see any more because it is very delicate; damages are common and replacing a facing on a finished jacket is one of the most infuriating jobs. If you are wearing real silk lapels, do not hug anyone wearing jewelry, and keep your dancing partner at a distance for fear of snags. But it is VERY nice.....
Samuelsohn- This has the more common synthetic facing. Note that this type of satin is made specifically (and only) for tuxedo facings and is just as expensive as real silk in most cases. It is popular because it is more resistant to damage, not only during construction but during wear.
In this part we look at some of the details that we can see inside the jacket but without opening the lining up. Clues for the thrifters among us.


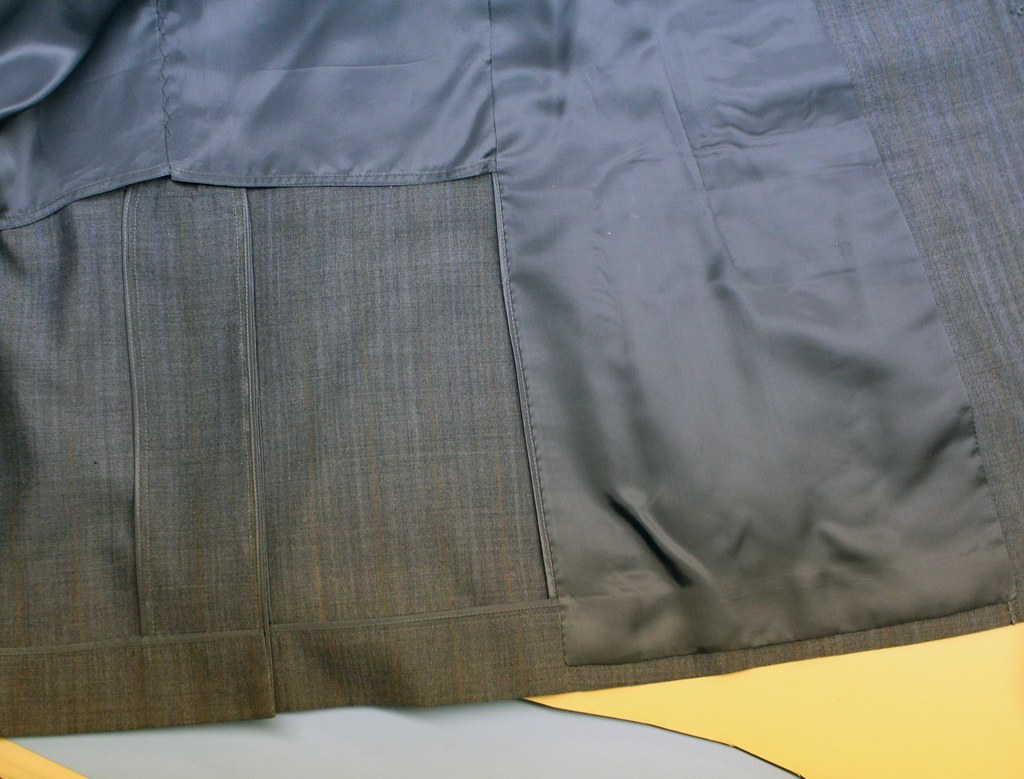
Hem finishing

Brioni- The hem has been closed by hand with a tight little stitch. There is also what appears to be a pick stitch running close to the hem- most likely holding wiggan or some sort of hem interfacing in place. It looks like this was done with the Columbia machine (Juki makes one too) which is a type of imitation hand stitch. More on this in a minute.

Samuelsohn- This hem was closed by a felling machine- the two parallel threads are what distinguishes the machine stitch from a hand stitch which may look similar. This type of stitch is usually a good indicator that the coat was not bagged and that the hem itself was felled rather than just tacked like in lesser garments.
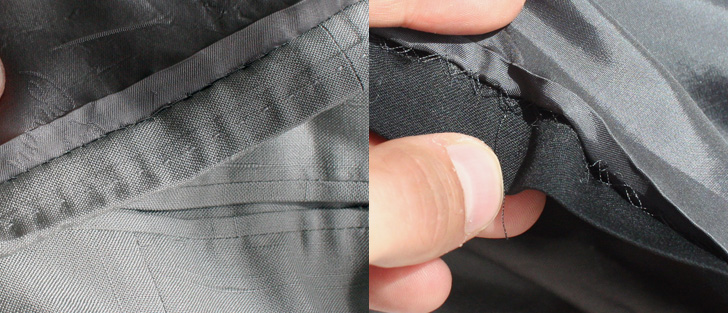
Lining hem

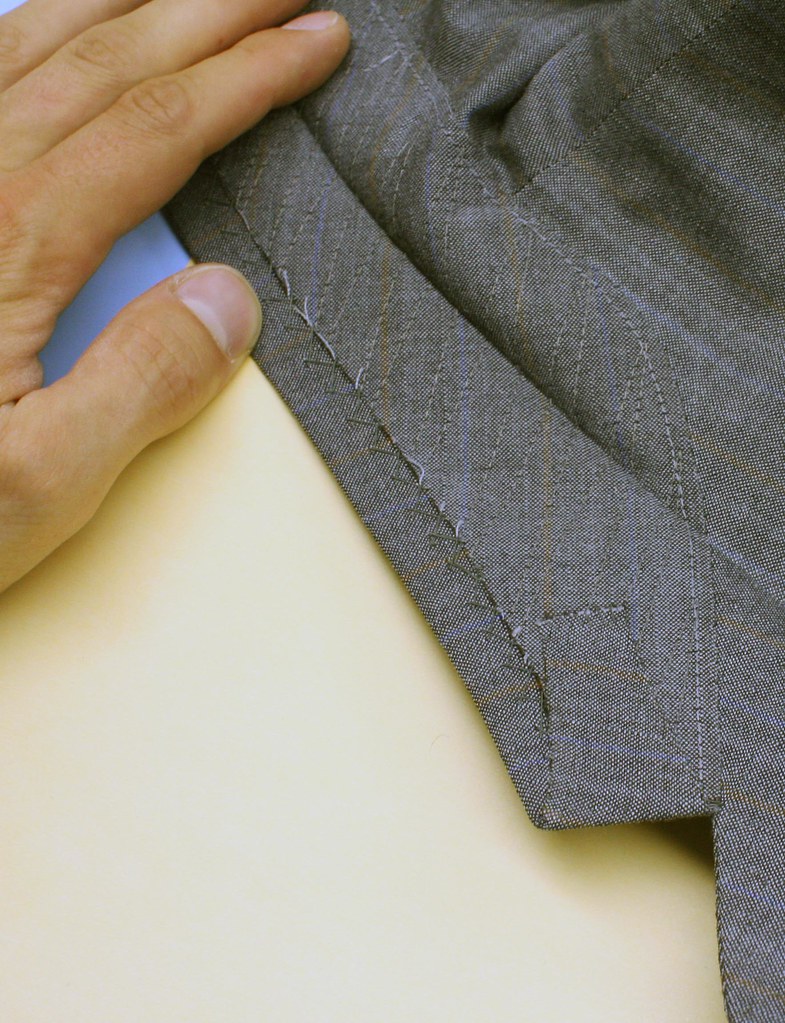
Facing and lining seams

Brioni- there is a little pick stitch which was clearly done by hand along this seam. Some manufacturers put a Columbia stitch as decoration along this seam, but on garments such as this, it is possible that the stitch is not primarily decorative but functional- it may be used to fell the lining to the facing by hand. This can also be done with a more discreet stitch, but if the finisher is talented, it can be functional as well as decorative. The lining must be opened up to know for sure.

Samuelsohn-
The lining has been closed by machine and there is no decorative stitching along this edge
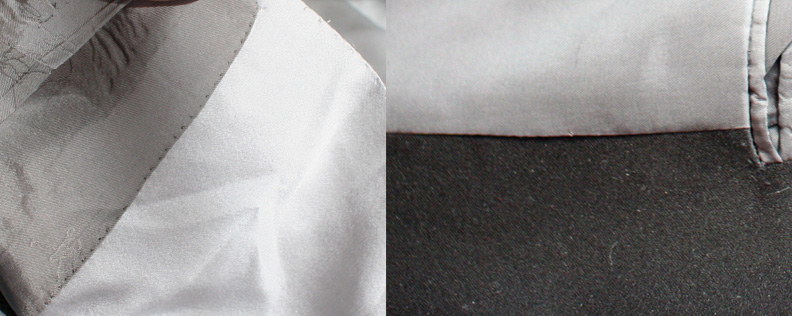
Facing lining seam

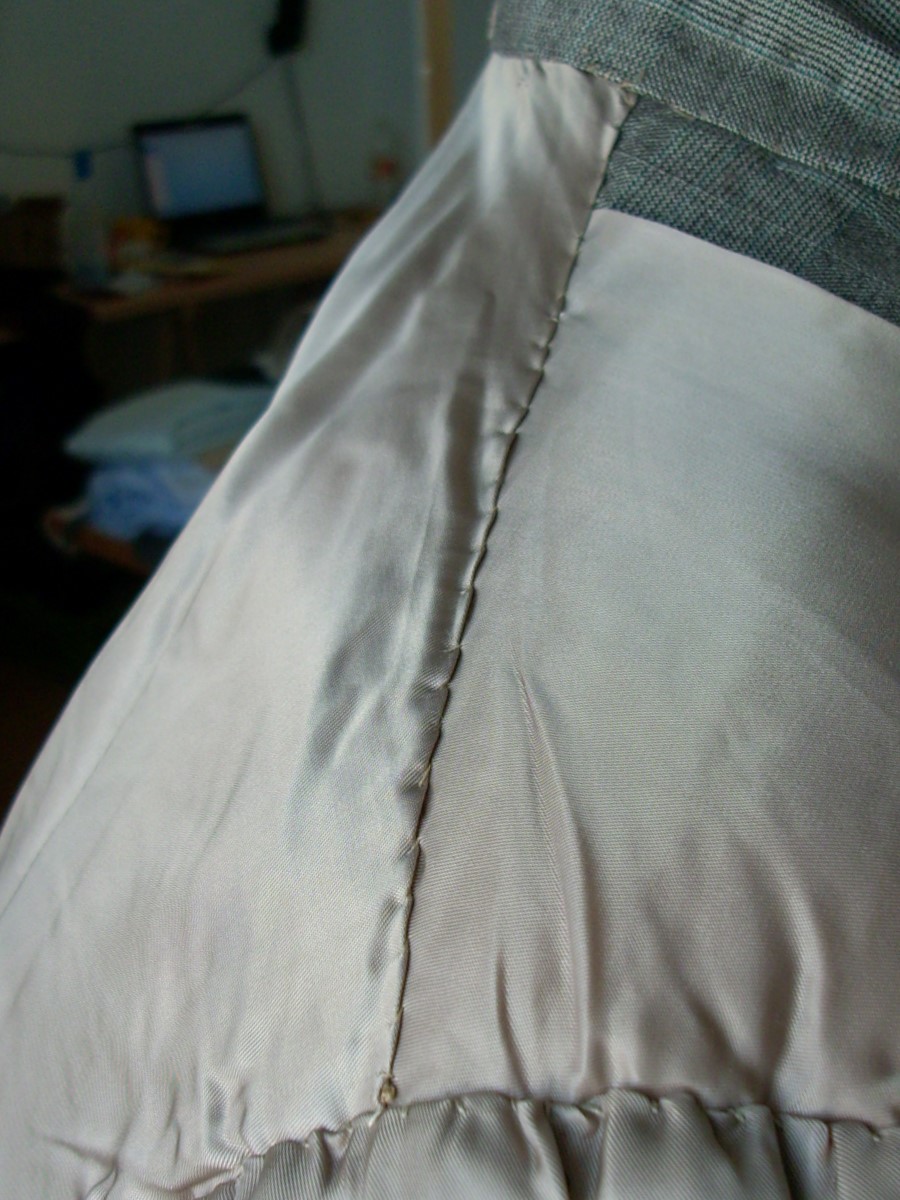
Neck Finishing

Brioni- several interesting things. The pick stitching continues around the neck, a further suggestion the lining has been felled by hand. Notice that the lining is lapped over the collar. Also notice the seam in the collar stand- this is a two piece collar, as in my previous post about collar drafting. Silk is very difficult to shape with the iron so they were wise to make this a two piece and avoid possible fit trouble. The shoulder seam of the lining has been felled by hand, which means the lining is held in place along the shoulder pad and won’t shift around.

Samuelsohn- The collar is lapped over the lining, and felled with a machine-made pick stitch; there is also a row of pick stitching just inside the roll line to hold things in place. The shoulder seam has been closed by machine which means it is loose and not tacked to the shoulder pad.
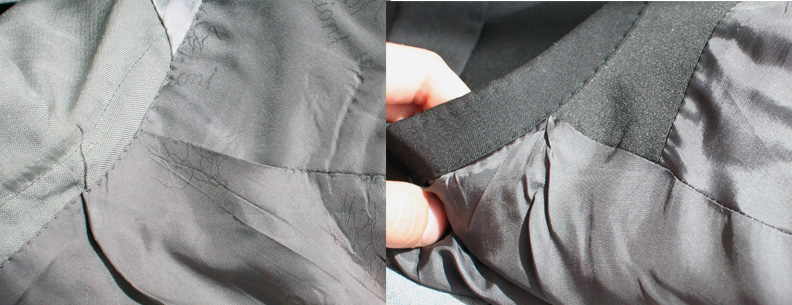
Neck lining

StumbleUpon.com

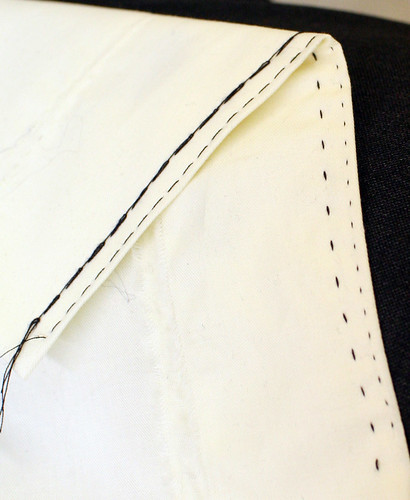
Pickstitching by machine

The pick stitch is that little tiny stitch done along the edges of garments to keep the edge flat and crisp and to keep it from rolling to the wrong side. This was traditionally done by hand but machines have been developed which resemble it, some more than others.

There are two types of machine pick stitch- one that resembles the hand stitch very closely on both sides, and one that doesn’t.

Of the former type, there are two major makes of machine, the AMF and Complett; the Complett, new, costs around $25,000 and is VERY slow. The AMF is an antique and can only be found in bankruptcy sales. The stitch looks presentable on both sides, and can be recognized by its uniformity. It is also usually a tiny bit longer than a stitch done by hand.

Columbia and Juki are two makes of machine that do a single-thread pick stitch which is much faster but has a chainstitch on the underside, making it suitable only to applications where the underside will be hidden, like along the edge of the facing or to lap certain seams. If you look very closely, the pick portion of the stitch also shows two threads instead of only one. These machines are also much cheaper- a few thousand dollars for a new one.

In this photo, the stitching on the very edge was done with a Complett machine, and the one further away was done with a Columbia machine.

pick

StumbleUpon.com

Tuesday, September 15, 2009

Next suit

Just bought some cloth for my next suit. A 13/14 oz charcoal flannel from Minnis. We'll look at constructing the pagoda shoulder when it arrives.

3816109385_67b85110e2

StumbleUpon.com

Saturday, September 12, 2009

More on Pagoda Shoulders

Karen asks about how to construct a pagoda shoulder, but first, a bit of background. Initially known as a "natural" shoulder as it followed the natural curved formed by the hollow between the clavicle and the acromion, the term has been appropriated to denote the round, sloped shoulder seen on Ivy League suits of type sold by Brooks Brothers, Southwick, Paul Stuart, and the like.

If we no longer see the pagoda shoulder very often, it is likely because it is, in my opinion, the most complex to construct and requires specific handling of the wadding, if any, in the shoulder; the canvas construction supporting the shoulder requires some extra work, and a careful manipulation of the cloth to give not only the concave shape we see when seeing it head-on but, more importantly, the distinct forward pitch of the shoulder. Some tailors who like a rounder shoulder seek to preserve what little elasticity is present in the shoulder area; my preference is instead to follow the actual contours of the body in order to create comfort and avoid pressure on the shoulder points, distributing the weight of the coat across the trapezius instead. So all this pagoda business is really more about comfort than aesthetics, but it can also appeal to some.
Enough blathering.

This will require a series of posts, as first, the cloth requires some ironwork without which we will never achieve the correct three-dimensional shape out of a flat piece of cloth (see post on trouser ironwork if you're not familiar with the concept).

We need a series of "fishes" or "wedges" (reverse darts) and cuts in the canvas underneath, then some careful pad stitching.

We will look at making a shoulder pad for those, like me, who need a bit of help.

Then, instead of waiting until the shoulder has been joined to add the pad, we will attach it to the canvas after basting the canvas to the front. This step is crucial to the final shape of the shoulder.

I suppose I'm going to have to make myself another suit. :)

StumbleUpon.com

Friday, September 11, 2009

Another suit completed

I don't know why I have always hated the term "pagoda shoulders", but I do. Spalla insellata sounds a little better if you speak Italian but sounds pretentious to those who don't. Well, whatever.

pagodas

But to something more important. I think that the survival of our craft depends not only on the propagation of the technique but also the survival of our suppliers. It's getting harder and harder to find the necessary stuff for making nice suits so when I find someone who makes it just a little easier I like to support them. I normally buy cloth in large quantities from the Italian mills, but when I want to cut something special, they aren't very helpful. Enter people like Andrew Rogers, from whom you can buy half a meter of Fox, Minnis or Harrisons cloth if you want; we need to keep people like this in business. So if you like the cloth I used for my suit, check out his stuff here or at britishclothsales@gmail.com; he offers good service. And tell him I sent you.

StumbleUpon.com

Tuesday, September 8, 2009

The trouser- fitting & completion

If you're just joining us, back up one post first. We were discussing the ironwork involved in making trousers.

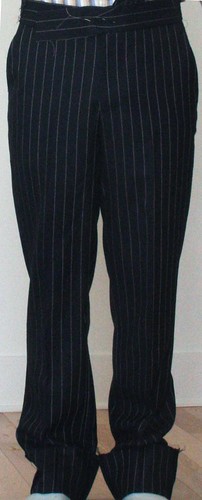
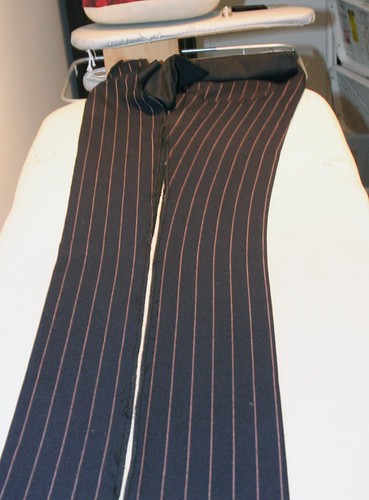
David asked what the difference would be between a trousers done with this ironwork and one done without. So the first fitting I sewed the seams straight with no manipulation, no fullness, no stretching, no shrinking, and the result was this. Not a very nice line. The hem is turned up at the bottom so it puddles around my ankles, but look more at how it hangs around my knees. Not clean

trouser fitting

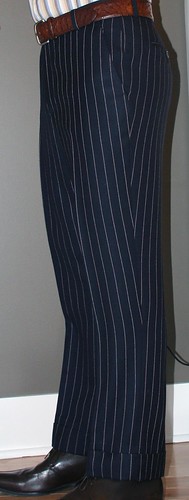
Then I ripped them down to show the ironwork in the previous post, and put them back together again. This is the result, which I much prefer.

trouser side front

Trouser rear

While David is right, some of the shaping will be lost with wear, but I can put it back with a careful pressing. Those who steam their pants are ruining all this shaping and will have pants that puddle around their legs; by pressing them with a good iron and observing the shape illustrated in the T&C thread you can have a marked improvement in the fit of the leg.


UPDATE

To answer a few questions, the first thing that will help getting a better press on your trousers is a wider ironing board; normal household ironing boards are too narrow to fit the entire leg so you not only have a hard time visualizing the correct shape, but you also tend to do the front only and then shift the pant and then do the back (or vice versa) when you should really be doing the entire leg at once. The Rowenta board that I have at home (in the pictures) is great for this and has a much better pad than most domestic boards. I know that some department stores have followed their lead and started producing wider boards as well.

Next, some puddling around the legs can be from bad fit and can't be rectified by pressing; hip-forward posture or flat seats will cause cloth to puddle around the knees in a horse-shoe shape and no amount of pressing will fix that. But assuming you have a trouser that fits adequately, it also helps if the manufacturer has made provisions for this kind of shaping. As I mentioned, the knee notch is shifted so that when the seam is sewn the back thigh is sewn on tight to the front which has some fullness, and there is some fullness in the back calf area. This allows us to stretch the panel opposite the fullness, like when constructing the inseam of the two-piece sleeve, and work the trouser up when busting the seams (industry jargon for pressing the seams open). If this was not done (for expedience during production) you won't be able to get the full shape out of the trouser, but you will be able to help it a little. When pressing your trousers, always keep this shape in mind and your results will be much better.

Like any part of any garment, it helps to visualize the shape of the body which is being covered. The trouser is not really two straight creases- the leg makes a bit of an "s" shape so we will recreate this shape in the pant. Whenever we want to create a curve in a garment without a seam, we have to stretch the outer arc and shrink the inner one, so if you are dealing with misfigures, keep the person's shape in mind when shaping the garment. Refer to the diagram below- stretch over the front of the thigh, stretch the seam into a forward curve, and shrink the excess under the back of the thigh. Do the opposite on the lower half, working the curve into the shape of the calf. Notice that the creases are not straight and that the hem of the trouser will dip lower in the back than the front.
If and when I can get my hand on a video camera I will post video of the process with and without a vacuum table (which is a godsend).

Trousers_dressurZSK002

StumbleUpon.com

Sunday, September 6, 2009

Cutting trousers- a cultural divide

We've been discussing trousers on the T&C forum & it occurred to me that I haven't really looked at trousers on my blog. Largely because I feel that there is a lot less room for individual expression and nuance in trousers than in jackets, which I, of all people, should know is not really true. I explain.

Working in the RTW industry in Canada gives me an interesting perspective in that I sell garments in Canada, the United States, and sometimes central America, Europe and Asia; regional variations in taste and fit are more obvious to me than someone who only sells into one market. But let me focus on Canada and the U.S. who share a similar history and culture but have very distinct tastes in trousers. I can sell basically the same cut of jacket into the States as I do in Canada, though generally a little easier in the U.S., but the trousers are a deal-breaker. It has always been a basic truth in our trade that (despite the fashion cutomer whose preferences bounce around quite a bit) Americans like a big, roomy, pleated, high-waisted trouser and Canadian prefer the opposite, namely a trim, plain-front, low-rise trouser. We had some leftover suits hanging in stock that had been cut for the States and no matter what kind of promotional price we might offer in order to get rid of them here, nobody wanted to touch a pleated, easy trouser so we had to cut them down to slimmer, plain front versions in order to liquidate them in Canada. A major expense (and royal pain) but we had to do it.

The British and the Neapolitans have different cultures and sartorial traditions so it is understandable that their preferences in cut should differ, but why would we find such a disparity between Canada and the U.S.? I've never really thought much about it until now.

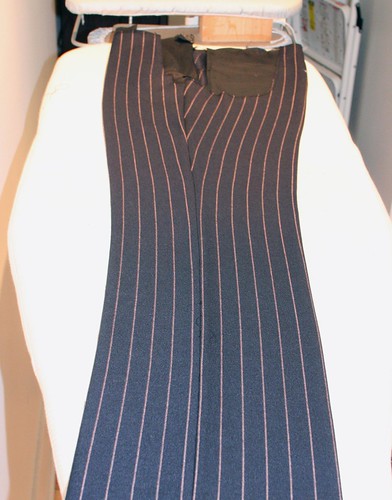
Which brings me back to my next project. Bigger, easier trousers are more forgiving in their fit and require a bit less shaping in order to get a good fit; close-fitting trousers, like those that I cut for myself, need a bit more help. I just got a nice, sturdy piece of English cloth from which I'm going to make a suit and we'll look a bit at the shaping that goes into a traditionally-made trouser. Some of it is at construction level, but the shaping that I do in pressing can be used by anyone who is pressing their trousers at home to refine the fit a bit.

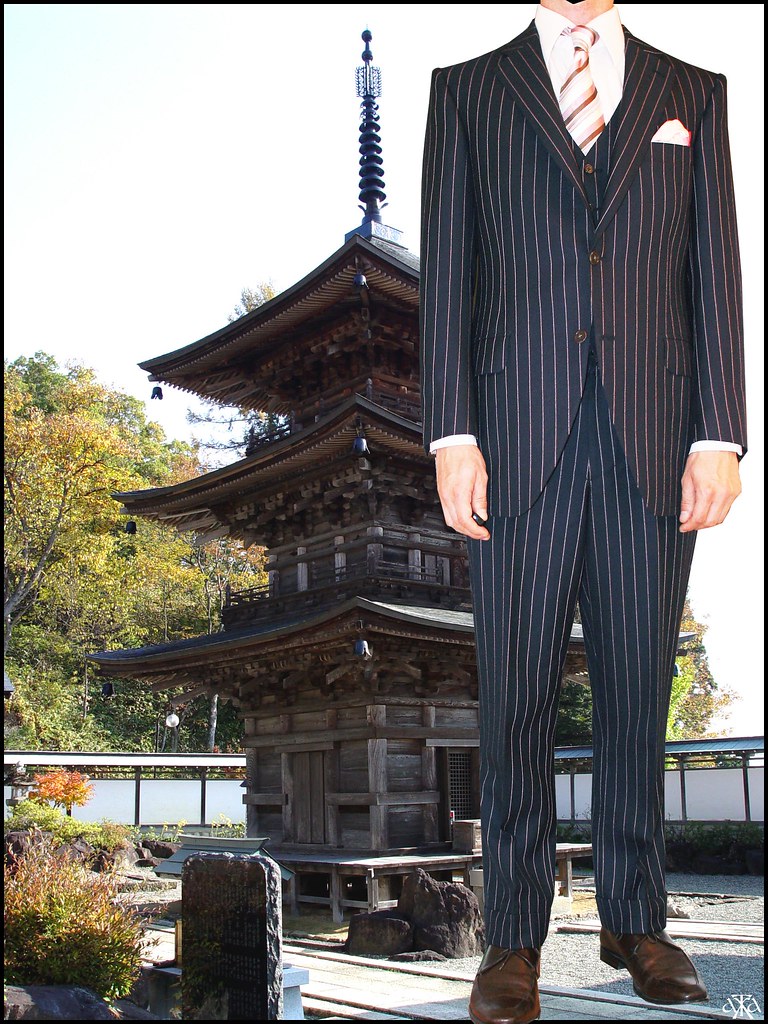
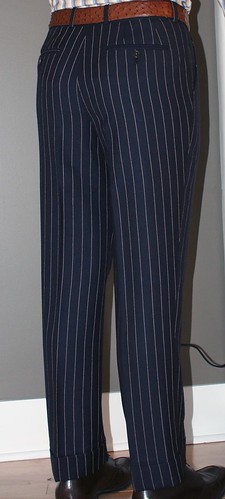
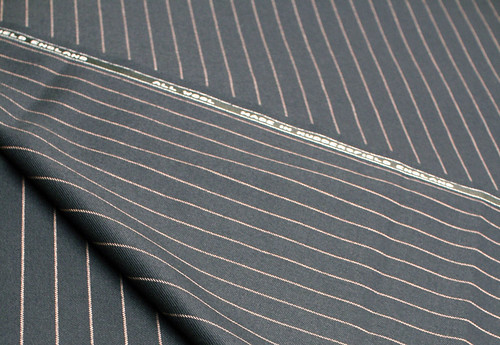
My next suit- a navy twill with a soft pink stripe.

Cloth

Having typed this, I wandered over to T&C to see that Sator had posted this article on shaping the trousers. which saves me the work of having to illustrate it. I don't have much to add except that in a factory setting in order to control the amount of stretching and shrinking, we shift the knee notch up by 1/4" to 3/8" on the back panel- this has the effect of introducing fullness into the calf area and shortness in the back of the thigh. When we press the seams open and crease the trouser we then stretch the back thigh and front calf, eliminating any ripples of fullness in the seam and doing the same shaping.

The waistband should also be shaped, which is not illustrated so I will do that. To allow for that shaping, we ease some fullness on the front panels onto the waistband when sewing it on ( which is alluded to in the German text).

So here's a bit of a recap of the German text on ironwork, but with an explanation of WHY we are doing it. Note that normally I construct the fly before joining the front to the back but it would be difficult to see the result of the shaping so I am putting them together in the wrong order for the sake of this demonstration.

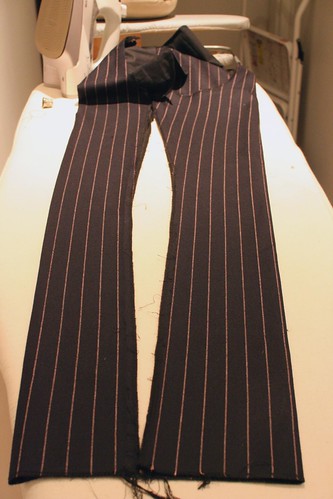
When the two panels are creased along their center line and placed next to each other, we see a gap at the thigh and the knee. Trousers which are narrower at the knee will have a greater gap and require more shaping than ones which are a little looser, as will trousers which are cut closer at the thigh. These are not really flared bottom trousers- the camera distortion makes it look like that.

trouser open

If we shift the back panel to meet the front as if the seams were joined, we can see the excess length this creates at the back of the trouser, which often puddles around the wearer (not to be confused with a garment which has not been cut properly for forward hip posture, which will also puddle around the calves)

troouser together

To make up for this extra length in the back we will use a combination of stretching the seam around the thigh and the knee, and shrinking a bit of the length out at the back. As David rightly pointed out in the T&C discussion, the trouser is subject to strain during wear so some shaping is bound to be lost- this is true of some of the shrinking so I prefer to do more stretching than shrinking. Notice the stripe line in the back panel.

trouser shaped

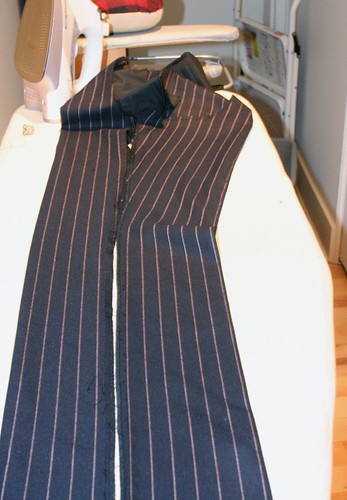
The panels are then joined and the back of the calf given some additional shaping.

trouser pressed

Here is the waistband which has been pressed into a curve to conform better to the waistline. Lower-waisted trousers need more shaping than higher-waisted ones.

StumbleUpon.com

Wednesday, August 26, 2009

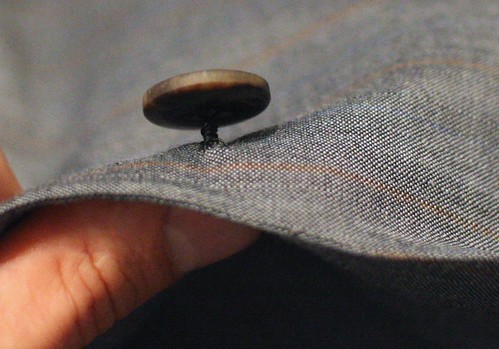
How to sew a button on a suit

Following up from the previous post, and because someone on Ask Andy asked for it, here's a quick tutorial on sewing buttons on a suit. It's a little different from sewing buttons on a shirt.

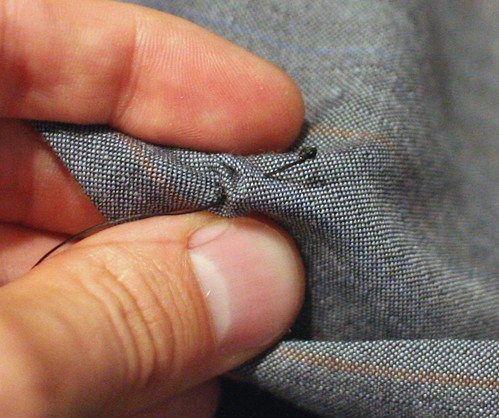
Mark your button placement, make a large knot in a length of thread, thread the needle and insert it between the layers, 3/4" away from the mark, and come out at the mark.

Button1

Take a small stitch, forming a loop, and insert the needle through the loop (making a knot). Pull tight and repeat.

Button 2

Pull on the big knot (the one 3/4" away from the button mark), bunching the fabric and clip off the knot- the thread tail will slip between the layers and be hidden. This way the end will not slip and loosen by accident.

Button 3
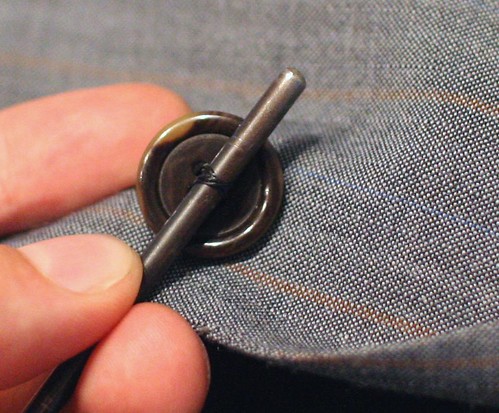
Insert the needle through one of the holes in the button, hold the button against the coat, and place a match or similar device over the button. Take a stitch across the match, into the coat, coming back up through the button. Repeat several times through each hole.

Button4

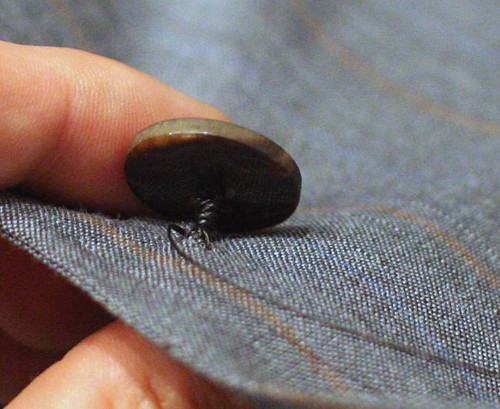
Remove the match and pull the button away from the coat. Wrap the thread tightly around the shank that has been formed until the button stands up on its own. Insert the needle through the base of the shank, make a small loop to knot like when starting, pull tight and repeat twice.


Button 5


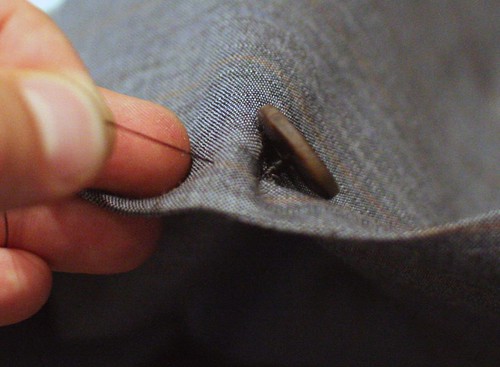
Insert the needle into the base of the shank, between the layers of cloth, and come out 3/4" away from the button.

Button 6

Pull tight, then clip the thread close to the cloth so that the tail will slip between the layers of cloth.

Button 7

The shanked button should stand firmly like this; if it is at all loose, remove and redo it.

Button 8

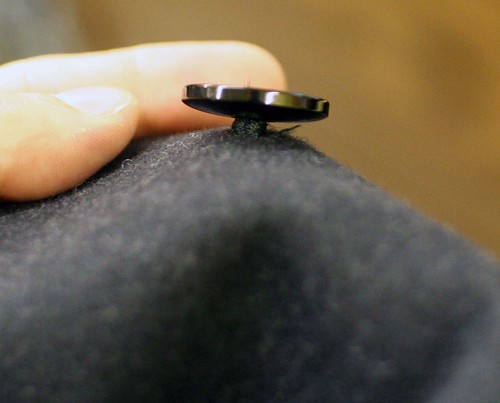
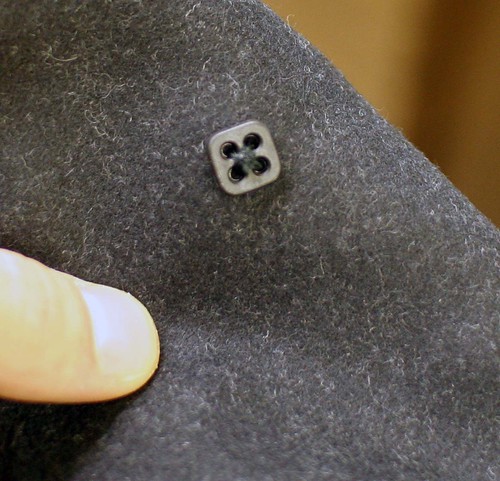
In response to Jordan's question, I don't like plugging buttons which involves making a hole in the cloth. Overcoat buttons are done the same way as regular buttons, but I put a stay button behind them- this prevents the button from ripping out and making a hole when subjected to a lot of strain. Instead of just catching the cloth when taking the stitch, go all the way through and sew through the stay button on the reverse side.

OC

OC2

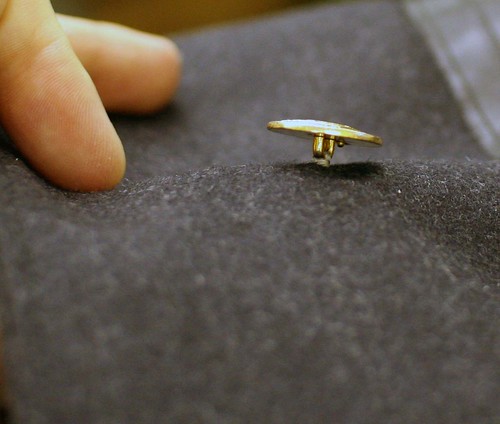
Metal buttons can also benefit from a stay since they are sometimes heavy, and often expensive. I occasionally make golf blazers with the club crest and club buttons. These buttons come as a set in a fancy jewel-type box with velvet padding and losing one is not a good idea. A stay prevents damage to the cloth and prevents them ripping out. To get them to stand up straight instead of looking limp and droopy, use a heavy waxed thread size 8/3 (40) or bigger. Since they already have a shank you don't need to make a new one, just make sure your stitches are firm and you wrap tightly enough that the buttons stand but not so tightly that you make the cloth pull.

METAL

In response to Lynn's question, I am using a size 4 glazed thread made especially for sewing on buttons. Gutermann's M1003 which is available at retail (their heaviest stuff), would work if it were waxed and pressed.

button sewing

StumbleUpon.com

Tuesday, August 25, 2009

Sewing buttonholes by hand

Something I've been too lazy to do myself- a video on sewing buttonholes by hand. It's in Japanese but I think the images speak for themselves. Slightly different technique from mine, I will try this one out and report (minus the paper template- how do they get that to stick?). And if anyone speaks japanese and feels inclined to translate I am sure there are many besides just me who would be interested.


UPADTE:

I like it. It's a nice, low-profile buttonhole with a less bulky purl.

StumbleUpon.com

Thursday, August 20, 2009

A look under the hood- mystery suit

A friend donated what was sold on ebay as a vintage Savile Row suit to my dissection project. At first glance it had most of the hallmarks of a SR suit but a few details were bothering me. I'll get into those in due course. One of my first reactions was also that the finishing was quite a bit neater than I'm used to seeing from SR (except the buttonholes which were meh), but one of the houses could have discovered someone fantastic..... In the process of taking the thing apart there was a surprise and a possible clue. Again, all in due course.


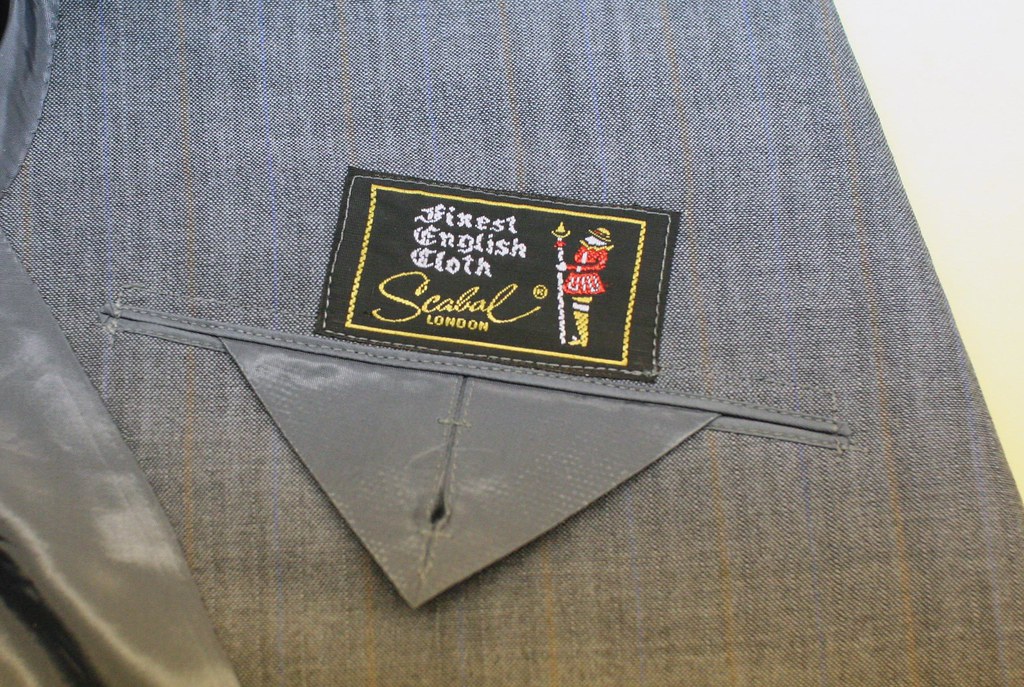
First off, there is no maker label, no customer label, only the cloth label- Scabal. There is also no indication of this garment ever having been worn; was this a RTW suit or a window sample? Was this made for Scabal to showcase their cloth? The interior was carefully engineered, suggesting a different approach to the lining than we usually use in bespoke (as in, a proper paper pattern appears to have been carefully made for the lining). I notice that the canvas used is quite stiff, which is not unusual for many SR houses. The pockets, both inside and out, have been very carefully made, and the inside pockets are particularly well done with tiny little jets. The envelope flap on the inside pocket, as well as several other key parts, have been stiffened with tailor's soap or starch, giving a very crisp, firm appearance. It is obvious that neatness and cleanliness area high priority for this maker.

Scabal

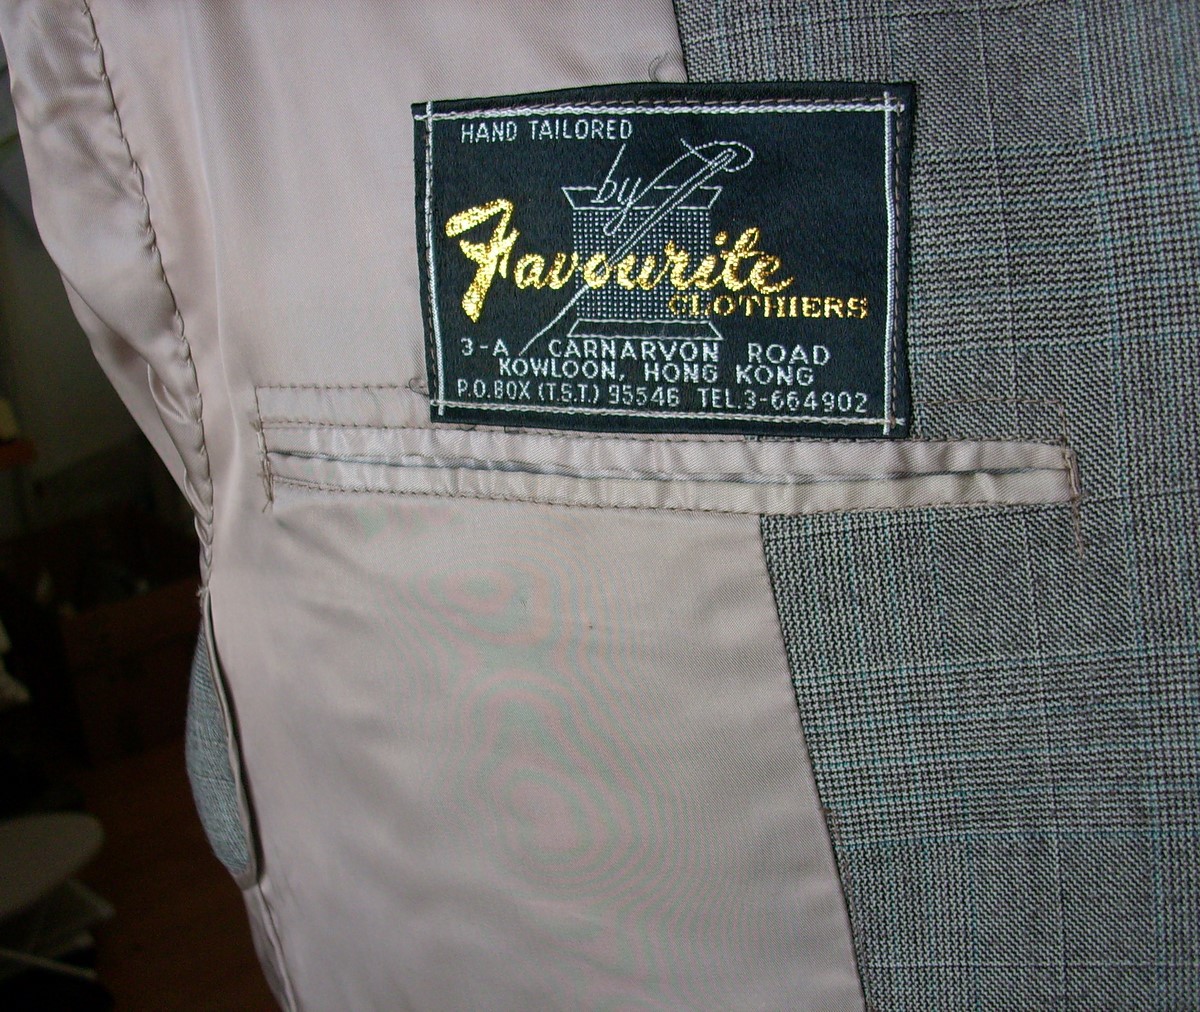
To appreciate the neatness it is perhaps useful to compare the pocket to another one made using the same basic technique by a Hong Kong tailor (thanks for photo sent by Schneidergott). Note also the hand finishing of the armholes.

NOTE- I have put large size photos so you can see up close. If you have trouble with your monitor, click on it and it will take you to the Flickr site where they are hosted. Click on All SIZES, then LARGE to see the full res photo.

DSCI0003

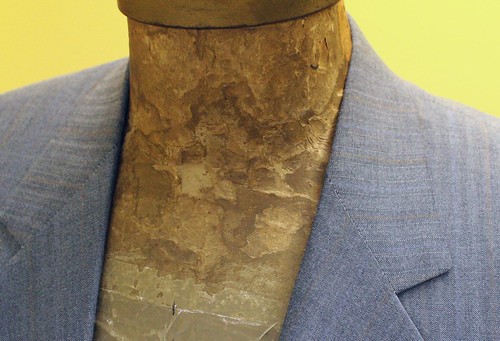
Placing the garment on an old tailor's dummy we see that the collar sits flush with the chest and tight to the neck. I put the garment on (it's rather tight fitting) and moved around a bunch and the collar stayed put. The collar, in my opinion, is rather binary- either it sits well or it doesn't- there is no middle ground, and in my opinion this collar sits well. All the more surprising to turn it up to find that the pad stitching has been done by machine. It is a self-cloth under collar which has the advantage of being finer and thus a bit flatter than felt or melton, but the linen canvas has not even been padded using the typical padding machine but with a plain machine. The rest of the collar construction has been done by hand so I don't think this was done to save time or money since the savings is really quite negligible- the line of stitching around the neck line is meant to hold the seam allowance in place, not to fell the collar to the coat- the felling has been done by hand. This speaks to the debate over hand padded versus machine padded collars; machine padded collars, done with the padding machine, are rolled to some degree but not as much as when done by hand and the proponents of hand padding insist that machine padding is inferior. Here we have a collar that has been padded by plain machine yet exhibits all the characteristics of a well-fitting collar. Hand padding would not make this fit any better- it can't get closer to the chest or neck, and there is absolutely no sign of it lifting away no matter how I move in it. Home sewers take note.
Collar front

Collar side

Under collar

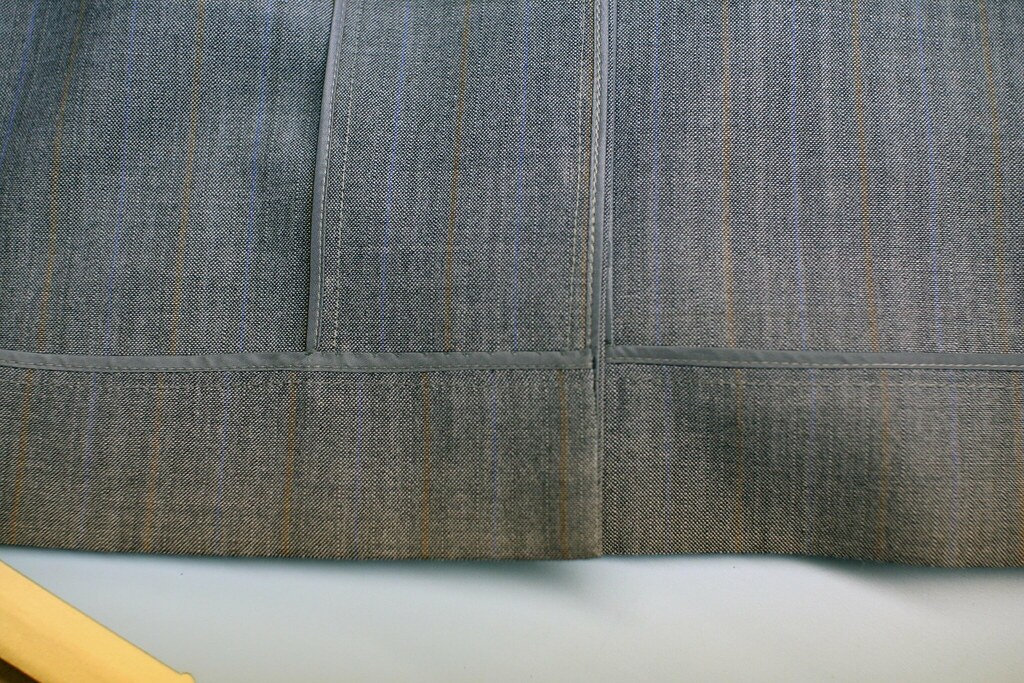
The interior is a typical buggy-lined finishing, done by hand, very neatly. The seam edges are piped with a tiny 2mm (less than 1/8") piping; the piping is sewn on right sides together at 2mm, then it is turned over the edge, pressed, stitched very precisely along the edge, then stitched again about 4mm away to fell the raw edge of the lining tape. Working in such small scale, the seaming has to be absolutely perfect for it not to look a mess, and they have done a very good job. Notice also, if you can, the hand finishing at the side seam, which we can compare to the finishing of SG's HK coat.
INside 1

DSCI0002
The vent underlay is round, and the piping around this edge is done just as perfectly as the straight edges; anyone who has gone around corners like this knows how difficult it can be to control, especially where bias areas tend to stretch and move. The work on this is impeccable.

Vent

Compare the seam finishing to another example posted on the web by a SR house

Contrasting piping is very decorative but I think it needs to absolutely perfect to not look sloppy. My personal preference would be the way this mystery suit was done (in terms of piping width and precision).

Hem1

The buttonholes, as I mentioned, are disappointing considering the high level of finishing, but I have seen much worse.

Buttonholes

The lapel has been padded by hand, with a layer of lining between the canvas and the cloth. Multiple layers padded together give added shape so not a terrible idea. The edge tape is applied by hand, and while there is no pick stitching in the traditional sense that it goes through all layers, the seam has been understitched by hand to prevent it rolling out to the wrong side. The facing is understitched by hand a second time, 1/4" away, below the breakpoint for extra reinforcement.
lapel

Like the collar, the canvas has been padded by machine. There are certain SR houses that do this so it is not necessarily an indicator of inferior workmanship. The machining is done in neat, precise rows which might have actually taken more time to do than it would have taken to do by hand; machining, though, gives a certain stiffness to the already firm canvas. Some prefer structure and cleanliness over softness
canvas

Curiously, the gorge has been sewn by machine and tacked on the upper side of the collar. This means that the top collar was not just stretched and worked over the undercollar, trimming away excess and then felled by hand in the usual manner by the tailor; a paper pattern had to be pre-engineered to fit over the undercollar. This tells me that the cutter had some pretty advanced skills, and on certain cloths it is much cleaner to sew the gorge by machine than by hand, so this is not surprising given the attention to cleanliness in the rest of the garment.
Gorge


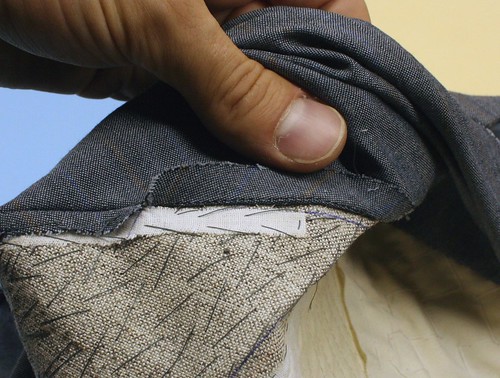
So far I am thinking that this is a very well-made RTW garment because of the level of engineering in the lining and collar- this shows some extra work on the cutter's part which is often reserved for when several garments will be made off the same pattern. Otherwise a lot of this work is left up to the tailor, which is clearly not the case. What tells me for sure that this is NOT a RTW garment is the fact that the inlays, thread tacking, and chalk marking which we see only on bespoke garments are still intact, like here at the shoulder and sleeve seams.

Shoulder seam

There is evidence of alterations to the side seams which would have been done during a baste fitting so there is no longer much doubt in my mind that this was a bespoke garment fitted to somebody. Then I notice the absolute giveaway, which don't really show up in photos; balance construction lines are still faintly visible in chalk. Not only was this garment bespoke, but there was no paper pattern- it was drafted directly onto the cloth. The horizontal lines at the breast, the shoulder blade, the side seam level and waist line are still visible, as well as lines used to calculate shoulder slope, neck width and front scye position.

Ordinarily I draft onto paper, cut from that, then transfer any adjustments during fittings back onto the paper. Some dispense with the paper altogether but then there is no record for the next time we cut for the same client (we do hope to have repeats after all). This cutter must have drafted onto the cloth, fitted, then ripped down to make a paper pattern from the ripped pieces. Regardless, not only the finishing is good but the drafting is good too.

Curious, I studied the construction lines and some of the measurements and it would correspond quite closely to something drafted for a 36" chest from a Modern Tailor, Outfitter and Clothier draft by Whife. Worth noting is that the coat and sleeve length are definitely for a short person (I'm guessing around 5' 6").
side seam

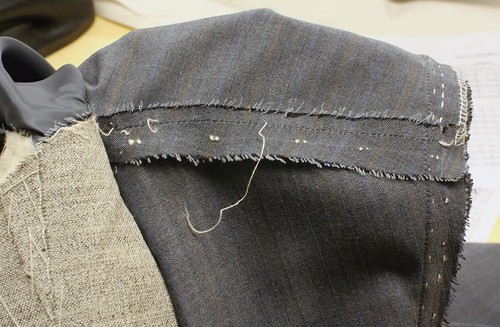
There is no wadding in the sleeve head to break down over time, instead a bias cut strip of cloth similar in weight and construction was sewn in as a sleeve head. This idea of sleeve heads and shoulder pads "breaking down over time" drives me a little nuts. I think a garment should hold up over time and look the same ten years from when it was delivered. Hearing tailors tell their clients "oh it will break down over time" sounds like a way of getting customers out of the shop to me. Or shoddy practices which don't hold up.
Sleeve head

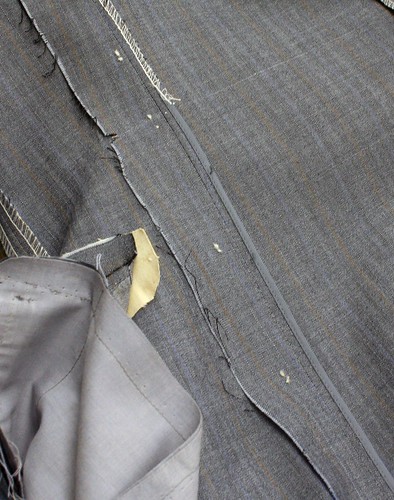
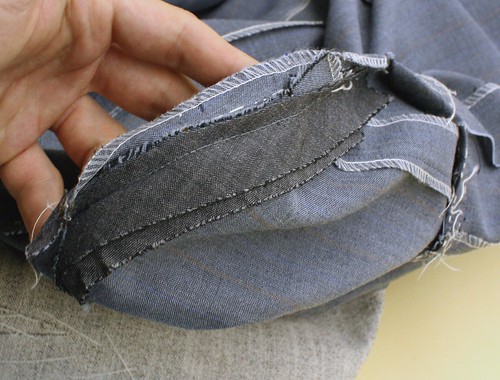
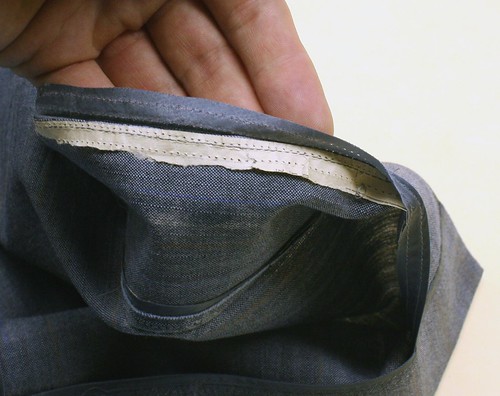
Gong back to the hem underlay, I noticed it was crisper than the seams, but since a good deal of starch had been used in other parts I was not surprised. I decided, however, to unpick the piping and found paper in the seam. I am reminded of the technique of using tissue paper to cut and sew difficult cloth like chiffon. You would lay the underlay piece on a piece of paper which would prevent it shifting as you go around the corners, place the lining tape and sew around the edges through all layers. The paper will help reinforce the edges when turning the piping and make the job that much cleaner. Then the excess is torn away, leaving only a small amount hidden under the piping.
Paper

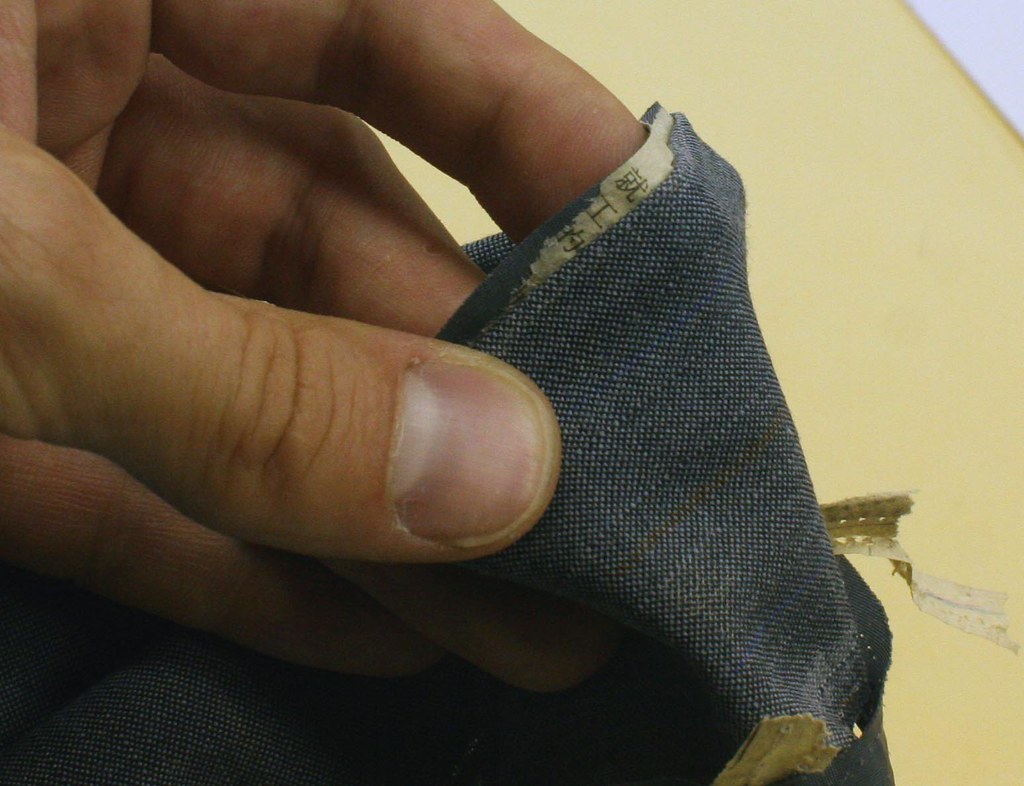
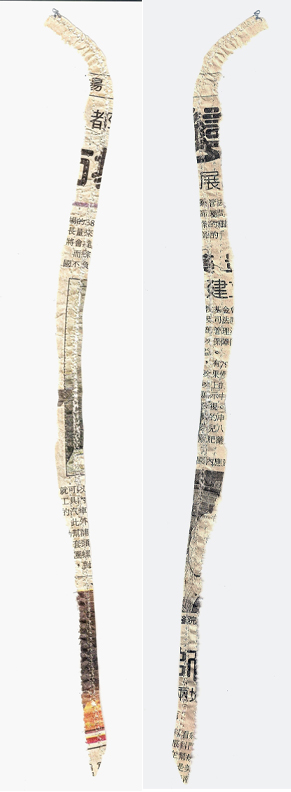
The final little bit of curiousness is this- the newsprint used was from a Chinese newspaper. So either this suit was made in China or Hong Kong (this would have been made before the reunification) by a foreign-trained cutter and tailor, or some tailor shop was using immigrant labor (very possible as well).

Interesting......

Chinese

In response to a question, I really don't know if it was common to use mainland workshops during the British period, but I will ask the question at WW Chan, who say that the work is "OK" and pretty typical of HK during the 80s. And here is the rest of the paper that I managed to get- it's not terribly clear but maybe you can see something?

Chinese

StumbleUpon.com