Friday, February 27, 2009

Grainlines, fulling and stretching

(I'm trying out a new photo hosting format and I'm not sure what results I'm going to get so bear with me here)

When discussing fulling (or, the modern term, easing) and stretching as well as elasticity it is important to have an understanding of what is happening to the cloth, and to understand this one needs to understand a bit about the weave.

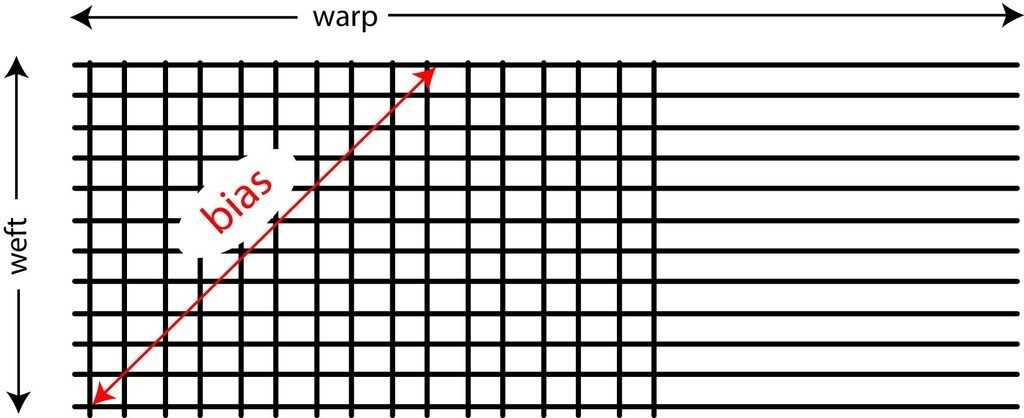
Cloth is made up of interlacing yarns running, in a plain weave, perpendicular to each other. Fancy weaves can be created by varying the way they are interlaced, but that is not within the scope of this discussion. The yarns running along the length of the goods are known as the warp (or the lengthwise grain), and are generally stronger than the filler yarns that are run along the weft (or, crosswise grain). This is important when cutting pieces which are subject to strain like waistbands and pockets- they will generally be cut along the warp.

If you try to stretch the goods along either grain, the amount of stretch is limited by the amount of elasticity in the yarns themselves, which is usually rather limited; imagine stretching a shoelace- not much stretch? How is it, then, that we can shape a garment by stretching parts of it? That is where the bias comes in.
Photobucket

The bias is an angle measured from the straight or crosswise grain; the true bias is a 45 degree angle. Just as the properties of the warp and weft are considered when cutting, the bias must also be considered. Madeleine Vionnet was widely (and dubiously) credited with the “invention” of the bias cut, but she is clearly the most notable champion of it; her fluid gowns of the twenties and thirties showed how the bias could be used to mold cloth and that the weave would shift, clinging to the body and draping gracefully.

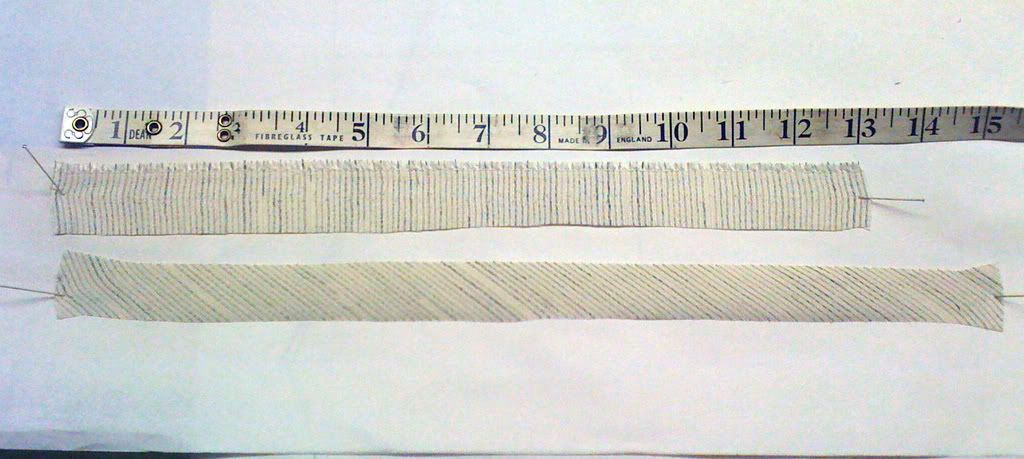
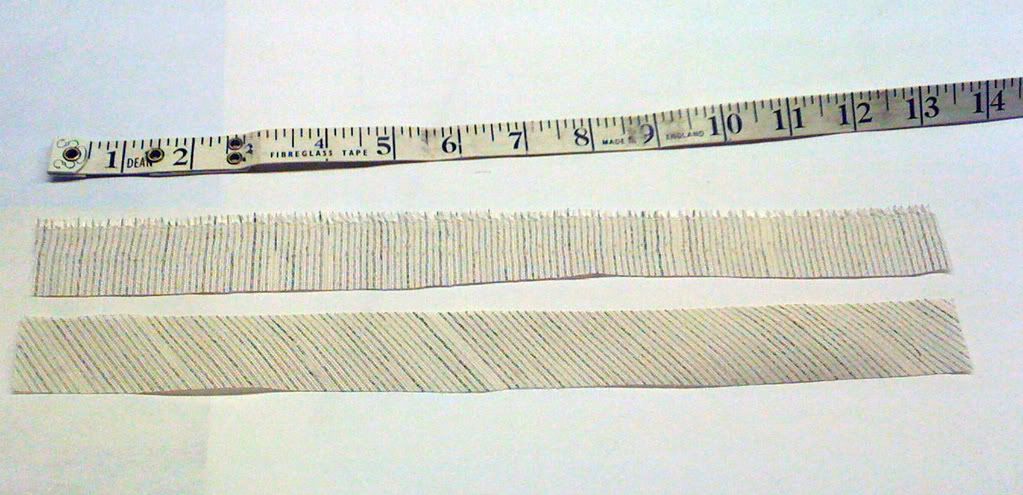
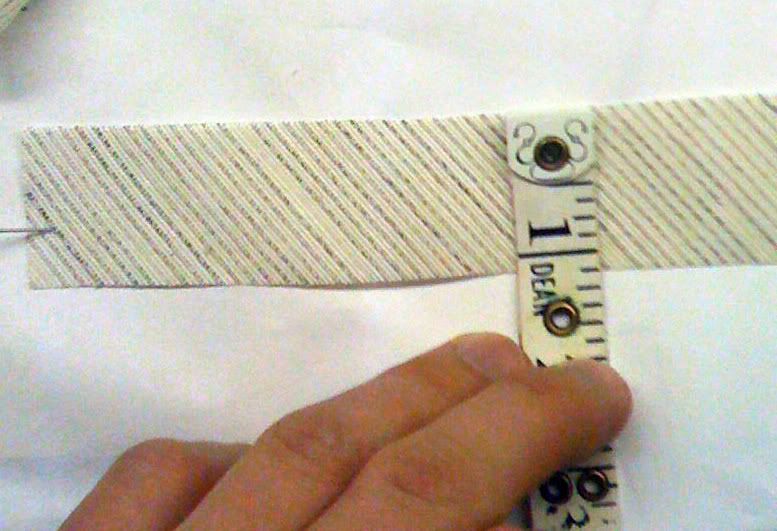
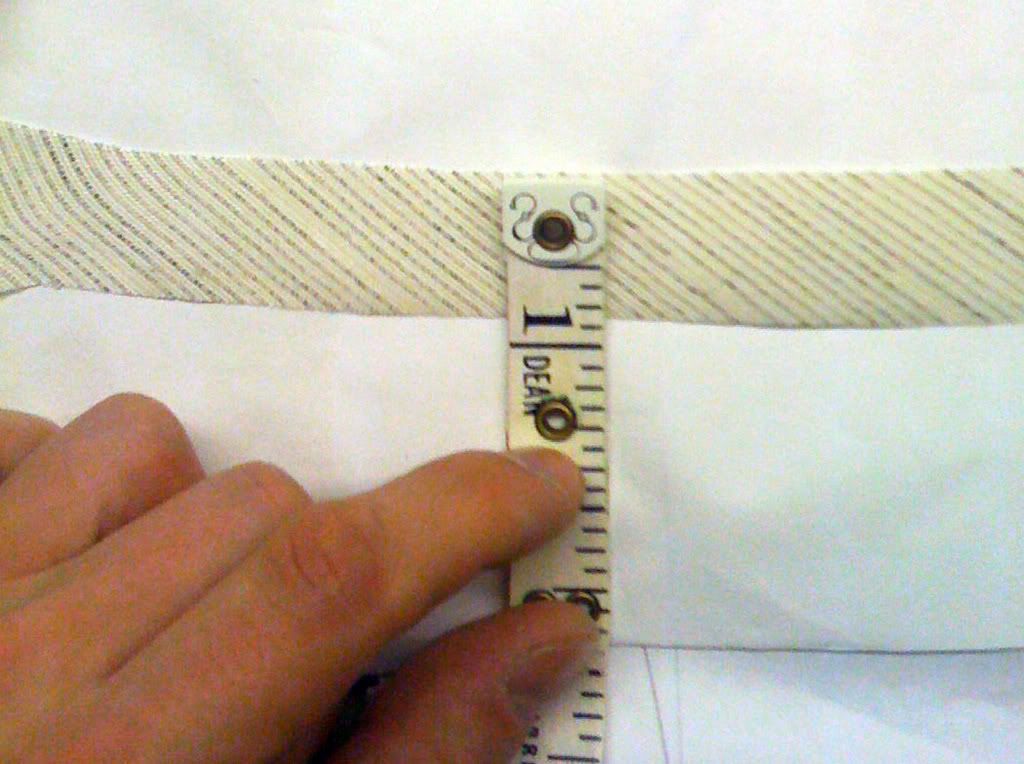
The principle behind this is that tension exerted along the straight grain stresses the yarn and very little displacement occurs; tension exerted along the bias will not strain any given yarn, rather it will cause the weave itself to shift- the yarns are displacing themselves. In the images below you see two strips of canvas cut the same length but one is on the straight and one on the bias; the they are also shown stretched out- the straight has gained very little but the bias-cut strip has stretched a great deal.
Photobucket
Photobucket

Notice also that the bias-cut piece changes its dimensions- as it gets longer, it gets narrower.
Photobucket
Photobucket

The inverse is also true- when we try to ease or full parts of the garment, an area cut on the straight grain is likely to wrinkle or pucker since the yarn is being compacted (think of folding a paper into an accordion) but the weave of areas cut on the bias will compact and thus the easing will be smooth. The degree of bias will govern how much easing can be done- straighter cuts will allow less easing and cuts at 45 degrees will allow the most.

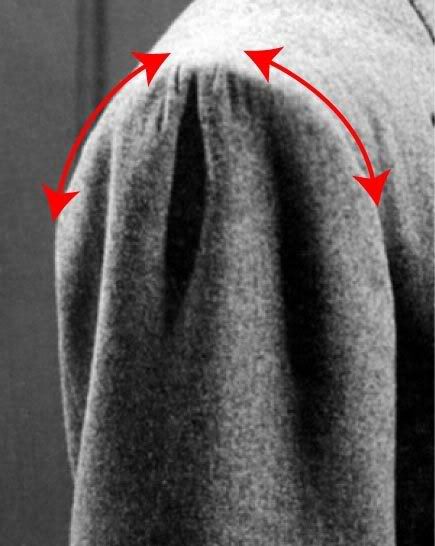
The clever cutter will keep this in mind when considering where he might need extra length, like the front of the shoulder and thus maximize the degree of bias, or areas which need to be eased in, like around the sleeve cap, and plan the distribution accordingly. The sleeve in particular, with its varying degrees of bias, is a tricky thing- the middle of the front is close to the straight grain so very little ease should be placed there, whereas the area around the front of the shoulder bone is very rounded so a lot of fullness can be placed there, but one must be careful- the area roughly ¾” to either side of the very top of the sleeve is on the straight grain so no fullness must be placed here or the sleeve will pucker. Below you see a sleeve which, by accident or by design, shows this puckering at the very top because fullness has been placed there. These days we would be careful to distribute the fullness to either side of the top where it will be eased in smoothly (as highlighted by the arrows), and place nothing at the very top. The sleeve can be just as full but a more careful distribution will give cleaner results. Of course, certain Neapolitans have different ideas about that, but I have been told stories straight from the horse’s mouth about how that kind of thing came to be accepted in Naples at the time….. Not having been there myself I won’t comment.
Photobucket

StumbleUpon.com

Soft tailoring

Having worn the drape coat a bit I have noticed one thing about the comfort- it is markedly more comfortable in the chest, but that has nothing to do with the drape allowance (actually, the drape in the chest bugs me a little when I move my arm forward).

Drape and soft tailoring have often been confused and I am inclined to think that the softness of the construction has much more to do with the comfort than the drape. While I have cut soft coats in the past, one thing I have not done is to put the chest on the bias; I am convinced that this is giving a lot more comfort than a straight-cut chest would since the hairline is not impeding forward movement. I think my next experiment will be to cut a clean-cut coat with a soft-construction and bias-cut chest to compare with the drape coat. I guess I'll have to keep this a while longer.

StumbleUpon.com

Thursday, February 26, 2009

Canvas Fronts

I went to visit a friend of mine today.

She started in the business as a machine operator (seamstress) at Samuelsohn; today she owns the company which makes their, and the majority of North American manufacturers', canvas fronts.

canvas 005

She has special double-needle jumpstitch machines with custom-built forms. This machine doesn't sew like most, whose presser foot and feed dogs feed the fabric- the operator feeds it through at their own pace. They can control how many stitches, whether lots for a firm shape, or few for a soft shape, and the forms allow them to work in the shape of the chest and shoulder. It requires a certain amount of skill since the operator is building in the shape and has to know how to do it correctly. They do a very nice job.

canvas 004

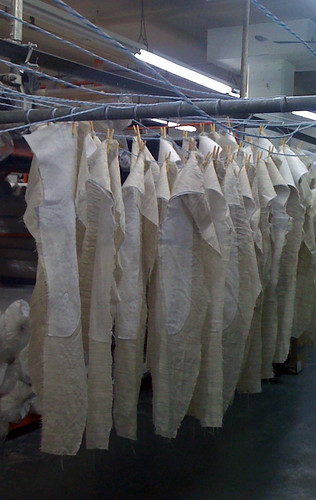
Canvas has not been though all the finishing processes like cloth has so there is still a big amount of shrinkage left. A tight canvas will make the fronts ripple, and I suspect this is one of the reasons some people put their canvases on the bias, since the bias allows more stretch. Whife alludes to it, and suggests that clever tailors are able to put the canvas on the straight grain without trouble. One of the most important steps to avoid trouble is to pre-soak the canvas fronts. They are soaked up to 24 hours, and then hung to dry, then pressed on custom-designed forms which retain and enhance the form of the chest, and stretch the shoulder at the same time. Some people then run some light shirring stitches through the canvas to draw it up a bit to prevent any further shrinkage problems.

canvas 002

StumbleUpon.com

Wednesday, February 25, 2009

An old iron

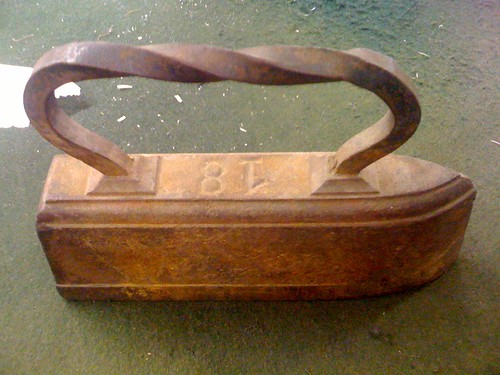
I found this when going through some old stuff. An 18 pound iron of the type that used to sit in coals to get hot. One of the first jobs an apprentice would have would be carrying this thing back and forth, and swapping out the press cloth which would keep the dirty iron from soiling the garment.

Thank god for electric irons.

iron

StumbleUpon.com

Tuesday, February 24, 2009

Not seeing the forest for the trees

This drape experiment has got me thinking. I feel very Meh about this coat but the general population seems to like it. Why?

I like pagoda shoulders. I like a good rope on a sleeve. I like a polished-marble clean chest. I like pocket jets that match the coat.

Why?

Because they are the most difficult things to execute properly.

Where I see virtue, normal people see, well, I don't know what they see, but it's clear we don't see it the same way. But this is normal. People like things that are difficult, that are rare, that show virtuosity. We go sit through 2 and 3 hours of opera and most people are only waiting for a few notes to come out- how much of Che Gelida Manina do they really hear? They're waiting for the tenor to belt out that high C and everybody leaps to their feet and claps. Because that high C is hard to get and hold. And it's easy to understand that it's special.

The coat I feel most meh about is generally liked and the coat I prefer is generally disliked. Maybe I am judging only on Technical Merit and completely ignoring Artistic Impression. On the other hand, the other night I drank a bottle of wine which sells for $150 at the liquor store. Sure, it was good, but could I, a non-expert, tell the difference between it and a $30 bottle? No way. Should wine-makers abandon their high standards because only experts understand the virtue of an excellent bottle? Is it a fair parallel? At least the wine tasted good so had some merit. Many people think the Prince of Wales coat looks bad. Would it be pure snobbery to say that they are not aware of the technical superiority, or is that just a bunch of tailoring claptrap and a coat should just look good and be comfortable, regardless of how hard it was to make?

Probably the latter.

StumbleUpon.com

Monday, February 23, 2009

Drape, part 3

Coat's done.

Meh.

For all the fuss they make over the comfort of drape, I expected the clouds to part, rays of sunshine to burst forth and choirs of angels to sing when I put this on. It's soft, it's light, it's comfortable, but is it really all that much more comfortable than the starch and armor that I normally wear?

No.

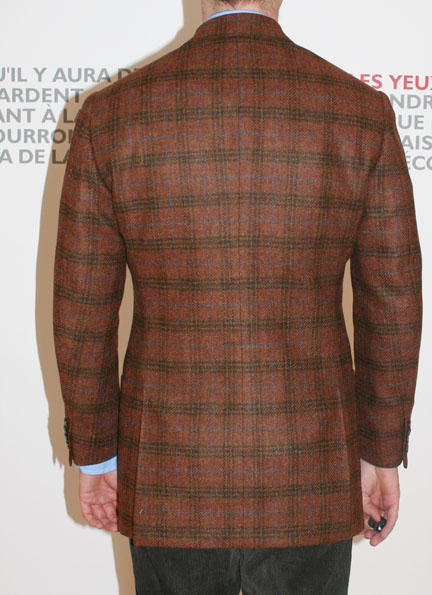
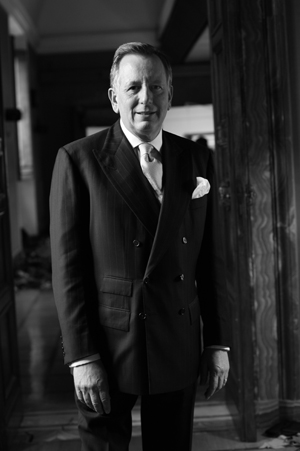
In part, because of the sleeve. People have this funny notion about sleeves and their fullness. Despite what most people think, the neapolitan sleeve is not the fullest; in fact, it is one of the smallest. And neither is the A&S sleeve (I hate to burst your bubble, Mr Hitchcock, but EVERYBODY fulls a large sleeve into a smaller armhole, not just you guys). The rope shoulder is the fullest sleeve up top; that's what makes the rope. You have to fill in all the extra room with wadding to make it clean, otherwise you wouldn't have "soft ripples" like the spalla camicia, you would have Niagra Falls. I can then taper from that fullness toward the wrist and have a sleeve that is full up top but trim at the bottom. Much more modern and appealing to my eye. People don't usually have fat elbows, and extra space around the lower bicep or elbow is not actually more comfortable. The key is to have more space ABOVE the breast line. In this, a rope-shouldered sleeve is the fullest and affords the greatest amount of movement. That is why I have more movement in the POW jacket picture below, even though it is lean-cut than I do in this drape coat. Of course, if the armhole were in the wrong position, nothing is going to comfortable.

Does this coat suit me better? Probably. I'm still not thrilled about it, though that may change. Since it is a sport coat it is not bad, but I think a business suit cut like this would not feel right. Not for me, anyway. I'll wear it a bit but I have a feeling this is going to end up on ebay.

IMG_8884a
IMG_8886a

StumbleUpon.com

Thursday, February 19, 2009

Drape, part 2

I have since found some things out about A&S and drape.

I didn't think that the full canvas would have been cut on the bias- Sator showed me a oage from Whife in which he indicates that it was, in fact, done on occasion, but I get the impression he did not favor it.

Edwin DeBoise, of Steed (who is former A&S cutter) pointed out in a LL post that A&S only cut the chest canvas on the bias, as I suspected.

Bengalstripe posted some photos of the insides of an A&S garment here and it appears that they use linen canvas, not hair canvas. Interesting, but not for me.

Upon reflection, I have changed my mind about the spalla camicia thing. While the purpose is not to reproduce a period A&S coat, it does seem that the spalla camicia was a later invention. I am not sure if the seam should be opened, though, since several photos indicate that it was not, however there was no or little wadding which would have made a rope-type shoulder. the photos posted also clearly show a little padding in the shoulder of the A&S garment, but I am omitting it in mine. I have drafted a nice trim sleeve using my own ever-developing system, and this time I got everything to match nicely in the back and still fit the way I want. Yesterday I was not feeling so good about the coat, feeling that there was just way too much drape. Now that I have a sleeve in, my feelings are changing.

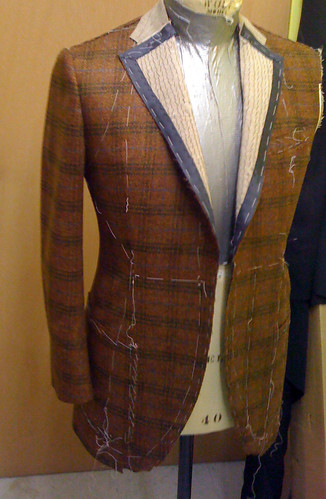
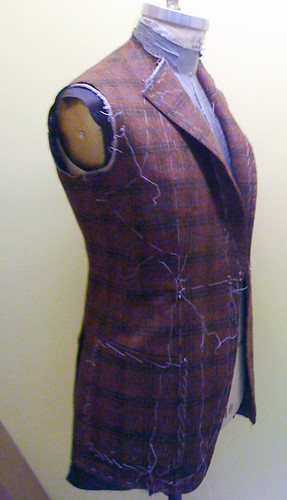
Here we are at the office, I have one sleeve basted in, and placed on a tailor's dummy which is quite a bit bigger than I so it fills out the coat, but you get an idea of the shape of the coat so far. I am not displeased.

PM 006

PM 007

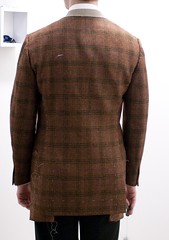
EDIT It looks much better on the dummy than on me. It's now a little rumpled from having been stuffed into a bag but here are two shots anyway. Feeling a little discouraged right now.

Up until now I had only seen the back in the 3-way mirror and a very distinct vertical fold ran down the back, much as I had expected it to, however I didn't have a sleeve on it yet. Now that the sleeve is on and I see it full-on thanks to a tripod and a camera, the fold is no longer visible and I see some cleaning I have to do. So is this to do with the angle of vision or the weight of the sleeve or both? The back now looks clean (well, not clean, but not drapy)- can this be also a result of the weight of the cloth? It is a good 3/4" than I normally cut my back, which is twice the drape allowance given in Regal's. I am starting to think it is possible to conceal a great amount of drape in the back without it looking too messy. Definitely worth more thought.

The front in this photo makes me look about 20 pounds heavier than I am. Again, maybe camera angle and the fact that it is not finished. Note the high position of the breast welt- I had to bring the chest dart higher than I normally would because the fullness of the chest seemed to sag much too low. This is probably a feature of the style and maybe I should have left it as is, but I did not like it. What seemed like a huge amount of drape before I had sleeves on is again, not so apparent, but again, probably camera angle.

drape back

drape front

PM 022

StumbleUpon.com

Wednesday, February 18, 2009

To drape or not to drape

I'm getting ahead of myself (again). The windowpane coat is finished but I'm going to wear it and abuse it for a while before making any further observations on it. On to my next experiment.

A whole lot of fuss is made over the drape cut, some claiming it to be the ultimate in bespoke silhouettes and others deriding it as just bad cutting. Many people aren't very clear about just what drape is, especially since what is made nowadays as drape is perhaps far from what was being made in its heyday. The proponents of it claim that it is not only more elegant, it is also more comfortable. I favor a clean-cut chest over drape and feel quite strongly about it, however I have never worn a drape coat and I am also not so much of a testa dura to not put it to the test. So my next experiment- to cut myself a drape coat and do the wear-test.

First, what is drape? Opinions can differ on the details, but drape is primarily characterized by soft vertical folds of excess cloth around the scye, on the premise that this affords more movement or comfort. It seems to have been made popular (some claim it was invented) by Frederick Scholte, a famous cutter at Anderson & Sheppard, a Savile Row house. EDIT- I AM INFORMED THAT SCHOLTE TRAINED A&S CUTTERS BUT WAS NOT, HIMSELF, AN EMPLOYEE OF A&S. Cutting manuals of the time state that it was not clear where the drape came from, whether from England or the States or even Europe, so I wonder if it really was invented by Scholte or the fact that he popularized it misleads us. I don't know. They also pioneered a "soft tailoring" school which sometimes confuses people, since a suit can be clean-cut but be soft, and a draped suit can be structured. Here are a few examples, the first being Mr. Hitchcock, the current head cutter at A&S, and one of them being a very extreme version, just in case you missed it.

as

DSC00719_edited-2-1

3272234579_c1790fe172

The same vertical fold would appear at the back of the scye.

I have two texts which give instructions for drafting a drape coat- one is Whife's Modern Tailor, Outfitter and Clothier of London from the late 40's, and Regal's Garment cutter, which, if I am not mistaken, dates from 1933 so they are both from the period of greatest popularity of the style. Regal's gives a draft with a moderately small drape allowance- 1" on the half while Whife gives well over 1 1/2" on the half; Whife also gives options for a closer-fitting seat and appears to be more of what we see in the drape cut. One feature it does include is a front dart which extends all the way to the hem, something that we rarely see except on Rubinacci, some Huntsman and perhaps a few other Neapolitan tailors. I know that this was hugely popular in Naples at around the time that English tailoring was catching on there, and I would prefer a cleaner seat so I chose to use Whife's draft with dart extending to the hem. It is the first time I have drafted and cut this sort of thing and it posed a certain challenge where matching the pocket was concerned. More one that later.

The draft instructions are actually manipulations to the regular draft so I started by drafting a pattern to their standard grid, then followed their instructions for turning that pattern into a drape coat. I made the pattern without a separate side body, another thing which is new for me. One of the reasons I am doing this is to see exactly what the drape coat of the day would have looked like and felt like so I am trying to stick to it to the letter. Being a checked fabric, I have left the sleeve until I am happy with the fit of the coat since changes to the armhole will affect how well (if at all) the checks match. Once I get the armhole nailed down I will draft a sleeve to fit it, using my own sleeve drafting system, not Whife's.

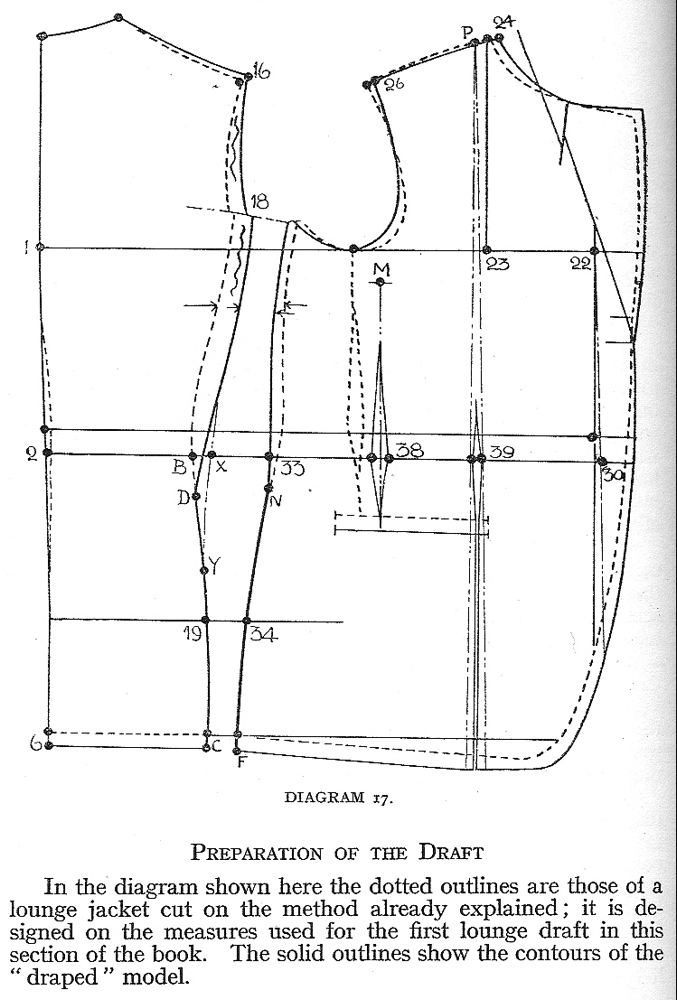
Here is part of the instructions for the drape manipulations- you can see there areas which are getting larger, and also the extreme straightening of the neck point. Further manipulations include cutting through the front to open it up and create the long form dart

DrapeCut_Whife2

One thing that Scholte was known for doing was putting the canvas on the bias. I have been trying to get a look inside vintage A&S jackets to see if the whole front was on the bias or just the chest part; I suspect it was just the chest part. The large piece of canvas that goes all the way down the front is quite supple and I see no reason to put it on the bias. The chest, however, has stiffer hair running across it but not lengthwise; putting this on the bias, running diagonally toward the top of the shoulder, would give dimensional stability but be softer when the arm was reaching forward. It would also allow the extra cloth in the scye to drape and form that famous fold- otherwise the crosswise hairline would just fill the chest out and it would be less evident. So I am cutting the main front on the straight and the chest canvas on the bias. I am not putting any other chest plates or shoulder reinforcement pieces a I would for a fully constructed garment, nor am I putting a shoulder pad.

I have done two fittings so far (which is hard to do on yourself, even with a 3-way mirror) and this is what the coat is starting to look like. The bag is a skein of silk thread- the way most finishing threads are sold, as opposed to on spools. You cut one end of the skein and that makes pieces of thread just the right length, and all the same length. The thread is pre-waxed.

IMG_8813a

It was very tempting during fittings to clear the scye (clean up the chest) since to my stubborn eye it just looks wrong. But I resist! It is quite a lot of drape, even though I allowed the minimum suggested by Whife.

Manipulations with the iron play a big role in shaping so I will note now what I did. Since the chest seems amply big on its own, the only manipulation was a bit of shrinking of the scye near the front pitch notch. I stretched the neck and first two inches of the front shoulder to give the forward pitch, and that is all I did to the front. The side seams were stretched as usual, as well as the blades of the back and center back seam (see my previous post on shaping the back). I would normally tape the back scye, drawing it short, but Whife admonishes against it so I did not. That is the full extent of the manipulations with the iron.

Having a seam going down the front means that pockets won't necessarily match at certain parts. Iammatt was kind enough to show me a closeup of one of his Rubinacci coats which they had cleverly managed to disguise this mismatch at the bottom of the pocket. I was not so successful, but I think it has more to do with the width of the check- the check on Matt's coat was much wider. I will do some more looking into this later.

This is Iammatt's Rubinacci. The check mismatch is very well disguised.

pkt

Even though I find the drape amount excessive, it was what Whife described so I am going to leave it. Tomorrow I will be able to draft my sleeve and go to that fitting. Then I will post some photos of where I am at with it.

StumbleUpon.com

Wednesday, February 11, 2009

Learning to sew with a thimble

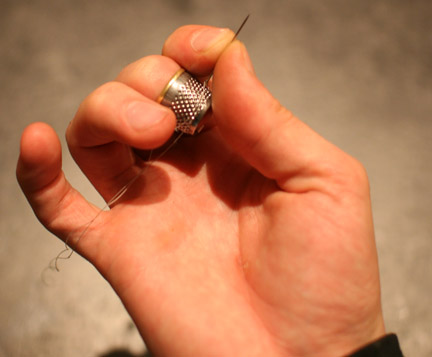
Someone asked me how to learn to sew and I told him to start by learning to work with a thimble. This will protect your finger as you work with multiple layers which can sometimes be stiff. FIrst, get an open-ended thimble in the correct size. The average size is 10 or 11.

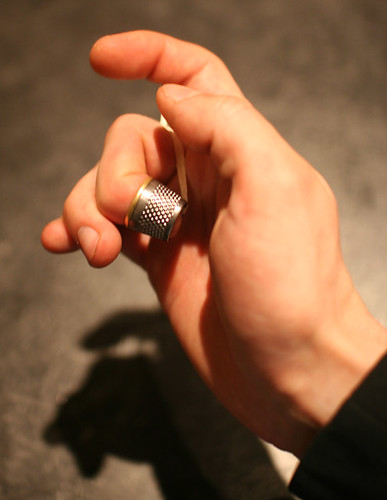
Thread a piece of ribbon through the thimble, then place the thimble on your middle finger. Bend the finger toward your palm and have someone tie the ribbon. Take a threaded needle between your thumb and index finger, with the end supported by the thimble. The dimples are there so the needle won't slip. Now practice taking stitches. It is pretty hateful at first but you will eventually get the hang of it. Use a turning motion of your wrist to drive the needle through the cloth- most people's natural tendency is to extend the finger to drive the needle through, and like this you will tire quickly, especially when working with thickness like canvas or collars. This is why you are tieing your finger- to rid yourself of this tendency.

Now practice.

IMG_8613

IMG_8617

StumbleUpon.com

How to Iron a Shirt

Anyone interested in the pro method of ironing a shirt should check out this tutorial at

http://lavraiechemisesurmesure.blogspot.com/

While on the subject of shirts, does anyone know what David Page Coffin is up to these days?

StumbleUpon.com

Tuesday, February 10, 2009

I am reposting an interesting article I found on LL. It echoes some of my sentiments about drafting systems, and the propensity for bespoke cutters to be slightly "loose" in their cutting, leaving a lot to be adjusted during fittings and by the tailor. Though RTW and MTM is often maligned on the fora, the patterns and cutting systems have to be perfected to a great degree since there is very little basting and adjusting being done. A sleeve pattern must be so perfect that the sewer merely matches notches and sews, and can do about 20 pairs in a hour. My work in RTW has positively influenced my cutting for bespoke for this very reason.

But let me be clear here. It is not any cutter's fault that his system may be loose or imprecise. The author is partly correct in that many who do have knowledge of better cutting systems do not share that knowledge, largely because it was hard-earned. We all learned cutting from one system or another, and these systems were imprecise. They mostly date to a time when production standards were different. In a factory, I have the opportunity to observe my patterns being made up thousands of times in different cloths- I can make observations and generalizations that a bespoke cutter can not. I also found that the cutting systems we were all taught were not perfect; in RTW when we do a draft it was common to make several samples, fitting each one several times, before something satisfactory was achieved. Sleeves were probably the worst. So I started to reverse-engineer the results of my testing and fitting and came up with much more precise ways of drafting which eliminate the need for a lot of these fittings and trial samples. This is an advantage that I may have had over the cutter who only cuts a few garments per week. Many of the old-timers like to say that they stick with what they know and don't bother with fads. that's fine. They like to think their systems work so why change them? That's fine too. But I counter by saying that technology evolves, things improve. Why not keep up, if it offers a competitive advantage?

This article could have been written today, but I was surprised to learn that it dates from 1932.

Interesting

cutter

StumbleUpon.com