Showing posts with label pockets. Show all posts

Tuesday, March 5, 2013

On gaping pockets

Gaping pockets are a common affliction on plain-front trousers, and are almost always caused by tightness in the hips- the tightness causes the pocket to pull open and form what some say look like dog's ears on the side of your hips. Never an attractive feature.

When selecting a coat size, we advise to fit the shoulders first, then worry about the rest; when fitting trousers, it is best to find a size that fits correctly in the seat and adjust the waist to suit. This is one of the reasons. There is a possible fix, however.

Tightness in the front of the thigh is often a cause of this and can be remedied by dismantling the waistband and working about 3/8" of fullness across the front of the trouser, taken from the outlet at center back, shifting everything forward. An extra dart above the back pocket (there is usually only one) is helpful for prominent seats (but difficult to add to a finished garment), and a dart in the front helps with very muscular thighs.

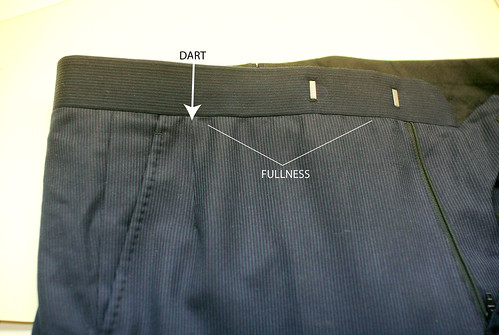
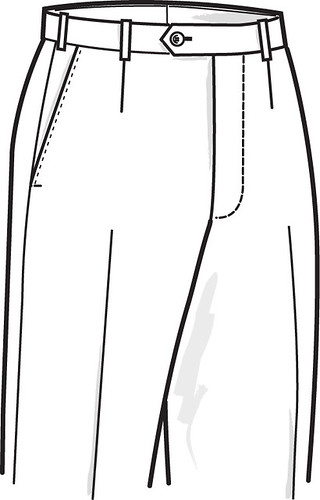
We don't often see this front dart on ready-to-wear, and when we do, it is usually in the wrong place. The most aesthetically pleasing spot for this dart would be right under the belt loop where the crease would intersect the waistband were we to extend the crease all the way up the front, as illustrated.

749


Anatomically, however, this placement is incorrect. The hip is somewhat hollow at that point, and the fullest part is toward the side. By placing the dart next to the offending pocket we can add some extra room for the thigh and correct the problem.

The fullness and extra dart can be seen on this outstanding trouser, part of a suit made by Leonard Logsdail for an evidently athletic client who donated it to this blog. You can see the proper dart placement (some prefer to approximate the angle of the pocket for aesthetic reasons) as well as the slight puckering along the waistband where the fullness has been worked in. Bespoke tailors will be aware of this but some alterations tailors may not so if you are a former (or current) hockey player who has trouble with trouser fit, you may want to bring this up with your alterations person.

Web

StumbleUpon.com

Friday, December 18, 2009

Huntsman, Ripped and smoothed, part two

Since my last post, a reader emailed me to tell me that the initials of the cutter would be found on the label, those initials being "TH". I assume this must mean Terry Haste, former MD of Huntsman, but was he there in 2000? I'll have to go back and read the book again. Or do some more homework. But in any case, we're not evaluating the cutting here, only the sewing. It's just fun to know a bit about the suit.

Another thing I have been thinking about; there was a mass exodus from Huntsman during that period so anything not quite up to par may be a result of them losing their best people. Or it may not. More to think about. Meanwhile, let's get ripping.

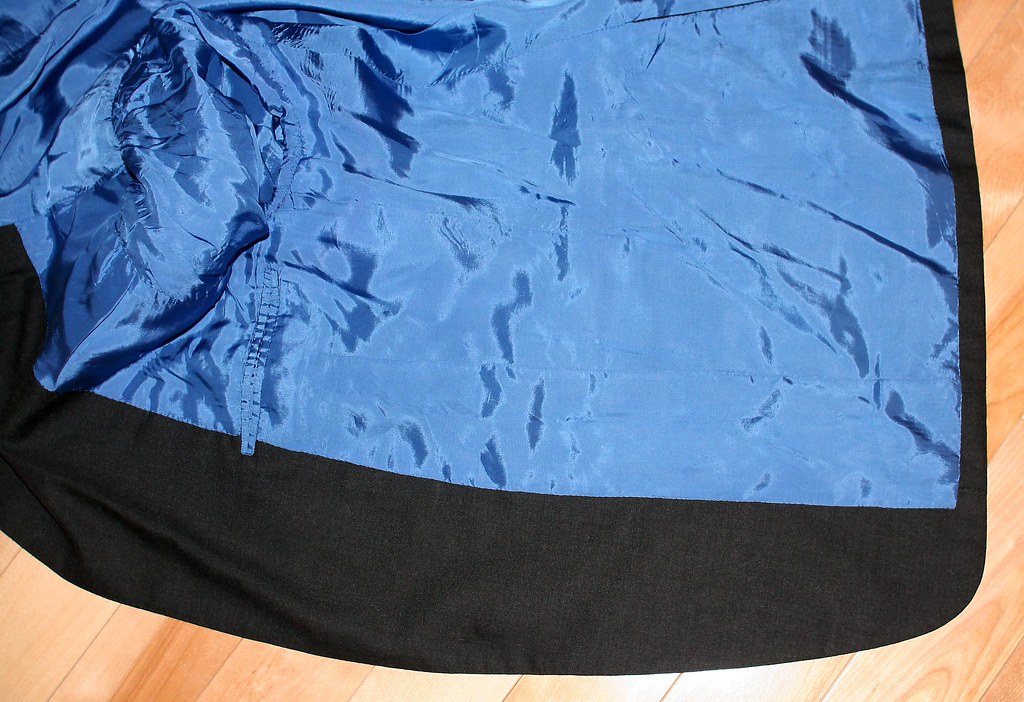
The finishing inside is quite neat; the felling is so neatly done that you have to look close to see it in spots. There is no pleat in the bottom of the lining and to tell the truth, I'm not sure one is really needed, looking at this suit. Hmm.

Inside1

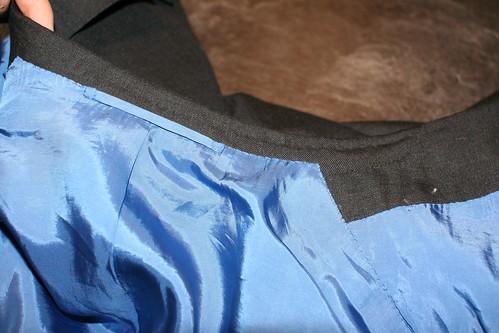
The neck is neatly done as well. The facing/collar seam has actually been opened and drawn on the whole way, rather than clipping and working the facing over the top collar around the neck which creates some bulk. Extra work, but I like it and will use it.

collar

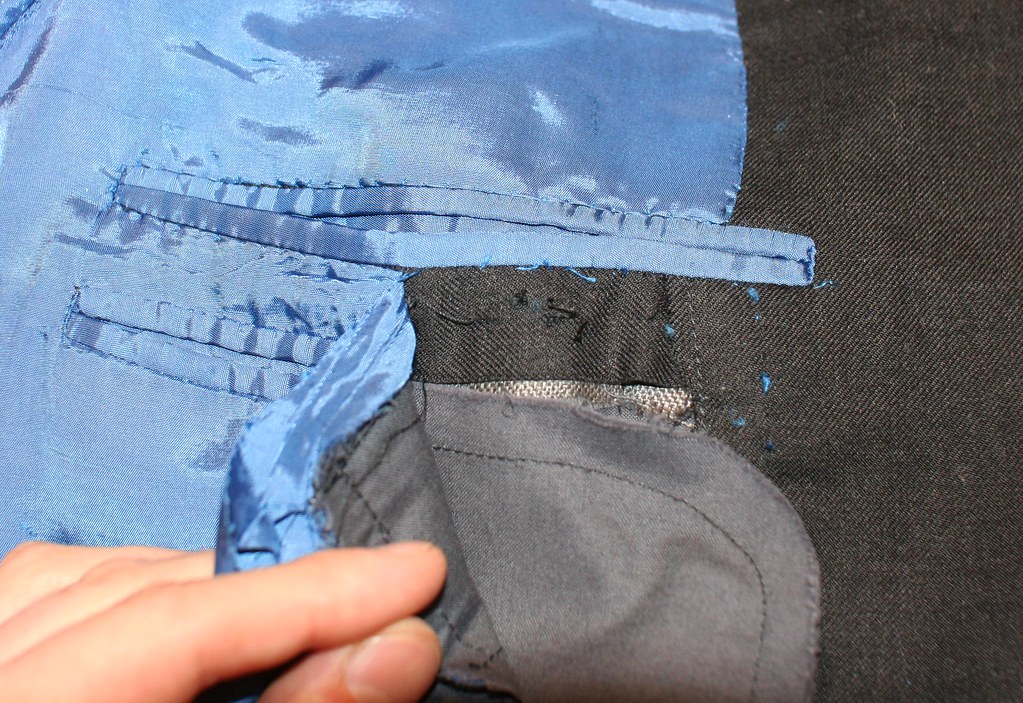
Two pockets on the left, one on the right, neither with any kind of closure.

pockets2

While I was surfing Ebay listings I found the pockets odd, as they seemed to have been worked onto the lining, the way manufactured suits are done, and like this one-

IMG 063

I prefer to set the pockets onto a cloth facing which will carry the weight better. It also makes relining much easier- if the pocket has been cut through the lining and goes onto the facing, as in the picture, it's a bit of a beast to reline neatly since you have to work the new pocket exactly over the hole in the facing- margins of error no more than 1/32" or so. Not a job for your average alterations tailor. Well, I should have known better. I didn't notice that the lining was a bit crooked at the pocket- this would have given it away. The pocket is not actually worked through the lining (though the smaller one just below it is)- the pocket is worked through a cloth facing and the lining is felled to conceal the work. It is common for most Italian tailors to leave this facing exposed in a bit of a decorative manner, like in this shot from a Zegna Couture coat (notice also the hand-felled lining with a backstitch instead of a felling stitch- we also saw this on the Brioni dinner jacket I dissected)
Photobucket

but Huntsman has chosen to conceal it entirely; naturally, it has all been done by hand.

pockets peel


pocket open

Now on to some of what gives the suit its shape.

The bridle has been taped with lining instead of the cotton tape which is more common, and the lapel has been sparingly pad stitched. Remember that a lot of the stitching poked through- it is probable that the padding was done by an apprentice. I personally feel that denser pad stitching on the lapel will give a richer roll, and the results that I get would seem to support that theory, but I haven't properly tested it yet so I can't state it as fact, only as received wisdom. Which can sometimes be false. The undercollar (not shown) has been padded by hand, something that I HAVE tested extensively and found that it is not necessary to do by hand- the machine does just as adequate a job, in my opinion.

bridle

The canvas front is a lovely, dense hair canvas which has not been singed. I need to find out where this canvas comes from. Huntsman has a reputation for being a firm coat so I expected to find more in the chest. Instead, there is only one piece of haircloth, on a partial bias, and a rather thick piece of chest felt.

canvas

The direction of the hairline is surprising since this won't support the upper shoulder as well and there is no additional shoulder support piece.

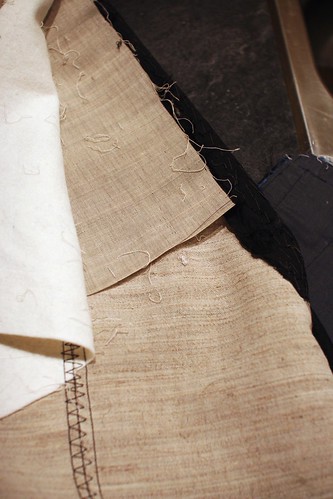
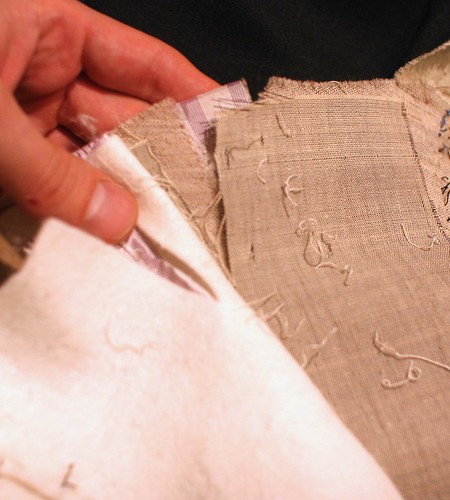
The "vees" or shoulder cuts are left open rather than being fixed. I'm not sure how I feel about this yet. Readers who survived my pagoda shoulders will remember that these vees are opened and fixed in place to provide the shape to the shoulder and without them being fixed in place they can shift around so the shoulder shape will not be constant. This could possibly be a good thing since there is perhaps more movement allowed, but I think this would be very dangerous in lighter cloth- the hollow created by the open vees would make a very visible dent in the shoulder which would be very obvious in light cloth- the only thing covering them is the piece of striped lining on the top and bottom. I need to think about this for a while.

vees

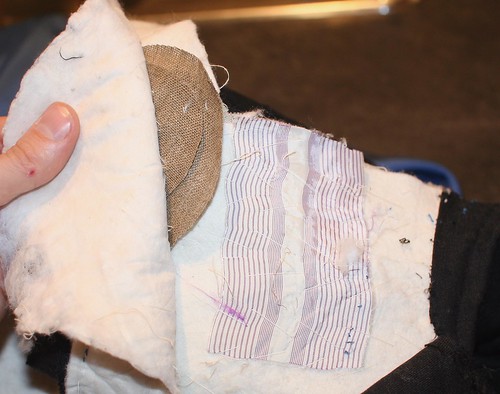
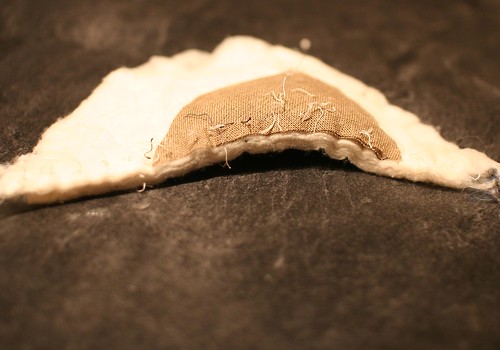
There is a moderate amount of wadding in the shoulder and two small pieces of collar linen. This is certainly a lot less than either Oxxford or Brioni put in their shoulders, again a surprise, since I expected a firmer shoulder from Huntsman.

shoulder

Here is the pad removed

pad

In the sleeve head, FOUR layers of heavy felt. This is a lot, even for me who likes a good, healthy rope. The effect is not bad, but its a bit chunky and lumpy since it's put in straight rather than shaped, which is now the norm (sometimes tradition should give way to innovation).
sleeve head

The back of the scye (as well as the underarm) has been padded with cotton and chest felt. This was common in the days of body coats (Sator will love it) but I haven't seen much of it lately; I'm not sure if this is common practice for them or if this gentleman had very hunched shoulders which needed some help. Judging by the, um, proportions of the suit, I am guessing the latter.

scyepad

EDIT
I went plowing along without mentioning that the shoulder seam was sewn by hand and that the sleeve has been sewn in by hand. More on that later.


So far so good, the only major surprises being how LITTLE stuff there was inside. I was expecting much more. As some of my other garments begin to arrive, we'll have a better basis of comparison, though. Need to find an A&S......... But before that, the trousers, which seem to have changed little in the last 100 years.

StumbleUpon.com

Friday, September 12, 2008

Pockets, part two

Like so many parts of the garment, pockets seem like simple, insignificant little things but in reality are quite complex and pose certain challengers to cutter and tailor alike.

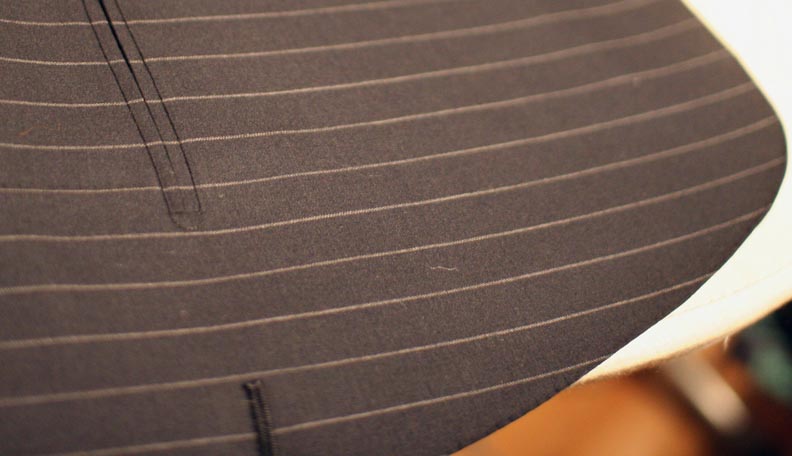
One of the first considerations is whether there are stripes or checks to be matched. If you look at most RTW, and even some bespoke garments, the lines of a pocket flap will match the jacket nicely below the flap, but seldom above the flap. The jets (the thin welts above and below the flap) never match on RTW but on many bespoke garments, will match nicely as in the photo below.
pocket matching
The former is due to the way the jacket front is cut- the dart is cut in such a manner as to allow a little extra length over the abdomen area, and helps keep the lower front from kicking out. It is also easier to manufacture in this way. In this photo, however, you will notice that the check matches above as well as below the flap- this is a particularly large check so I decided to cut the front differently to allow the check to continue undisturbed. I could also have cut the side body in one part with the front, thus allowing the flap to match all the way (notice that it no longer matches the side body), but I like a very trim garment and the fit is much better with a separate side body. Notice also that the jet matches the flap and the front, in fact, it is difficult to spot because a) it is matched and b) it was made by hand.
pockets 006a

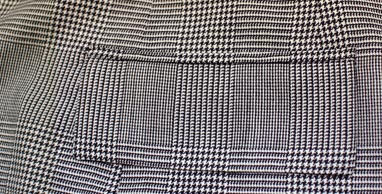
The next consideration is the ticket pocket, if one chooses to include one. Notice on my light grey jacket that I have chosen to line up the ticket pocket with the lower pocket. This cloth is plain so I was able to do this pleasingly. Looking back at the checked jacked above, you will notice that the check distorst above the pocket due to the dart. If I were to line up the ticket pocket with the lower pocket, it would match for 1/2" only. Some choose to place the pocket there anyway, others move it back behind the dart- this was the checks will match much better. We see this done both ways and I don't think there is a definitive answer to the question- which is better?

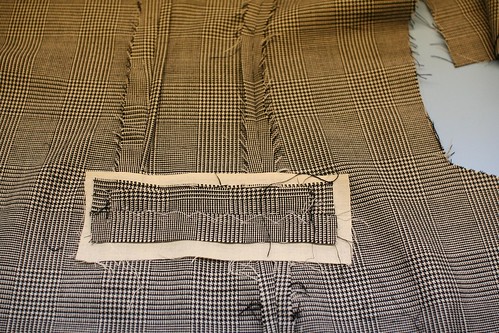
The underside, before attaching the pocket bag.
pockets 002a

Once decisions about how the pocket will be matched to the front have been the, the jacket can be cut. In modern factories the flaps are made with jigs- special templates in the shape shape of the flap, placed on the sewing machine, a button is pressed, and the machine sews and trims the flap in one step. The flap is turned and pressed, again on a template in the form of the flap, in order to get a correct and consistent shape. Then things get complex. Machines now exist onto which the operator places a rectangle of fabric, a pellon stay, then the flap, then the pocket bag. Guided by a laser on the machine, the operator is able to place the jacket in such a way as that flap will match the front with no extra effort on their part. The machine then folds the rectangle of fabric to for the two jets, sets the flap and pocket bag, sews all together, then cuts the pocket, all in one step which takes only a few seconds. This is the result (the ticket pocket is done in another step);

pocketa

The pocket is turned and the bag is tacked to the top, it is pressed, and that is it. In all, a few minutes. The jets, however, can't be matched in this way so no attempt is made; in fact, the rectangle is cut on the length of the cloth instead of the width so the stripe will run the length of the jet.

Let's now consider the hand-made method. Two rectangles of fabric are sewn by plain machine to the front in a very slight curve; they are then pressed, cut, the seams opened, basted in place, the rectangles are turned over the open seam, basted, then a prick stitch is sewn in the seam to close the jets. Done in this way, the checks or stripes can be matched- in the photo above, if it weren't for the very slight bowing of the pocket, the jet would be virtually invisible.
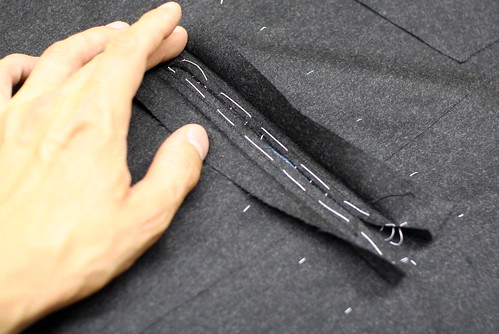
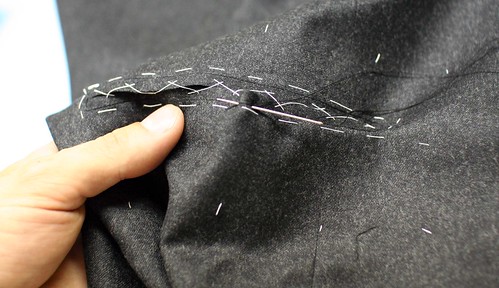
IMG 002a

IMG 019a

A little half-moon is often sewn by hand at the ends of the jets to tack them in place. This can also be done my automatic machine, but it is much nicer looking when done (properly) by hand;
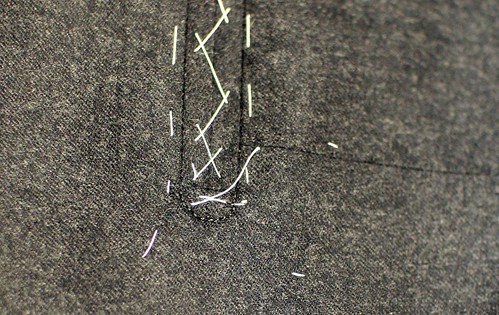
IMG 036a

The whole process takes me about an hour for a pair of pockets, and requires a lot of care and patience. In fact, most tailors, including those on the Row, send their work out to pocket makers who specialise in this, since it is such a finnicky job. The result is a much softer, finer, flatter pocket with a much more discreet profile.
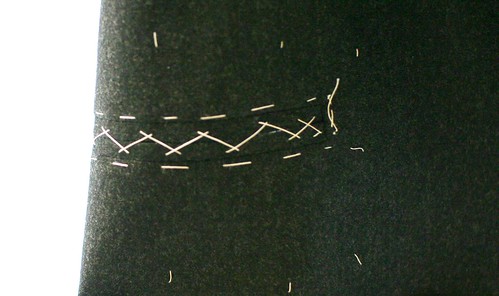
IMG 018a

Compare this to a pocket on a RTW garment.

IMG 001

There is, of course, another way of making the jetted pocket without an automatic machine, but in a way which resembles it. This method is quick and easy and I use it to make the breast pockets on my lining, and may occasionally make the outer pockets this way if I am pressed for time. The pocket placement is marked with chalk, placed on the machine, I fold the jets by hand, and using the presser foot as a guide for the width, sew the jets through by machine. This method takes me about ten minutes to make a pair of pockets as opposed to the hour or so for the other method.
IMG 063

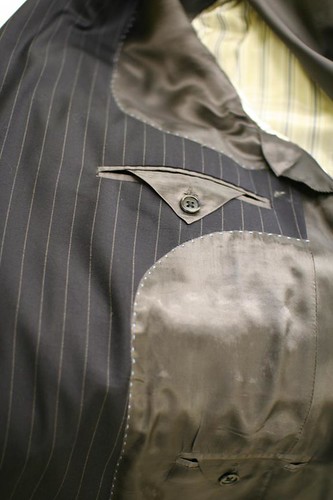
Notice how the pocket extends over the seam and onto the facing. That will allow me to tack the pocket bag invisibly onto the facing so it wont' shift, which will also later be tacked to the canvas, so all layers will move together. Some jackets have
what we call a french facing- rather than the straight seam as I have cut, the cloth will extend a little, and the pocket will be made on the cloth. There are many variations, but here is one;
pockets 012a
The reason I mention it is this- if you ever have to get your jacket relined, it is a much simpler operation if the pocket is made on a french facing. If the pocket extends beyound the seam like in the photo with the striped jets above, the facing will be cut in a Y shape where the pocket once was when I have removed the lining. Some tailors will just advance the seam 5/8" to cover it, but it is preferable not to. A small piece of fusible is placed behind the cut, the edges are very carefully aligned, and fused. When I have replaced the lining I will have to make a new pocket EXACTLY where the old one was, which is a job demanding great precision. Early in my career it was my job to do this sort of alteration in a factory, so from an alterations perspective, I MUCH prefer a french facing. However, I don't personally like the bulk of it which is why, for my own suits, I cut a straight facing.

So which method of pocket construction is better- by hand or machine? The hand-made pocket is certainly more attractive, softer, more discreet. The machine-made pocket is probably a lot stronger, but if you're not shoving heavy stuff in your pockets that probably doesn't matter. In this case, in my opinion, the difference is really only aesthetic.

StumbleUpon.com

Wednesday, September 10, 2008

Pockets, part one: the Breast Pocket


Also known as the taschino (little pocket), the barchetta (little boat), a hand-made breast pocket is easy to spot.


The first giveaway is the presence of a micro zig-zag stitch or straight stitch along the edge of the welt- this has been done by machine. A hand-felled pocket will have no visible stitching along the edge, and may have a row of pick-stitching about 1/4" from the side. The second, more subtle clue is that automatic machines can only sew the welt on in a straight line- many tailors will give a very subtle curve to the seam of the pocket- this is supposed to more gracefully follow the curve of the chest but also help prevent the pocket gaping open.


The hand-made pocket is clearly more attractive as there is no visible machine stitching, but other than aesthetics, can it be considered superior? You are not likely to stress this pocket so the delicate hand work is in no trouble of coming apart. There is no performance benefit either way- it is just more appealing when done by hand.

StumbleUpon.com