So here is some of the progress so far.
As promised, I pulled the pad stitching from half the collar and redid that half by hand; the stand is pretty heavily padded, the fall is more lightly padded and the ends were curled under as I worked to keep the corners tight to the chest. After breaking the collar, there is no noticeable difference in shaping or shape retention, though that may change, particularly after it's been worn so we'll have to keep checking back on this one. The side which looks bare is the one done by machine- it is done with a fine, clear monofilament thread which is nearly invisible.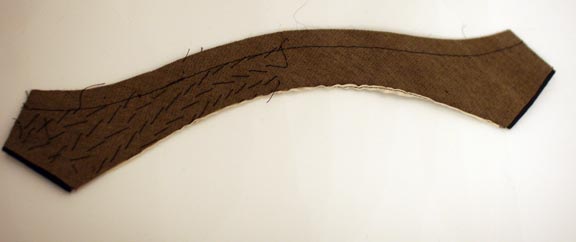
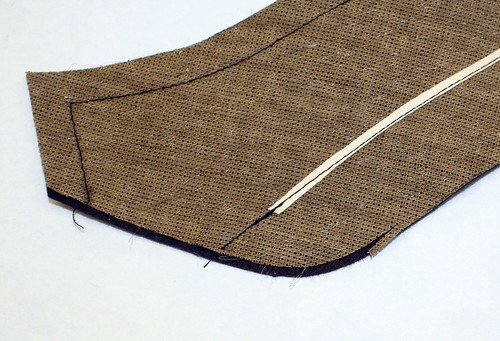
Going back to the business of felling, here you see that the facing seam has been sewn to the canvas; this can also be done by blindstitch machine. As we work across the garment we are sewing everything together, in place, so that nothing moves once it's been (shudder) steamed or had its first chemical bath at the dry cleaners. On more economical garments, this seam may be glued in place, which will come apart after a few cleanings; some garments whose lining has been "bagged" will not be tacked at all.
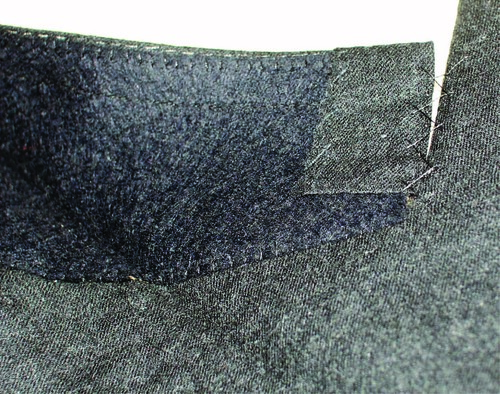
I talked about Chris Despos' method of balancing the patterns on the back; this is the result for this check. Normally when I draft the back, the result would have the lines evenly balanced (mirrored) at the neck so that the collar matches but very close together at the hem. Chris' idea is to balance the pattern at the hem, as shown- this requires more shaping with the iron to get a good shape to the back, but I like the result shown below. I recently worked with a navy cloth with a very bold white windowpane; it would have been much nicer done with this method. My one snag is that I like to be able to keep a person's pattern on file once a garment is finished so that there is less fitting the next time I cut a garment; with this method a new back must be drafted for every cloth if it is a stripe or a check, requiring different amounts of shaping and fitting. One of those techniques I'll keep tucked up my sleeve for when I have very distinct fabric designs.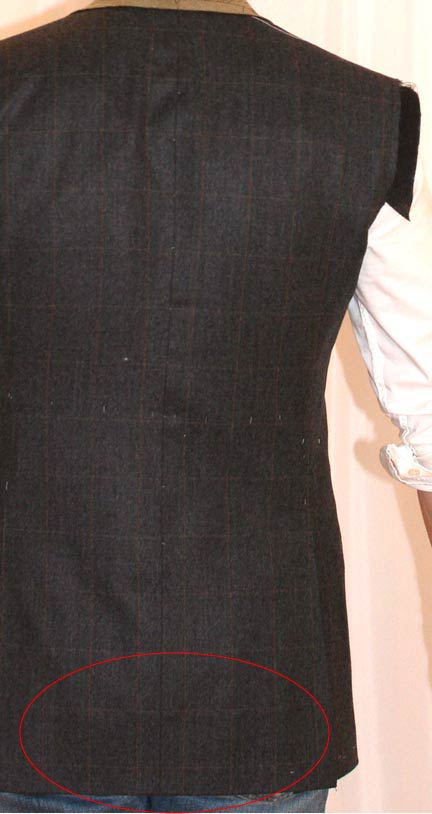
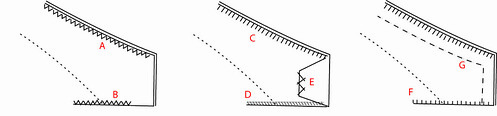
To further drive points about felling and steaming home, let's consider this side vent (look closely, it's there); the back hem is folded up and the back underlay is folded under- the side body seam allowance is folded back and the hem is folded up. This is a lot of folding- eight layers of cloth, not to mention the lining. A lot of stuff to fall out of shape as a result of humidity and cleaning, which is why we fell everything in place, so it keeps this nice flat appearance. But let's consider that many manufactured garments are not felled so that the lining can be bagged; let's also consider what happens to a pant crease when it is steamed- it relaxes unfolds itself. So someone who takes their jiffy steamer to the back to get rid of wrinkles is also relaxing those 4 creases used to create the vent and since they are not felled in place they just open up. I can guarantee you that the vent will not sit flat any more.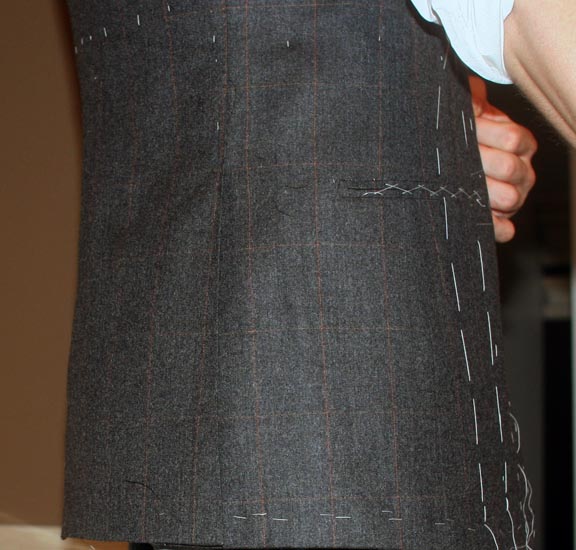
The most intriguing for last.
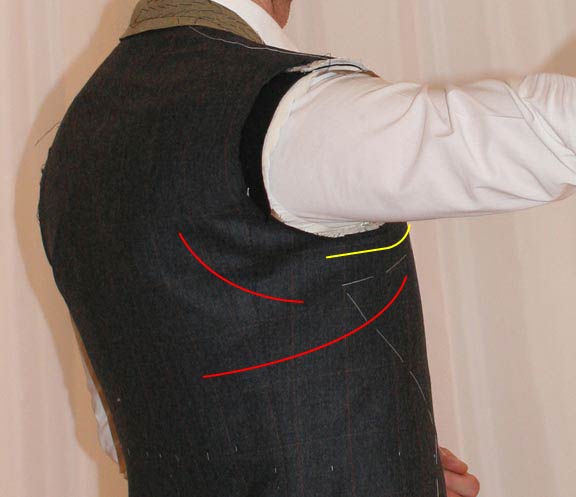
The proponents of hand sewing the sleeve talk about elasticity and looking at the chain stitch versus tape in the armhole looked promising in this regard so I decided to observe what areas of the garment come under the most strain during movement and was surprised at what I saw. When we reach forward we feel the back of the armhole straining; this area is mostly bias and so I figured if the chain stitch and hand sewing could provide support and elasticity it would be far superior to a lock stitch. But what I saw (and is difficult to see in the photograph) is that the back armhole was not even touching my body at all; the forward motion of the arm was dragging on the front of the armhole, causing the area shown in yellow to pull, and that the garment was pulling on my blades but mostly along the latissimus dorsi. The bias area received no tension at all, and the area under strain is on the straight grain so there would be not much give at all. The front of the armhole and a large part of the underarm are tacked into the canvas which negates any benefit of elasticity so I am starting to have big doubts about this. I also wonder if those who equate hand-sewn seams with elasticity consider that bathing suits and T shirts are sewn by machine and yet are elastic so if elasticity is really so key then surely a machine dedicated to those operations requiring it would have been invented. There are still enough big guns who advocate hand-sewn sleeves so I am still not ruling it out but it's starting to look like marketing hype to me.