Showing posts with label ironwork. Show all posts

Wednesday, January 15, 2014

Shaping the underarm

I was discussing techniques with a tailor by email and was having trouble describing something so I thought "blog post".

We typically find two types of tailored sleeve in men's suiting- English tailors often cut what is known as a 50-50 sleeve, whose under sleeve is roughly the same width as the top sleeve. More common today is a sleeve with what is known as a "false forearm" because the forearm seam is offset from the from of the sleeve by around an inch in order to conceal it. The offsetting of this seam can cause a kink near the elbow if the sleeve is not shaped properly. The under sleeve is cut roughly 1/4" longer than the top sleeve along the forearm seam; some tailors work this fullness in and shrink it out when pressing the forearm seam. I have a different take on this.

Notice the concave shape of the forearm seam when the sleeve is flat.


Now when I turn the seam back to replicate the offset of the seam in the finished sleeve, notice that the front of the sleeve is straight and the seam is now convex, rather than concave- this is what can cause the break in the sleeve.


To counter this, instead of shrinking out the fullness on the under sleeve, I stretch the top sleeve using a steam iron or by moistening the cloth to within 1 1/2" of the cut edge, pulling on the cloth as I hold the sleeve as shown (this can also be done after the seam is sewn, when opening the seam).


Notice how the edge of the sleeve ripples because of the stretching. The top sleeve seam is now 1/4" longer than it was, and even with the under sleeve seam.


And now when I fold back the front of the sleeve, the fold is now nicely curved and the seam is now the proper, concave shape.

StumbleUpon.com

Thursday, February 24, 2011

IRONWORK, or Why I Hate Steamers

I've ranted a few times about the many reasons I dislike the use of steamers on tailored clothing, but one of the reasons which I failed to fully explain was ironwork. Tailors use heat and steam to transform a flat piece of cloth into a 3-dimensional shape, only some of which occurs due to seams and darts, the rest is worked up with the iron (thus, ironwork).

Here's a look at what goes into the jacket before a single stitch is sewn; the trousers get worked up as well, which I alluded to in a previous post somewhere. The pages are nicked from an old textbook entitled (somewhat pompously) Il Sarto Architetto (The Tailor as Architect) and those who can't read Italian will still be able to get an idea of what's going on here. Namely, that a lot of shaping is being done which can be ruined with the aid of a jiffy steamer. You wouldn't notice anything jumping out at you, but the garment just wouldn't have the same shape or fit as before; very fitted or shapely (men's) garments are impossible to achieve without a good deal of this ironwork- something looser or more boxy will have less of it.

Cross-hatch lines indicate stretching and curved lines indicate shrinking.

IRONWORK1

IRONWORK2
IRONWORK3
IRONWORK4
IRONWORK5
IRONWORK6
IRONWORK7
IRONWORK8
IRONWORK9
IRONWORK10

StumbleUpon.com

Tuesday, September 8, 2009

The trouser- fitting & completion

If you're just joining us, back up one post first. We were discussing the ironwork involved in making trousers.

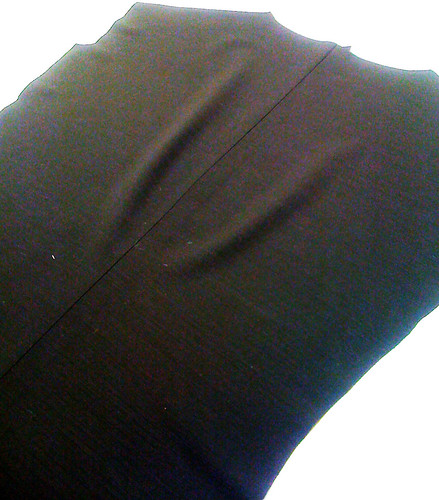
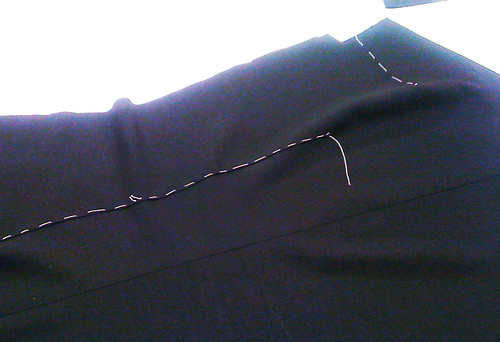
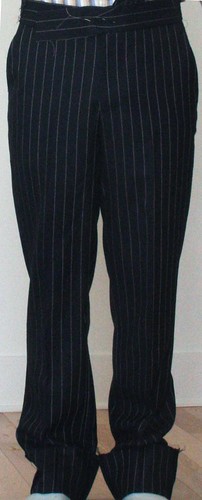
David asked what the difference would be between a trousers done with this ironwork and one done without. So the first fitting I sewed the seams straight with no manipulation, no fullness, no stretching, no shrinking, and the result was this. Not a very nice line. The hem is turned up at the bottom so it puddles around my ankles, but look more at how it hangs around my knees. Not clean

trouser fitting

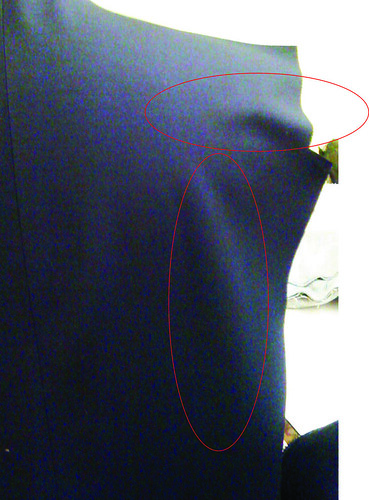
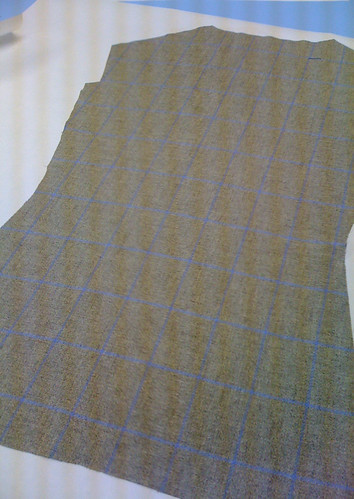
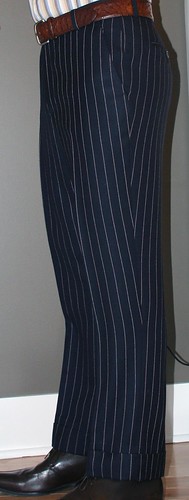
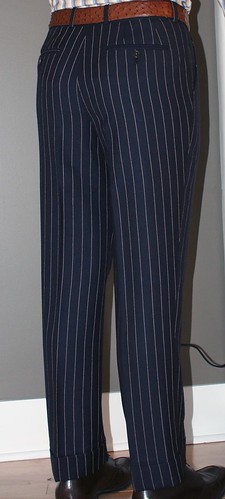
Then I ripped them down to show the ironwork in the previous post, and put them back together again. This is the result, which I much prefer.

trouser side front

Trouser rear

While David is right, some of the shaping will be lost with wear, but I can put it back with a careful pressing. Those who steam their pants are ruining all this shaping and will have pants that puddle around their legs; by pressing them with a good iron and observing the shape illustrated in the T&C thread you can have a marked improvement in the fit of the leg.


UPDATE

To answer a few questions, the first thing that will help getting a better press on your trousers is a wider ironing board; normal household ironing boards are too narrow to fit the entire leg so you not only have a hard time visualizing the correct shape, but you also tend to do the front only and then shift the pant and then do the back (or vice versa) when you should really be doing the entire leg at once. The Rowenta board that I have at home (in the pictures) is great for this and has a much better pad than most domestic boards. I know that some department stores have followed their lead and started producing wider boards as well.

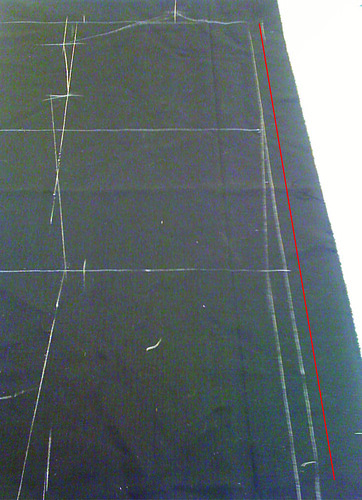
Next, some puddling around the legs can be from bad fit and can't be rectified by pressing; hip-forward posture or flat seats will cause cloth to puddle around the knees in a horse-shoe shape and no amount of pressing will fix that. But assuming you have a trouser that fits adequately, it also helps if the manufacturer has made provisions for this kind of shaping. As I mentioned, the knee notch is shifted so that when the seam is sewn the back thigh is sewn on tight to the front which has some fullness, and there is some fullness in the back calf area. This allows us to stretch the panel opposite the fullness, like when constructing the inseam of the two-piece sleeve, and work the trouser up when busting the seams (industry jargon for pressing the seams open). If this was not done (for expedience during production) you won't be able to get the full shape out of the trouser, but you will be able to help it a little. When pressing your trousers, always keep this shape in mind and your results will be much better.

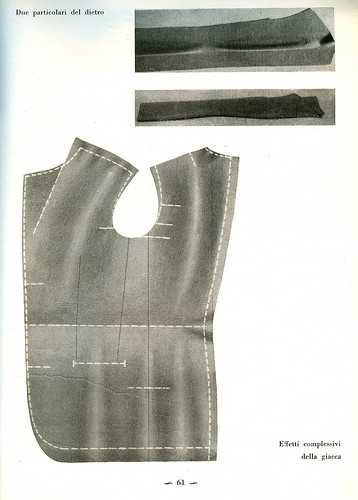
Like any part of any garment, it helps to visualize the shape of the body which is being covered. The trouser is not really two straight creases- the leg makes a bit of an "s" shape so we will recreate this shape in the pant. Whenever we want to create a curve in a garment without a seam, we have to stretch the outer arc and shrink the inner one, so if you are dealing with misfigures, keep the person's shape in mind when shaping the garment. Refer to the diagram below- stretch over the front of the thigh, stretch the seam into a forward curve, and shrink the excess under the back of the thigh. Do the opposite on the lower half, working the curve into the shape of the calf. Notice that the creases are not straight and that the hem of the trouser will dip lower in the back than the front.

If and when I can get my hand on a video camera I will post video of the process with and without a vacuum table (which is a godsend).

Trousers_dressurZSK002

StumbleUpon.com

Thursday, January 29, 2009

The one-piece back

We’ve been talking a lot about shaping and about the back, and recently voxsartoria posted some photos of some garments he’s having made with a one piece back; there have been a few questions about it so let’s look at the mechanics of the back of the jacket. Sorry about the crappy Iphone photos.

EDIT- dumb me is assuming everyone has seen vox's suits since he's posted them on every imaginable forum except the russian styleforum :) So you can see these suits here http://www.styleforum.net/showthread.php?t=99996

Traditional patternmaking rules dictate that a seam or a dart must pass over, or point to, the point of greatest fullness. On a lady’s front, this is the bust point. On the back, this is the shoulder blade. Tailors, however, do not like to follow rules; instead, we make up new ones.

The first new rule is that some of the shaping of the back will occur at center back, not at the level of the blades. Thus, the center back seam is not straight but shaped (usually). The red line shows that my first line in the draft is straight, but then the center back seam is shaped from the hem up to the blade area.

Print

This gives some room for the blades and some shape to the waist.

shaping back cb seam

But placed on a dummy, we can see that it is not quite sufficient to fit cleanly. Of course, I could just call this drape and have done with it. But some people prefer a cleaner looking garment so a little additional work is required.

Print

If we were to follow the rules of regular patternmaking, we would need to place a dart in the armhole to give length to the blade, and another dart at the waist to give the waist some shape. You will perhaps recognize the “princess” seam which was typical in tight-fitting dress coats taking form.

shaping back seams

If I place this fitted panel on the table you can see the large amount of shape given to the blades, and the ripple of length at the side seam which is a result of the dart.

shaping back table

We do not want this shoulder dart and would like to shift the waist dart off to the side, where it now exists in modern coats. It is not possible to do this using regular drafting and construction methods, which is where some of the tailor’s art comes to play. I will adjust my drafting to take into consideration the elimination of the shoulder dart and the displacement of the waist dart. I can also eliminate the center back seam. The back, when cut, now looks like this. Flat. Not so good. Yet.

shaping back flat

So I will start by stretching the blades, shrinking the armhole and center back, which will give this result.

shaping back blades

Then I stretch the side seam and shrink center back, which gives a ripple of length at the side. The result looks like the one pictured above, but minus all the seams.

shaping back waist

Placed on the tailor’s dummy, I have a back which is clean and shaped and well fitted. Two potential drawbacks are that injudicious use of steam can wreck what I have done, and that there is no inlay at center back to allow for future alterations, should they become necessary.

shaping back finished

This is a garment made by Edwin DeBoise of Steed Bespoke Tailors for one of his Boston clients who requested a one-piece back- note the amount of shape he was able to achieve (note also the drape near the armholes- this was intentional) and the spectacular sleeves. Edwin travels to various spots in the US and perhaps elsewhere- check his website or his blog for itinerary. The world needs more clothing like this.

Photobucket

StumbleUpon.com