
Shameless plug.
This month's issue of The Rake has an article I wrote on the "Boutonnière Milanaise", or the Asola Lucida.
Just a heads-up for those among us who can't get enough buttonhole porn.

Shameless plug.
This month's issue of The Rake has an article I wrote on the "Boutonnière Milanaise", or the Asola Lucida.
Just a heads-up for those among us who can't get enough buttonhole porn.
For Mike, who says he still doesn't get it.
I hope this helps.
(Sorry that the illustrations are rotated from the photos, but maybe this will actually help)
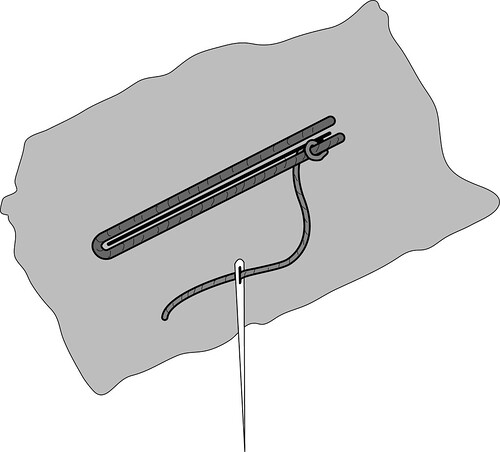
1.
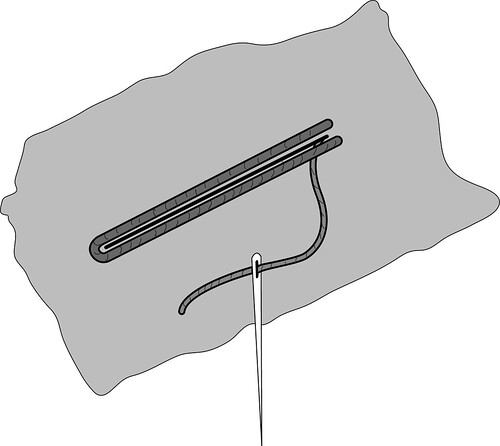
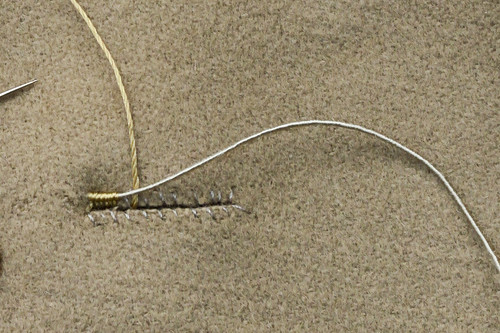
Cut through the cloth, overcast, and lay a length of gimp. Do not wax the silk twist. Unlike regular buttonholes which start from the top, the twist must be anchored on the bottom of the hole (on the wrong side).
Feed the needle through the slit, then underneath the gimp.
2.
Wrapping around the gimp, insert the needle underneath the gimp, about 1/16" away from the slit edge.

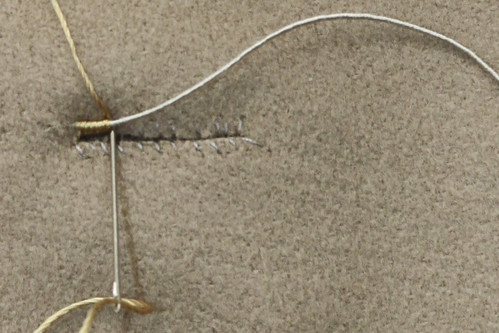
3. Pull tight.

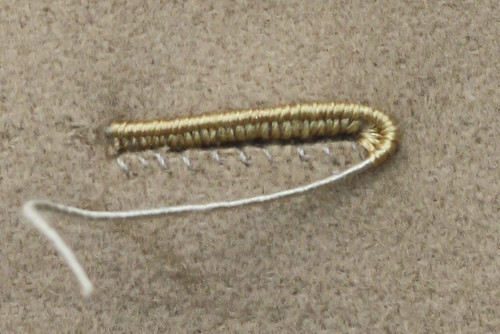
4. Repeat by feeding the needle up through the slit. When taking the next stitch, insert the needle exactly next to the previous stitch, and do not leave any space between the two. You may need to nudge the stitch with your thumb to pack them in tight.


So I had another little moment of insight. Or maybe my thickheadedness deserted me briefly.
I was contemplating my lapel buttonholes last week, the by now infamous asola lucida ones, that is, and finding them just too chunky, especially when compared to some nicer ones like the Tom Ford. The thread I am using is just too heavy.
To wit
Mine
And theirs
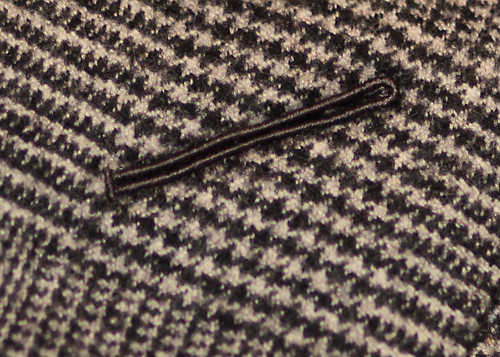
Silk buttonhole twist is only available in two sizes these days, the finest being size 40, which is the one I use. But still, it is not nearly as fine as the thread used on the nicest lapel buttonholes. So I was wondering where I could find both buttonhole twist and a much finer thread but offered in the very same colors, something I have never seen before. Then I had my little idea.
Buttonhole twist is 3-ply- that is to say, it has three yarns (rather than the typical two) twisted together to form the thread. If I were to strip the twist down, I would have three very fine threads to use, solving my problem. Of course, such a fine thread would require three times as much work to cover the same space- I think it was Francesco Smalto who said that 140 stitches are required to execute the asola lucida. Using a thread this fine, I believe him. Compounding the difficulty, a thread which has been stripped can be difficult to work with. It's just the sort of punishment I seem to enjoy inflicting upon myself in order to make a pretty buttonhole, and another detail over which to obsess for a while. So I started ripping apart the buttonholes on a few of my jackets, pulling apart silk twist, and reworking them over again.
Obsessive Buttonhole Disorder. I wonder if they make a pill for that...
I think the Asolsa Lucida, or glossy buttonhole (the example above being from a Tom Ford garment), originated in the Abruzzi region of Italy as it is most commonly seen on garments made in this area. It is also very common in Paris, where it is known as the boutonnière Milanaise, though likely for the brand of gimp that was commonly used and not the city; it is worth noting that most of the grand tailoring houses of Paris also trace their lineage back to Italy. The gimp itself, which is a key element of the buttonhole, I believe is now only available from Guterman and is known as Agreman; I will be in Italy in June and will dig around to see if there are any other manufacturers still producing the stuff and will report back if I find any (and if anybody else will be at Pitti and feels like meeting up for a drink, drop me a line).
A while back, Matthew was kind enough to share a method he learned at Cifonelli for making these buttonholes, his with a purl underneath the gimp. The ones made by what I shall call the Abruzzi method, for want of a better term, do not have this purl under the gimp and the stitch is made differently- I will attempt to explain it now that I have figured it out.
In addition to the previously mentioned gimp (and do not be tempted to use what most other companies sell as gimp but is really intended for machine-made buttonholes) you will need some fine silk twist- to get a really smooth, glossy finish, a thread finer than the 40 size typically used now, and much finer than the U size that some still use, is needed, and unlike ordinary buttonholes, the twist should not be waxed.
Because this buttonholes is more fragile than the regular knotted one, it is typically only seen on the lapel, not on the lower buttonholes.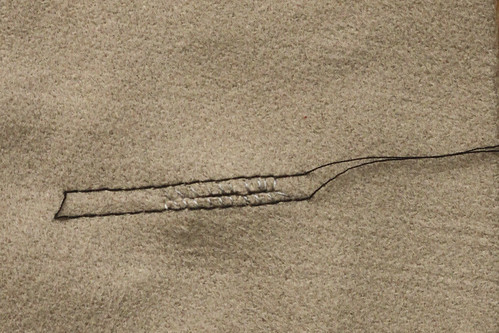
I start by running two rows of machine stitching to hold everything in place while I overcast the edges- it might also be a good idea to stitch even closer to the cut line than I have done and instead of ripping them after overcasting, just work the buttonhole over the stitching. A very narrow bite is required and this helps keep things from shifting, but also means that cloth that frays very easily is unsuitable.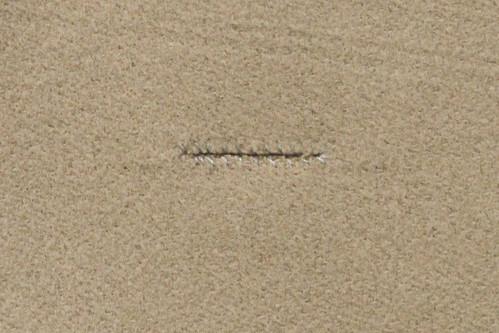
The mechanics of the stitch are actually quite simple but may take some getting used to if you have done lots of traditional buttonholes.
Working from the underside, pass the needle up through the hole- I find it easiest to poke the eye end through to avoid catching anything with the sharp end. I come up through the hole and then work the twist under the gimp, but for the sake of clarity I have shown the needle passing directly under the gimp. Do whatever is easiest for you.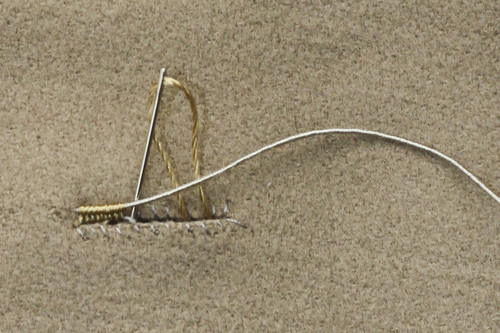
Come up and over the gimp, then insert the needle a millimeter from the edge- tight, close stitching is the key to a smooth appearance. You want the gimp to sit right on top of the stitch to conceal it, and by tightly spacing the stitches you will completely encase the gimp.
I've pushed everything to one side so you can get an idea of how the stitches are forming.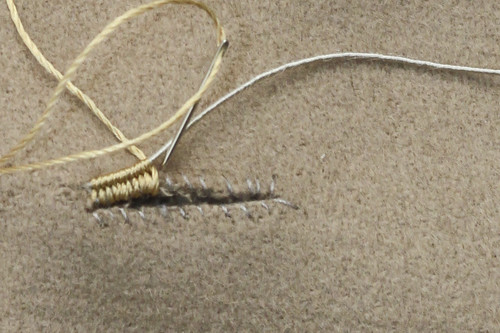
Pinch the gimp before working around the end of it the continue down the other side.
The completed buttonhole. You can see some of the stitches poking through beyond the gimp where my bite was a little too wide- I need to practice some more (and really have to think more seriously about a macro lens...)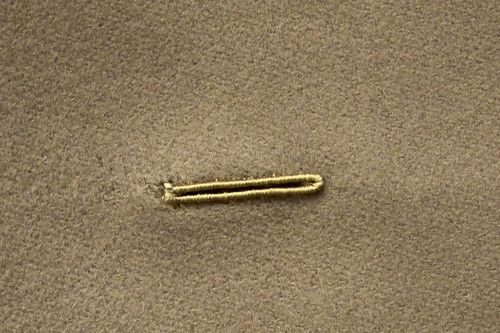
And thanks again to Matthew and Franca for inspiring this post.
EDIT- In response to a question, I made a few phone calls. In the U.S. Agreman gimp can be bought from B. Black and Sons (1-800-433-1546), Oshman Brothers (1-212-226-7448) and Ely Yawitz (1-800-325-7915) It is not listed on their websites so you have to call and ask for it.
In the U.K. it can be bought from Richard James Weldon 44 208 300 7878. I know there is at least one store in Paris which stocks it (ask for milanaise), though the name of it now escapes me. It is also available all over Italy (ask for vergolina).

 Posts
All Comments
Posts
All Comments





