Showing posts with label lapels. Show all posts

Monday, September 28, 2009

Brioni vs. Samuelsohn- the hand-sewn lapel

Going back a bit again to the Brioni coat. This blogger may need Ritalin.
gorge

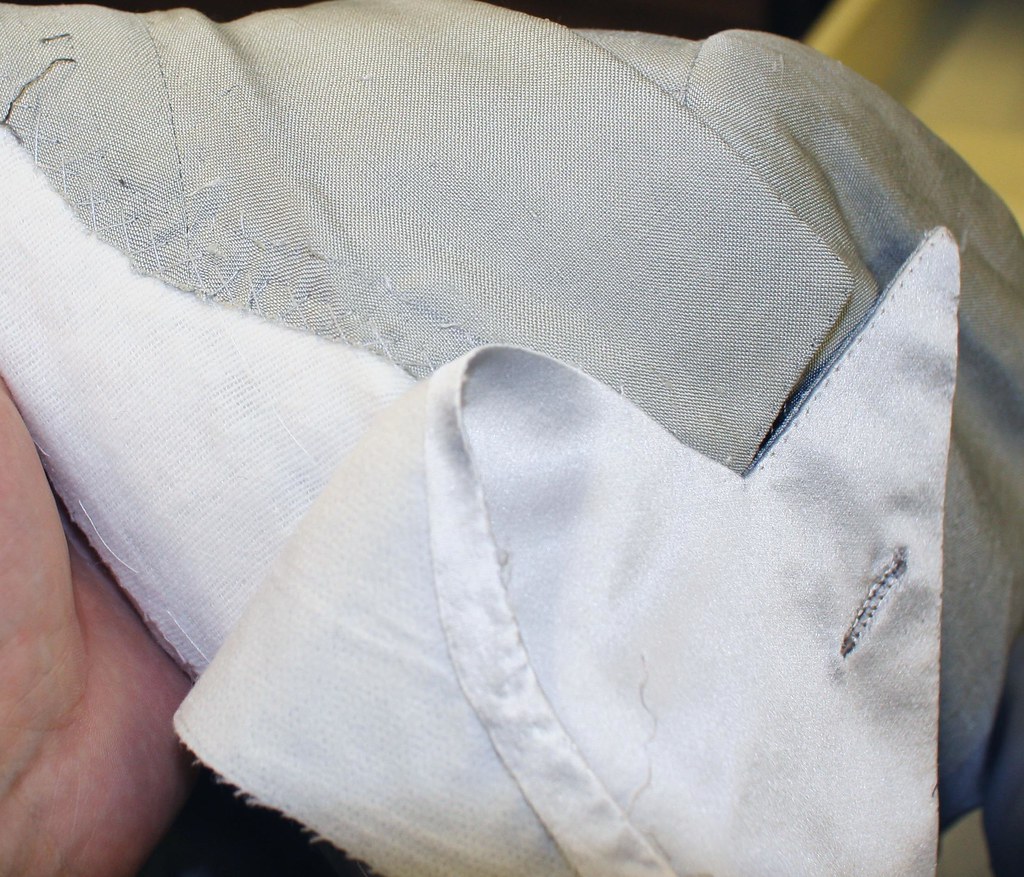
A curiosity here- the top collar is cross-stitched to the lapel by hand. What is a bit curious is that normally the top collar goes on AFTER the facing, but in this case it is clearly put on first. The facing must then be drawn on by hand. Which is curious in a factory setting. You may also notice that I have unpicked the lapel buttonhole to examine it more closely. This one needs some more research as to how they did it- I have seen this "upside-down" lapel buttonhole on some Zegna Couture, some Tom Ford, and some Neapolitan garments- the purl is much smaller and underneath the lapel making a very smooth, shiny buttonhole as though it had been done with a satin stitch and not a buttonhole stitch; the right gimp is crucial to this, I think. But back to the lapel sewing.

In a bespoke atelier where the shape of the lapel and position of the gorge may change during fittings, it is common to shape the lapel during the fitting, baste the seam allowances in place to check the result, and then fell them permanently to the canvas. The facing is then shaped with the iron, then basted on to the lapel, and slip-stitched in place. This is what we mean by hand-drawn; the gorge seam and the long lapel seam is sewn by hand. Here is an image from Sciamat's blog showing the process of sewing on the facing by hand.
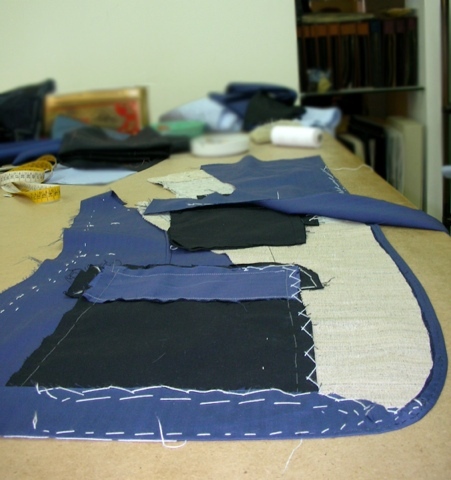
drawn on

In heavier cloth this is fine but lighter cloth will never be quite as crisp as a machine-sewn edge. The other disadvantage is that only the jacket seam allowance is felled- the facing seam allowance is free; when machining the edge, both seam allowances can be felled to the canvas making for a crisper, flatter edge. Regardless, even Oxxford, who prides themselves on doing absolutely everything by hand, sew the facing on by machine (at least on the garment I looked at) In a factory setting where the shape of the lapel is pre-determined I don't see any reason at all to sew this seam by hand- in fact, I think it is one of the few spots where machines give better results. But apparently Brioni has a reason to do otherwise.

I suspect it has to do with the silk facing and the fact that it may be very fragile; I will have to check but I would be surprised to learn they do all their production this way. I certainly would have noticed the ridge formed when doing the collar first, as they have here, so I am fairly confident that this is exclusive to their dinner jackets. What is also a little odd is that this sequence makes it impossible to finish the facing and linings flat; normally I like to have the side seams joined, then work the facings and linings on to the jacket flat on a table (where I will have more control, and as Sciamat are doing in the photo above) before joining the shoulder seam. Then the under collar is affixed, then the sleeves set, then the top collar, then the lining finishing.

The sequence here is a little different- first, the lapel is pad-stitched, then the edges are trimmed and turned then felled in place, then the flannel is applied to the lapel and then the side and shoulder seams joined; the collar can then be applied, both the undercollar and the top collar. Perhaps they then set the sleeves and finish by working on the facing and lining by hand, which is more difficult to do with a closed coat (rather than flat); this would avoid possible damage to the very delicate silk during the production cycle, as there are many opportunities to snag on machines, tables, and people.

All this extra work to preserve the delicate silk costs LOTS of money so the synthetic facing is now looking like a much more economical option, and most lay people probably wouldn't be able to spot the difference on a finished garment.

So once again the Brioni is splendidly made and delightful to look at and wear for the connaisseur; it is perhaps a bit like a wine novice spending hundreds (thousands?) on a bottle of Chateau Petrus- will he really appreciate it or would he be better off buying something more affordable which he will find equally pleasant? That is a question that only the consumer can answer for himself when making a purchase. It's all a question of budget and taste, I guess. На вкус и на цвет товарищей нет.

StumbleUpon.com

Sunday, September 14, 2008

What, exactly, is pad stitching?

roll

We hear the terms `pad stitching` and `padded lapels` frequently but not everybody understands the significance.

One of the important principles of tailoring, and which distinguishes tailoring from ordinary `flat`sewing, has to do with the fact that concentric arcs or circles become longer as they radiate from the centre. In easier terms, picture the starting line of a circular race track- the starting point of each lane is in a different spot because the outer lanes are longer than the inner lanes as they go around a bend. Tailored clothing consists of many layers of fabric that bend around each other in order to create shape. The layers of fabric and canvas in a lapel, for example, are like the lanes of a race track; the outer ones are necessarily longer than the outer ones; unlike a race track, whose lanes are staggered to maintain a consistent length, the tailor will cut the layers of fabric to different lengths so that when bent into shape they all meet together at the seam.

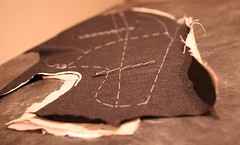
We have seen in a previous post that canvas contains horse hair which gives it a lofty roll. This roll contributes to the roll of the lapel but is not solely responsible for it. Once the tailor has basted the canvas and the cloth together, he will roll the lapel over his hand; the canvas being the 'outer lane' of the race track is thus a little longer than the 'inner lane' of fabric. He will sew a row of pad stitches parallel to the roll line, just catching the cloth underneath so the stitch is not visible under the lapel. At the end of the row he will roll the lapel over his hand again and sew another row of stitches, and continue until the whole lapel has been done. When it is finished, the canvas and cloth now roll as one; the canvas lends loft to the roll, but the additional length of canvas has been stitched permanently in place and so the two want to maintain the shape they were given. Notice in the photo above that the lapel stays curled- it does not fall flat to the table as it would have done had it not been pad stitched. Not only does this pad stitching create a beautiful roll in the lapel, a sign of a good-quality garment, but also helps the lapel to hug the chest tightly and not pull away, another indicator of quality.

Machines now exist which can do this job automatically, using special sensors so that the machine knows when it has reached the end of the lapel, and it will return to its starting point, advance a row, and sew the next one. The machines are quite fabulous, but also fabulously expensive; a pair (one for the right, one for the left) can cost upwards of $80,000 so are within the reach of mass-producers only. The machine takes only a few minutes to do a garment, and can do the two sides simultaneously. The garment shown above has a wide, peak lapel and took me about half an hour per lapel to do. This is a photo of a pad-stitch machine.

IMG 086a

This is a half-canvas garment which has been pad stitched by machine

fronts 008a

This is the same garment, showing the degree of roll.

pockets 025a

The machine stitch is very consistent, however I may want to roll certain parts of a lapel a little more tighly, such as the very tip of a peak lapel, which can not be done by machine but can easily be done by hand. You will notice that the garment which has been stitched my machine does not roll as much as the garment at the top of the page, which was paddded by hand. This does not mean that it will not roll as well; the canvas will still provide a great deal of loft to the roll. It may not, however, hug the chest quite as tightly as a hand-padded lapel will. By varying the amount of canvas worked over the cloth and by stitching closer together or further apart I can vary the degree of roll in the lapel. This is a very fine point and I am not sure that it makes a very great difference in a finished, pressed garment. My unsubstantiated opinion is that it is better done by hand, but to really investigate further I would have to make two identical suits using identical trims and machine pad one of them, and do the other by hand. Maybe when I have retired and have nothing better to do.

The same principles apply when making the canvas front- on the CANVAS page you see a full front which has been pad stitched by hand. Again, there are several layers of material which have been worked into a particular shape and stitched together so that they will hold this shape. As I stated on that page, while I enjoy making my own fronts, I do not think there are any substantial benefits to doing them by hand over doing them by machine. I have done both ways for a long time; one is generally hoping for softness in the chest rather than stiffness and the machine does an admirable job. The amount of shaping and density of stitching can be controlled by the operator, unlike when machine-padding the lapels so I think it really is a toss-up on this issue.

It is important to note that if one were to press the lapel or chest flat you would lose almost all of the shaping which is why we generally advise against having things pressed by dry cleaners who may not be trained in pressing tailored garments (an art and a post unto itself).

So to recap, pad stitching is used to hold several layers of fabric together permanenlty in a particular shape. It gives the chest its shape, and gives the lapel its roll, helping to prevent it from pulling away from the chest- a fused lapel will never roll like a padded lapel and makes judging a garment`s quality easier. While I think it is a little better to pad a lapel by hand, I have seen no real proof of it in a finished garment; this is a matter of great contention and I do not pretend to have the answer.

StumbleUpon.com