Showing posts with label pad stitching. Show all posts

Wednesday, January 7, 2015

Padded lapels by machine


These days I'm working on a big project, converting a men's suit factory from an entirely fused construction to a half-canvas construction. In fact, to be more technically correct, it should really be called a 2/3 canvas since the coat front we will be using is pretty much identical to a full canvas front but the lower 1/3 of the canvas is omitted. To do this conversion, and generally to bring the factory up to date, we have planned our capital expenditure budget over three years- the very first round of spending being around a million and a half US dollars.

New basters, new sleeve setting machines, new felling machines, new plotters, new pressing equipment, new software, new cloth, new trim, new fits, new patterns... nothing is being left untouched.

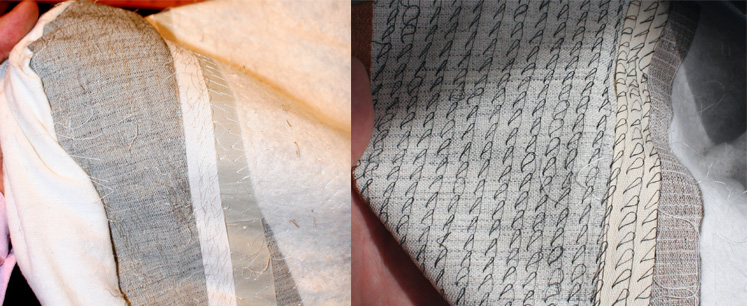
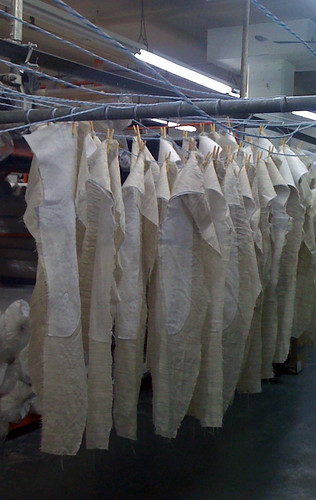
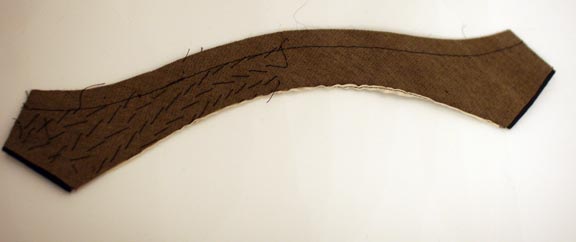
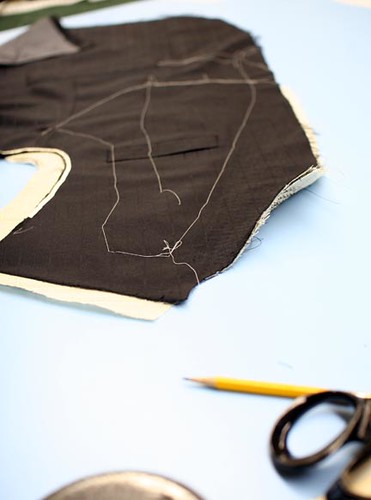
While many of the machines have already started arriving so we have begun training people on the new methods, one special set of machines is being made for us in Germany so won't be in for at least another month. The Strobel KA-ED single thread rollpadding machine is a pretty neat piece of equipment. To hand padstitch a lapel the traditional way takes up to an hour per pair, one left and one right. You roll the canvas portion of the lapel over the cloth, invisibly stitching the canvas into place while maintaining the rolled shape, so that the shape will be permanent. A fused lapel has none of this rolling so the shape is pretty limp and lifeless, and has a tendency to curl away from the chest. These machines, however, can execute a similar action, rolling the canvas over the cloth while stitching invisibly, but do so in about a minute. The machines come in pairs, one for the left side and one for the right, and the operator places the coat on the machine, lining up a guide with the roll line of the coat. The machine has sensors which see the start and finish of the cloth, so it knows where to start stitching, and knows where to stop. Beginning at the roll line, it sews a line of invisible stitching, stopping at the top of the lapel, then like a typewriter carriage, stops, returns to the beginning, and rolls the lapel, advancing a row, ready to start the next row of stitching. The operator can place one coat, then forget it, setting up the next machine while the first is sewing. A good operator can run two pairs of machines, or four sewing heads, rotating between each so that one is being set up while three are sewing. In an eight hour day one person could easily do eight to nine hundred coats this way, compared to the six to ten coats you could do if doing them by hand. It comes at a price, though. Each pair of machines costs almost one hundred thousand US dollars.


Padding by hand

Padstitching from Jeffery D on Vimeo.


Grabbed this video from the internet, I think it comes from a Turkish factory, showing an older model of the Strobel machine in action.


EDIT

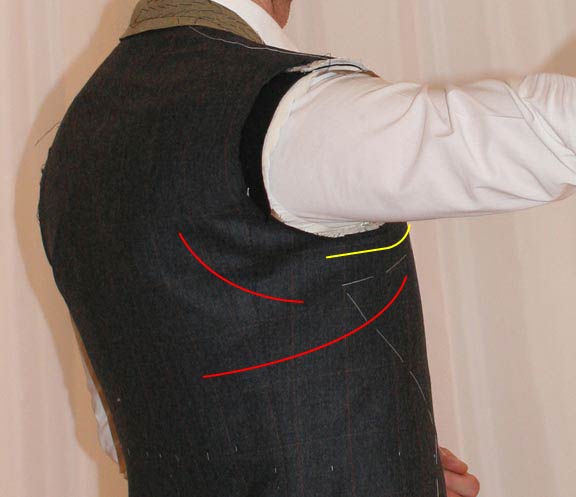
Josch of Pattern Design Analyst asked how we will do the shoulder construction. We are changing pretty much every single step of the coat construction, going from a two-shell construction back to a modified open coat construction.

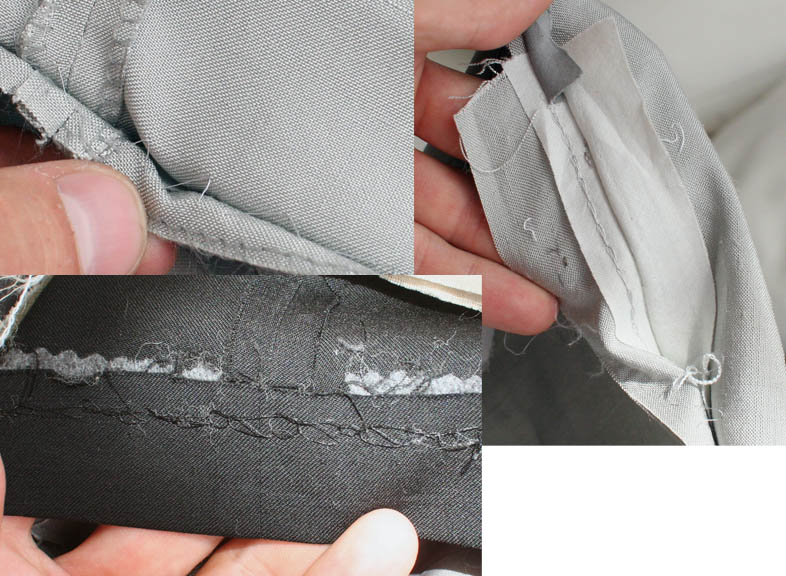
Currently the sleeve head is attached to the sleeve with a shirring machine, then the sleeve is set to the coat, going through the chest piece. Obviously the seam can not be opened so you get a rope shoulder effect which they then attempt to press down. This will all change.

We will have two basic shoulder constructions- one for most of our production and then a softer variant. The basic one be done as follows-

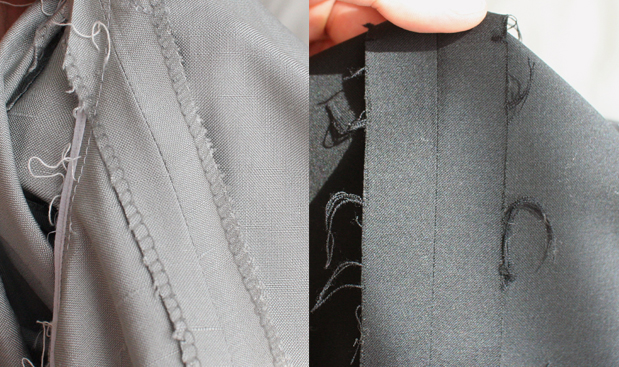
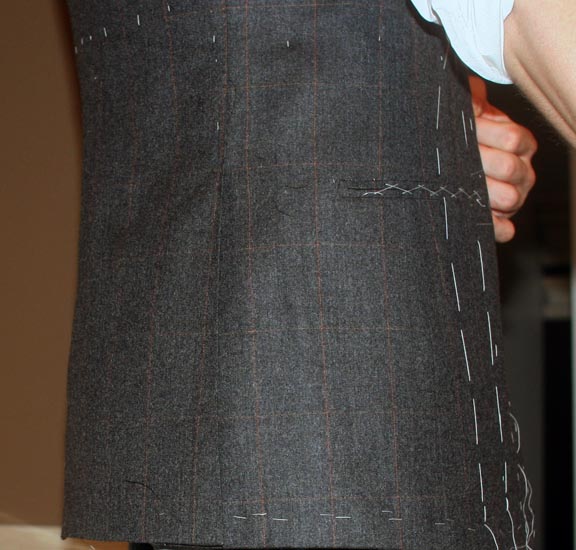
When shaping the fronts we will also measure and trim the canvas in the armhole, leaving the armhole free from the canvas.
Attach shoulder pad to the chest piece with a jump baster.
Later, set sleeve through the coat only, then press the seam open.
Baste the armhole into the chest and shoulder pad from the outside.
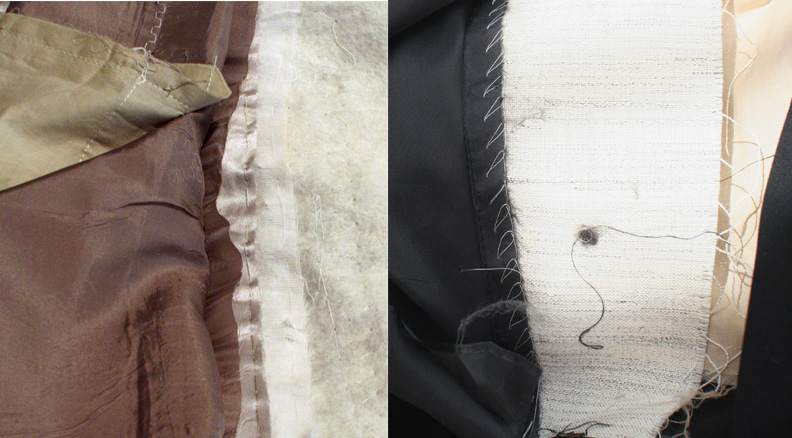
Baste the lining around the armhole, then set sleeve head and trim armhole.
Close armhole lining.

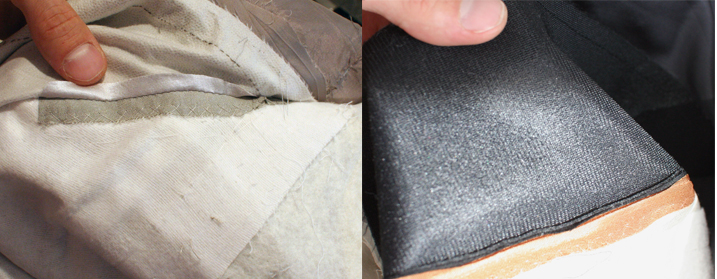
For the softer shoulder we will do something similar to a spalla camicia shirt sleeve- set the sleeve as above, sew in a 3/4" bias strip of silesia at the top of the sleeve, and press the sleeve and armhole seam allowances toward the coat.
Baste the armhole into the chest from the outside- the silesia will be used to secure the top of the armhole into the canvas. The rest is the same, but using only a very fine sleeve head (or none at all, depending)

So far we have had decent results. We got in new Durkopp sleeve setting machines yesterday and we like them a lot. We also got a series of finish pressing machines which we will install next week.

StumbleUpon.com

Wednesday, September 23, 2009

Brioni vs Samuelsohn- a look inside

Continuing the look at these two dinner jackets, we start to look at the guts of the coats, the interior workings, starting with the hem felling.

The hem has been blind stitched by hand (top left) using a very fine thread- thick wools are easy to do but a fine, tight silk is quite a challenge so I am impressed wit he skill of their hands. In a previous post we saw there was some sort of pick stitching running along the hem of the Brioni coat; now that it’s open we can see that there is a Silesia hem interfacing that has been held in place by a Columbia stitch (upper right).

The hem interfacing is a fusible non-woven (the light grey creeping over the edge of the hem) and the hem has been blindstitched by machine.

The importance of the hem interfacing is that the Silesia will never delaminate (never come unglued) from dry cleaning or steaming which, though rare now, is a risk with the fusible interfacing. The structural difference between stitching the hem by hand or by machine is so minuscule that, in the long run, I don’t think it matters to the quality. I will make a distinction between quality and craftsmanship, however.

Compared to a fused garment, whose hem is usually only tacked in place along the seams and will definitely sag when steamed or cleaned, or just with wearing in humid climate, there is a definite difference in quality between that and a felled hem like the two above. So between the fused garment and a Samuelsohn there is a huge, measurable difference in quality and the extra money is definitely worth the investment; between the Samuelsohn and the Brioni, however, there is a nuanced level of superior craftsmanship- what you are paying for in the Brioni is no longer necessarily a longer-lasting or more comfortable garment than the Samuelsohn, but a level of craftsmanship which the Samuelsohn does not have. If you area an oil sheikh for whom money is no object, the Brioni is the clear choice because of the skill and craftsmanship required to make it; if you are on a budget and are just looking for reliability (a Chevrolet, perhaps) then in your case it may not be worth the extra money to go up from Sammy to Brioni. Nuance.

Whew.

Hems


Inlays

Brioni
Notice that all the edges are overlocked. Silk ravels a lot so this is absolutely a necessity; good wool won’t ravel as much so it is not required. The inlays at center back and the side seams are about 5/8” wide; if you were to gain weight and have this altered, assuming a smallest possible seam of ¼”, you could then gain ¾” at each seam, or a total of 2 ½” circumference

Samuelsohn
Curiously, the inlays are 7/8” wide. So by the same math you could gain 1 ¼” at each seam, or a total of 3 ¾”.

Inlays

At this point I have a good look at the finishing of the lining in the Brioni and it is clear that the little pickstitch along the edge of the facing seam is not decorative- the lining has all been inserted by hand, though I would need a good macro lens to show it clearly. Which brings me to the construction of the facing and the lining.

Brioni

The silk has been fused with a soft non-woven interfacing to prevent some of the seams and stitching underneath from showing through. They have taken the step of covering the canvas of the lapel with flannel so that the canvas and the inner works don’t leave marks, but this is not enough to cover the edge seams, which are graded to avoid thickness. In the photo on the left you can see the lining peeled back, then the satin facing, and about one inch of the flannel extending past the silk, then the felt covering the chest piece. The silk has been tacked to the canvas using a long hand basting. The way that this has been constructed is a clue that the facing has been made in the traditional way, that is to say, it has been drawn on by hand, though this will be confirmed once the facing is open completely.

Samuelsohn
The facing has been felled to the canvas by blindstitch machine. Again, structurally equivalent to doing it by hand (it is no more secure by hand than by machine) but it is an indicator of the process of building the inside. The lining was joined to the facing by machine, then the pockets made on the lining, then the facings were attached to the jacket fronts. After turning the edges, the facing is basted in place, along the edges and then along the lining seam, which permits this machine felling from the inside. The same could have been done (though by hand) on the Brioni, but we are about to find out it was not.

Facing felling

On the left is the gorge seam, and you can see that the canvas has been covered by flannel. You can also see that the gorge seam allowance has been cross-stitched by hand, but it is curious that it is the collar seam allowance and not the facing. This very important detail will be covered in a later post.

Faciing underside

PAD STITCHING

BRIONI-
Though it is not very clear in the photo, peeling back the flannel we can see the pad stitching has been done by machine. It is irregular, telling me that they did not use the automated machine, perhaps because it is a peak lapel and they felt the need to vary the stitching through the peak. It’s what I would do.

Samuelsohn
The neat rows of stitching indicate that this was done on the automated pad stitching machine.

lapel padding

At this point I can tell for sure that the Brioni facing and collar have been drawn on by hand, whereas the Samuelsohn, like almost all other manufactured suits (including Oxxford) has been done by machine. This will require a whole post unto itself.

StumbleUpon.com

Thursday, February 26, 2009

Canvas Fronts

I went to visit a friend of mine today.

She started in the business as a machine operator (seamstress) at Samuelsohn; today she owns the company which makes their, and the majority of North American manufacturers', canvas fronts.

canvas 005

She has special double-needle jumpstitch machines with custom-built forms. This machine doesn't sew like most, whose presser foot and feed dogs feed the fabric- the operator feeds it through at their own pace. They can control how many stitches, whether lots for a firm shape, or few for a soft shape, and the forms allow them to work in the shape of the chest and shoulder. It requires a certain amount of skill since the operator is building in the shape and has to know how to do it correctly. They do a very nice job.

canvas 004

Canvas has not been though all the finishing processes like cloth has so there is still a big amount of shrinkage left. A tight canvas will make the fronts ripple, and I suspect this is one of the reasons some people put their canvases on the bias, since the bias allows more stretch. Whife alludes to it, and suggests that clever tailors are able to put the canvas on the straight grain without trouble. One of the most important steps to avoid trouble is to pre-soak the canvas fronts. They are soaked up to 24 hours, and then hung to dry, then pressed on custom-designed forms which retain and enhance the form of the chest, and stretch the shoulder at the same time. Some people then run some light shirring stitches through the canvas to draw it up a bit to prevent any further shrinkage problems.

canvas 002

StumbleUpon.com

Monday, December 29, 2008

Progress report

So here is some of the progress so far.

As promised, I pulled the pad stitching from half the collar and redid that half by hand; the stand is pretty heavily padded, the fall is more lightly padded and the ends were curled under as I worked to keep the corners tight to the chest. After breaking the collar, there is no noticeable difference in shaping or shape retention, though that may change, particularly after it's been worn so we'll have to keep checking back on this one. The side which looks bare is the one done by machine- it is done with a fine, clear monofilament thread which is nearly invisible.

bicollar

Going back to the business of felling, here you see that the facing seam has been sewn to the canvas; this can also be done by blindstitch machine. As we work across the garment we are sewing everything together, in place, so that nothing moves once it's been (shudder) steamed or had its first chemical bath at the dry cleaners. On more economical garments, this seam may be glued in place, which will come apart after a few cleanings; some garments whose lining has been "bagged" will not be tacked at all.

Facing felling

I talked about Chris Despos' method of balancing the patterns on the back; this is the result for this check. Normally when I draft the back, the result would have the lines evenly balanced (mirrored) at the neck so that the collar matches but very close together at the hem. Chris' idea is to balance the pattern at the hem, as shown- this requires more shaping with the iron to get a good shape to the back, but I like the result shown below. I recently worked with a navy cloth with a very bold white windowpane; it would have been much nicer done with this method. My one snag is that I like to be able to keep a person's pattern on file once a garment is finished so that there is less fitting the next time I cut a garment; with this method a new back must be drafted for every cloth if it is a stripe or a check, requiring different amounts of shaping and fitting. One of those techniques I'll keep tucked up my sleeve for when I have very distinct fabric designs.

Basic RGB

To further drive points about felling and steaming home, let's consider this side vent (look closely, it's there); the back hem is folded up and the back underlay is folded under- the side body seam allowance is folded back and the hem is folded up. This is a lot of folding- eight layers of cloth, not to mention the lining. A lot of stuff to fall out of shape as a result of humidity and cleaning, which is why we fell everything in place, so it keeps this nice flat appearance. But let's consider that many manufactured garments are not felled so that the lining can be bagged; let's also consider what happens to a pant crease when it is steamed- it relaxes unfolds itself. So someone who takes their jiffy steamer to the back to get rid of wrinkles is also relaxing those 4 creases used to create the vent and since they are not felled in place they just open up. I can guarantee you that the vent will not sit flat any more.

Vent

The most intriguing for last.

The proponents of hand sewing the sleeve talk about elasticity and looking at the chain stitch versus tape in the armhole looked promising in this regard so I decided to observe what areas of the garment come under the most strain during movement and was surprised at what I saw. When we reach forward we feel the back of the armhole straining; this area is mostly bias and so I figured if the chain stitch and hand sewing could provide support and elasticity it would be far superior to a lock stitch. But what I saw (and is difficult to see in the photograph) is that the back armhole was not even touching my body at all; the forward motion of the arm was dragging on the front of the armhole, causing the area shown in yellow to pull, and that the garment was pulling on my blades but mostly along the latissimus dorsi. The bias area received no tension at all, and the area under strain is on the straight grain so there would be not much give at all. The front of the armhole and a large part of the underarm are tacked into the canvas which negates any benefit of elasticity so I am starting to have big doubts about this. I also wonder if those who equate hand-sewn seams with elasticity consider that bathing suits and T shirts are sewn by machine and yet are elastic so if elasticity is really so key then surely a machine dedicated to those operations requiring it would have been invented. There are still enough big guns who advocate hand-sewn sleeves so I am still not ruling it out but it's starting to look like marketing hype to me.

Basic RGB

StumbleUpon.com

Sunday, September 14, 2008

What, exactly, is pad stitching?

roll

We hear the terms `pad stitching` and `padded lapels` frequently but not everybody understands the significance.

One of the important principles of tailoring, and which distinguishes tailoring from ordinary `flat`sewing, has to do with the fact that concentric arcs or circles become longer as they radiate from the centre. In easier terms, picture the starting line of a circular race track- the starting point of each lane is in a different spot because the outer lanes are longer than the inner lanes as they go around a bend. Tailored clothing consists of many layers of fabric that bend around each other in order to create shape. The layers of fabric and canvas in a lapel, for example, are like the lanes of a race track; the outer ones are necessarily longer than the outer ones; unlike a race track, whose lanes are staggered to maintain a consistent length, the tailor will cut the layers of fabric to different lengths so that when bent into shape they all meet together at the seam.

We have seen in a previous post that canvas contains horse hair which gives it a lofty roll. This roll contributes to the roll of the lapel but is not solely responsible for it. Once the tailor has basted the canvas and the cloth together, he will roll the lapel over his hand; the canvas being the 'outer lane' of the race track is thus a little longer than the 'inner lane' of fabric. He will sew a row of pad stitches parallel to the roll line, just catching the cloth underneath so the stitch is not visible under the lapel. At the end of the row he will roll the lapel over his hand again and sew another row of stitches, and continue until the whole lapel has been done. When it is finished, the canvas and cloth now roll as one; the canvas lends loft to the roll, but the additional length of canvas has been stitched permanently in place and so the two want to maintain the shape they were given. Notice in the photo above that the lapel stays curled- it does not fall flat to the table as it would have done had it not been pad stitched. Not only does this pad stitching create a beautiful roll in the lapel, a sign of a good-quality garment, but also helps the lapel to hug the chest tightly and not pull away, another indicator of quality.

Machines now exist which can do this job automatically, using special sensors so that the machine knows when it has reached the end of the lapel, and it will return to its starting point, advance a row, and sew the next one. The machines are quite fabulous, but also fabulously expensive; a pair (one for the right, one for the left) can cost upwards of $80,000 so are within the reach of mass-producers only. The machine takes only a few minutes to do a garment, and can do the two sides simultaneously. The garment shown above has a wide, peak lapel and took me about half an hour per lapel to do. This is a photo of a pad-stitch machine.

IMG 086a

This is a half-canvas garment which has been pad stitched by machine

fronts 008a

This is the same garment, showing the degree of roll.

pockets 025a

The machine stitch is very consistent, however I may want to roll certain parts of a lapel a little more tighly, such as the very tip of a peak lapel, which can not be done by machine but can easily be done by hand. You will notice that the garment which has been stitched my machine does not roll as much as the garment at the top of the page, which was paddded by hand. This does not mean that it will not roll as well; the canvas will still provide a great deal of loft to the roll. It may not, however, hug the chest quite as tightly as a hand-padded lapel will. By varying the amount of canvas worked over the cloth and by stitching closer together or further apart I can vary the degree of roll in the lapel. This is a very fine point and I am not sure that it makes a very great difference in a finished, pressed garment. My unsubstantiated opinion is that it is better done by hand, but to really investigate further I would have to make two identical suits using identical trims and machine pad one of them, and do the other by hand. Maybe when I have retired and have nothing better to do.

The same principles apply when making the canvas front- on the CANVAS page you see a full front which has been pad stitched by hand. Again, there are several layers of material which have been worked into a particular shape and stitched together so that they will hold this shape. As I stated on that page, while I enjoy making my own fronts, I do not think there are any substantial benefits to doing them by hand over doing them by machine. I have done both ways for a long time; one is generally hoping for softness in the chest rather than stiffness and the machine does an admirable job. The amount of shaping and density of stitching can be controlled by the operator, unlike when machine-padding the lapels so I think it really is a toss-up on this issue.

It is important to note that if one were to press the lapel or chest flat you would lose almost all of the shaping which is why we generally advise against having things pressed by dry cleaners who may not be trained in pressing tailored garments (an art and a post unto itself).

So to recap, pad stitching is used to hold several layers of fabric together permanenlty in a particular shape. It gives the chest its shape, and gives the lapel its roll, helping to prevent it from pulling away from the chest- a fused lapel will never roll like a padded lapel and makes judging a garment`s quality easier. While I think it is a little better to pad a lapel by hand, I have seen no real proof of it in a finished garment; this is a matter of great contention and I do not pretend to have the answer.

StumbleUpon.com