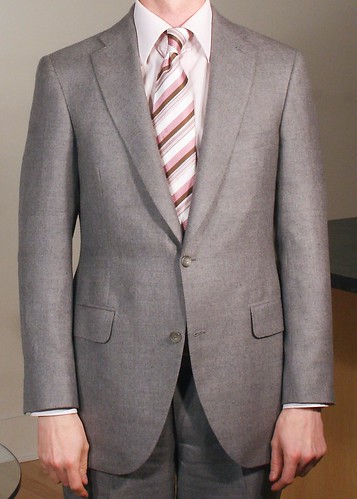
Since my next suit will have a softer shoulder than I usually wear, Lynn has asked for some details.
The drafting of the shoulder seam itself will depend on the amount of padding, if any, used. I have sloping shoulders so I will use some padding and structure, but it will be a much more commercial shoulder than the usual pagoda and rope.
For a pagoda shoulder I will start with a straighter line and work the shape in with the iron. For a softer shoulder, I draw a straight line for the front seam, then divide that line into thirds. The third closest to the neck will have a concave curve of about 2mm below the line, then I curve upward about 2mm above the line, and finish with a slight downward dip to ward the end of the line. The shape will be adjusted in the fitting so I don't get too crazy when drafting. More important is the sleeve draft.
One of the first calculations I make when drafting the sleeve is the cap height. To get this, I measure the shoulder height on the pattern from the breast line- right to the tip of both shoulder seams where they join the armhole. I measure both, add them, then divide by two to get an average height. From this I will subtract a variable amount to get the cap height- for a rope shoulder with moderate padding I will subtract 7/8", for a softer shoulder I will subtract 1 1/8", for a shirt-type shoulder I will subtract up to 1 3/8". The cap height is absolutely crucial to a good fit- too long and you will get dimples or divots, too short and you will get vertical drag lines. Fortunately it is easy to fix in the fitting so I would err on the long side and adjust during the fitting- it's easier to remove than to add.
The following image shows what a rope draft might look like and a softer shoulder in red. Not only is the cap height lower but the top sleeve is narrower by about 3/8" as well. A soft shoulder requires less fullness and a smaller sleeve. If I wanted the Neapolitan "waterfall" effect I would shorten the cap without narrowing it- the extra width gets worked in as the fluting or pleating.
The dark pencil line in the draft will give this kind of rope sleeve, which is very full
while the red line will give a much flatter appearance, not only in height, but also in the crown of the sleeve. The few inches forward of the shoulder seam are pressed open and flat, whereas there is a prominent ridge formed in the rope shoulder. I've started pulling the basting to give a better idea, but the coat has not been finished or pressed yet.
Ok- here it is after having been worn and travelled in but not repressed yet so you can see how the cloth performs.
ABOUT THE CLOTH
The grey is from Dugdale Brothers' English & Town Classics book, number 9437.


