Showing posts with label buttonholes. Show all posts

Monday, April 16, 2012

Asola lucida- some instructions

For Mike, who says he still doesn't get it.

I hope this helps.

(Sorry that the illustrations are rotated from the photos, but maybe this will actually help)


1.
Cut through the cloth, overcast, and lay a length of gimp. Do not wax the silk twist. Unlike regular buttonholes which start from the top, the twist must be anchored on the bottom of the hole (on the wrong side).

Feed the needle through the slit, then underneath the gimp.

Print

asola2


2.
Wrapping around the gimp, insert the needle underneath the gimp, about 1/16" away from the slit edge.

Print

asola3

3. Pull tight.

Print

asola5

4. Repeat by feeding the needle up through the slit. When taking the next stitch, insert the needle exactly next to the previous stitch, and do not leave any space between the two. You may need to nudge the stitch with your thumb to pack them in tight.

Print

asola4

asola6

StumbleUpon.com

Tuesday, January 31, 2012

Asola Lucida- a lightbulb goes on...

So I had another little moment of insight. Or maybe my thickheadedness deserted me briefly.

I was contemplating my lapel buttonholes last week, the by now infamous asola lucida ones, that is, and finding them just too chunky, especially when compared to some nicer ones like the Tom Ford. The thread I am using is just too heavy.

To wit

Mine

asola6

And theirs

buttonhole

Silk buttonhole twist is only available in two sizes these days, the finest being size 40, which is the one I use. But still, it is not nearly as fine as the thread used on the nicest lapel buttonholes. So I was wondering where I could find both buttonhole twist and a much finer thread but offered in the very same colors, something I have never seen before. Then I had my little idea.

Buttonhole twist is 3-ply- that is to say, it has three yarns (rather than the typical two) twisted together to form the thread. If I were to strip the twist down, I would have three very fine threads to use, solving my problem. Of course, such a fine thread would require three times as much work to cover the same space- I think it was Francesco Smalto who said that 140 stitches are required to execute the asola lucida. Using a thread this fine, I believe him. Compounding the difficulty, a thread which has been stripped can be difficult to work with. It's just the sort of punishment I seem to enjoy inflicting upon myself in order to make a pretty buttonhole, and another detail over which to obsess for a while. So I started ripping apart the buttonholes on a few of my jackets, pulling apart silk twist, and reworking them over again.

Obsessive Buttonhole Disorder. I wonder if they make a pill for that...

StumbleUpon.com

Saturday, April 30, 2011

L'Asola Lucida, part two

buttonhole

I think the Asolsa Lucida, or glossy buttonhole (the example above being from a Tom Ford garment), originated in the Abruzzi region of Italy as it is most commonly seen on garments made in this area. It is also very common in Paris, where it is known as the boutonnière Milanaise, though likely for the brand of gimp that was commonly used and not the city; it is worth noting that most of the grand tailoring houses of Paris also trace their lineage back to Italy. The gimp itself, which is a key element of the buttonhole, I believe is now only available from Guterman and is known as Agreman; I will be in Italy in June and will dig around to see if there are any other manufacturers still producing the stuff and will report back if I find any (and if anybody else will be at Pitti and feels like meeting up for a drink, drop me a line).

A while back, Matthew was kind enough to share a method he learned at Cifonelli for making these buttonholes, his with a purl underneath the gimp. The ones made by what I shall call the Abruzzi method, for want of a better term, do not have this purl under the gimp and the stitch is made differently- I will attempt to explain it now that I have figured it out.


In addition to the previously mentioned gimp (and do not be tempted to use what most other companies sell as gimp but is really intended for machine-made buttonholes) you will need some fine silk twist- to get a really smooth, glossy finish, a thread finer than the 40 size typically used now, and much finer than the U size that some still use, is needed, and unlike ordinary buttonholes, the twist should not be waxed.

Because this buttonholes is more fragile than the regular knotted one, it is typically only seen on the lapel, not on the lower buttonholes.

prep

I start by running two rows of machine stitching to hold everything in place while I overcast the edges- it might also be a good idea to stitch even closer to the cut line than I have done and instead of ripping them after overcasting, just work the buttonhole over the stitching. A very narrow bite is required and this helps keep things from shifting, but also means that cloth that frays very easily is unsuitable.

whip

The mechanics of the stitch are actually quite simple but may take some getting used to if you have done lots of traditional buttonholes.

Working from the underside, pass the needle up through the hole- I find it easiest to poke the eye end through to avoid catching anything with the sharp end. I come up through the hole and then work the twist under the gimp, but for the sake of clarity I have shown the needle passing directly under the gimp. Do whatever is easiest for you.

asola1

asola2

Come up and over the gimp, then insert the needle a millimeter from the edge- tight, close stitching is the key to a smooth appearance. You want the gimp to sit right on top of the stitch to conceal it, and by tightly spacing the stitches you will completely encase the gimp.

asola3

I've pushed everything to one side so you can get an idea of how the stitches are forming.

asola4

Pinch the gimp before working around the end of it the continue down the other side.

asola5

The completed buttonhole. You can see some of the stitches poking through beyond the gimp where my bite was a little too wide- I need to practice some more (and really have to think more seriously about a macro lens...)

asola6


And thanks again to Matthew and Franca for inspiring this post.


EDIT- In response to a question, I made a few phone calls. In the U.S. Agreman gimp can be bought from B. Black and Sons (1-800-433-1546), Oshman Brothers (1-212-226-7448) and Ely Yawitz (1-800-325-7915) It is not listed on their websites so you have to call and ask for it.

In the U.K. it can be bought from Richard James Weldon 44 208 300 7878. I know there is at least one store in Paris which stocks it (ask for milanaise), though the name of it now escapes me. It is also available all over Italy (ask for vergolina).

StumbleUpon.com

Monday, March 21, 2011

Boutonnière milanaise, méthode Cifonelli

scan0002

The image above is the wrapper for an old spool of gimp, "vergolina" being the Italian word for gimp, and La Milanese being the brand name. I am guessing that this is how the French came to know gimp as "Milanaise", and thus the Milanese buttonhole would have found its name. Conjecture, but likely.

LAPEL

I've discussed this buttonhole a few times, mainly because I didn't know how to do it and that was driving me crazy. The example above is from a coat by Smalto and I had a good look under a magnifying glass and finally figured that stitch out- it is a fairly simple figure-of-eight stitch with no knot or purl. More on that soon. A reader was kind enough to reach out with another method of making them.

Matthew Reed did the CAP Tailleur Homme in Paris (a training program in tailoring) and did his internship at Cifonelli, a famous Parisian house. (If you read French you can find a recent interview with Lorenzo Cifonelli here) Matthew was kind enough to photograph a high-contrast buttonhole sample that he learned at Cifonelli, and the steps involved in making it- you will notice that in this version there is a knot underneath the gimp, which I rather like because it raises the buttonhole higher off the surface and makes it a bit more pronounced (subtletly be damned). So thank you, Matthew.

IMG_9345

The gimp has been knotted and inserted between the layers of cloth- it must be lifted out of the way when taking the stitch.

bout.milan.1

Wrap the tail of the twist around the head of the needle.

bout.milan.2

Pull through

bout.milan.3

bout.milan.4

bout.milan.5

Pull tight

bout.milan.6


I've been mumbling about buying a macro lense since my close-ups leave much to be desired, but seeing Matthew's photos I'm leaning toward a point-and-shoot instead, which would be cheaper and more versatile. So double inspiration, thanks to Matthew.


EDIT-

Franca made some interesting observations in the comments section. She has discovered what many have found, namely that many old tailors guard their secrets jealously... She compares the buttonhole above to the buttonholes she sees in her region (Abruzzo) but the buttonhole above has a knot, and the ones made in Abruzzo, particularly Brioni, do not have a knot- it is slightly simpler in certain respects, but require more precision. She has discovered that cloth that frays easily is not suitable, or at least will be difficult to make a stitch that is small enough even though she has overcast before stitching. I will suggest running a machine stitch 1/16" away from the cut location on each side (before cutting) which will help stabilize the area. As for the stitch itself, once I get my macro photography sorted out I will post a series of photos like the ones Matthew submitted, showing the Asola Lucida, al modo di Brioni. And yes, Franca, the only thing to do is to practice and practice some more.

StumbleUpon.com

Tuesday, February 16, 2010

Hand Made Buttonholes, the video

BH5

I've been asked about my buttonholes a few times, mainly by people wanting to know how to do them. There's a good set of printed instructions here but I have a few things to add to it.

The type of cloth will dictate how narrow a bite you can take- loose cloth requires a wider bite, tight cloth you can get away with a narrower bite. It makes a difference in the appearance. Consider the buttonholes at the top of the post- they have a raised appearance like the Milanese buttonhole. The buttonholes below appear much flatter.

Amann

What is the difference? They were all made with the same size silk twist, the same gimp, using the same stitch type, and by the same person (me). To get the flat buttonhole, I take a fairly wide stitch so that the gimp sits under the leg of the stitch and the knot sits to the side of it. For the raised buttonhole, I take a much narrower stitch and pull straight up when making the knot in order to place the knot directly on top of the gimp. This gives the volume. I filmed the making of the grey sleeve shown above; I'm not sure if anything will be visible in the internet-friendly version, but let's give it a shot.

EDIT- Apparently some browsers only display half the video screen, so by clicking on the title of the video (Hand Made Buttonholes) you can go to the vimeo site where you should be able to see it complete. In the meantime I will try to figure this thing out..... still more technical problems. If you get jagged lines, try clicking through the full res version on Vimeo- I think that works better.

Those who are interested in the materials used can check out this blog post where I discussed the various threads http://tuttofattoamano.blogspot.com/2009/12/hand-made-buttonholes.html

Unfortunately, I don't know where to get the Agreman gimp online. Richard James Weldon stocks it in London, Lafayette Saltiel Drapiers stocks it in Paris and sells the black by the meter rather than by the spool, you could try calling Bergen Tailor Supply, B. Black or Ely Yawitz- they may stock it even if it's not on their websites. Next time I see my Gutermann rep I will ask if he knows of anybody who stocks it, but I doubt he will know.

Hand Made Buttonholes from Jeffery D on Vimeo.

StumbleUpon.com

Friday, January 8, 2010

Saint Andrews

A busy post box this week. A parcel came yesterday and today a notice that the post office is holding one; I'm hoping it's the A&S I've been waiting for. In the meantime, I give you Saint Andrews. Thanks to HRoi for getting it here so quickly!

inside pocket

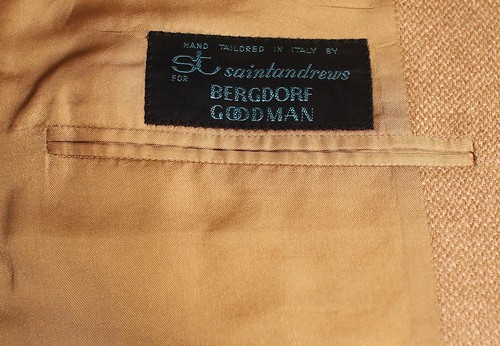
Also known as Saint Andrews, Sartoria Santandrea produces garments for a number of better doors but is not so well known in North America except perhaps by fans of Ralph Lauren's Purple Label, as Santandrea produces some of their tailored clothing (perhaps all? at one point Cantarelli also did some).

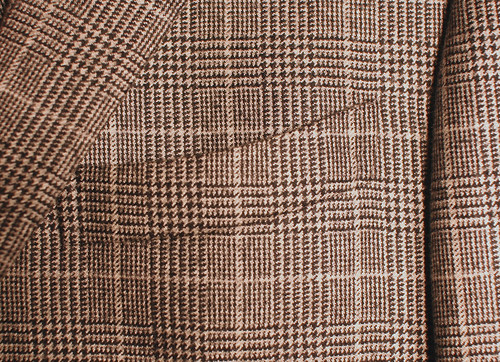
There's not a lot to learn from this garment but for the sake of those who are trying themselves who makes a better garment, let's have a look at some of the details.

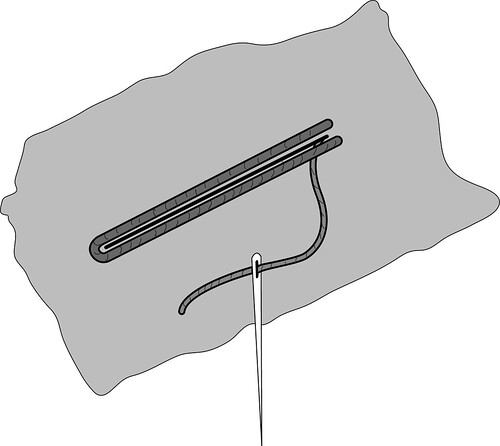
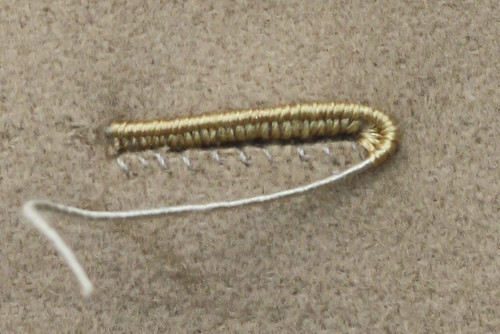
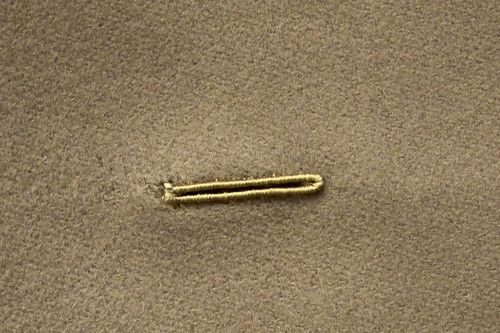
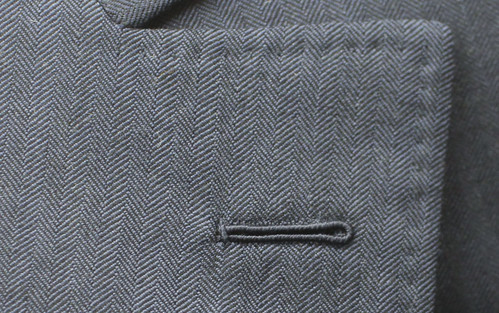
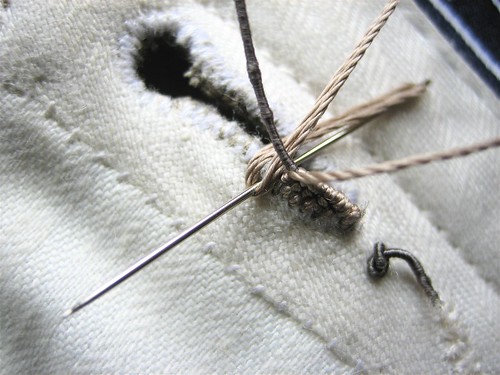
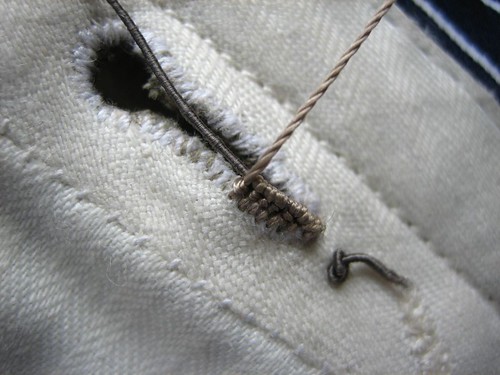
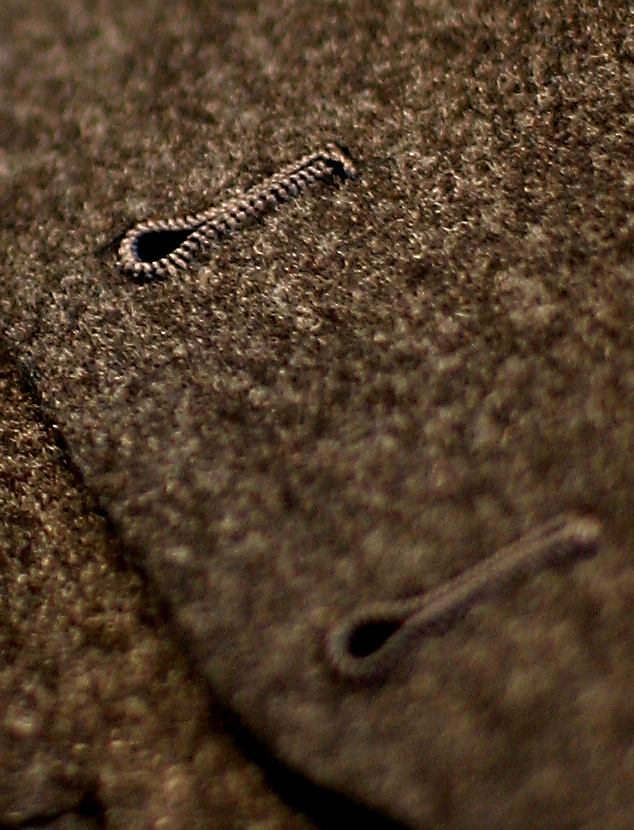
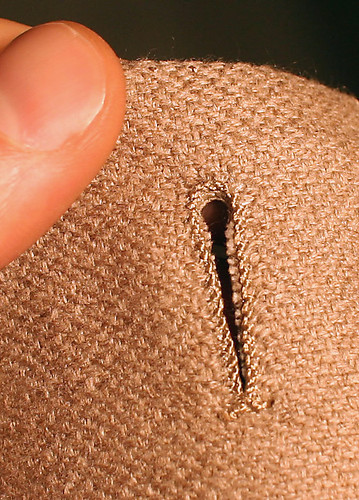
The buttonholes are very nice (naturally, they are done by hand) and the top buttonhole (the one that is meant to be buttoned, not the boutonniere) has been worked on both sides.

buttonhole

boutonniere

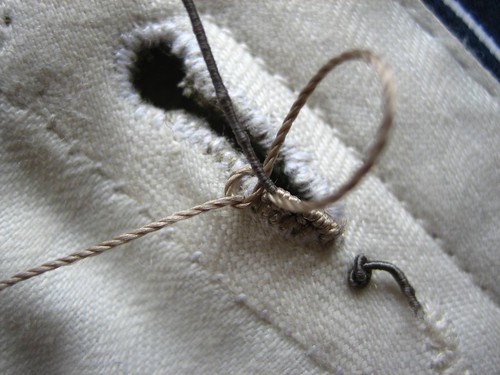
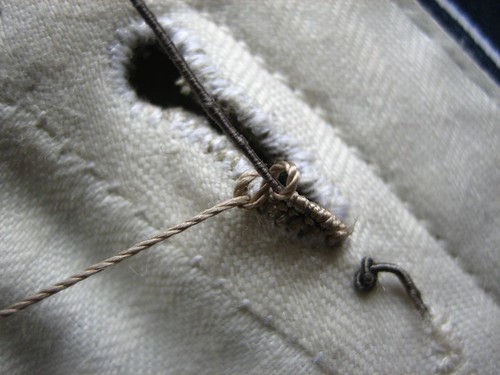
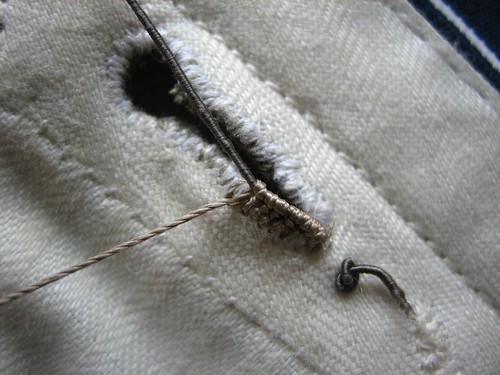
The back of the buttonhole

buttonhole backside

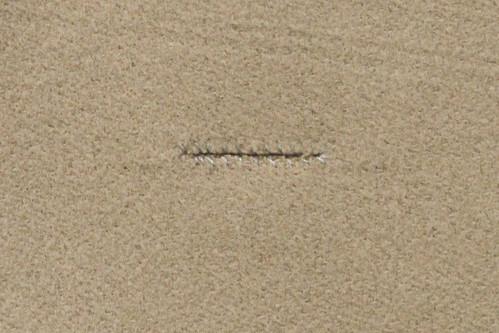
Something interesting.

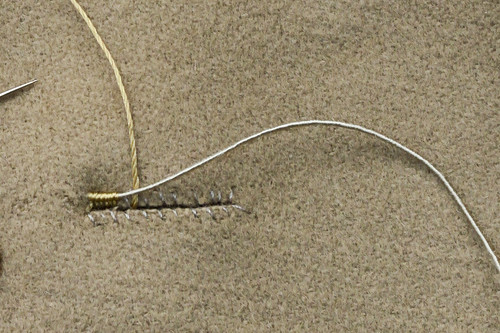
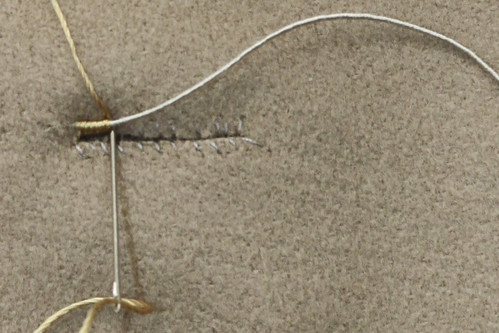
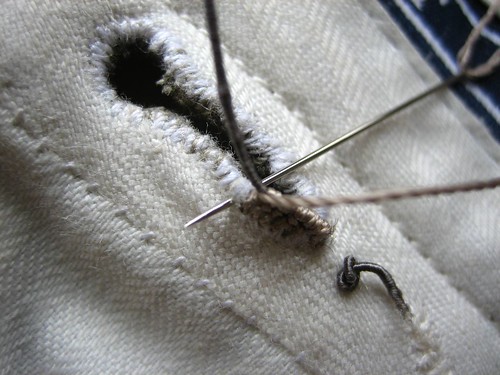
If you go to their site and go to "lavorazione", then "asole" you see someone making a buttonhole by hand. If you look closely you can see that the buttonhole has been whip stitched before making it (which is typical), but the stitches are very close together, which raised a flag. I have mentioned before that certain well-known Neapolitan makers make their buttonholes by machine with fine thread first then work them again by hand. A friend of mine who worked for a company which does it told me about this, saying it was much easier to get consistency in the cutting of the hole, and because it was all stitched up first, which is stronger than a hand stitch. It made the buttonholes much easier to make. We were talking about this because I was looking for gimp alternatives and he told me that by doing this, no gimp is necessary. As open-minded as I like to think I am about machines, this was one line I was not willing to cross.

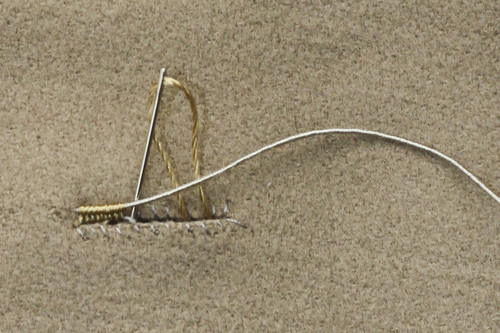
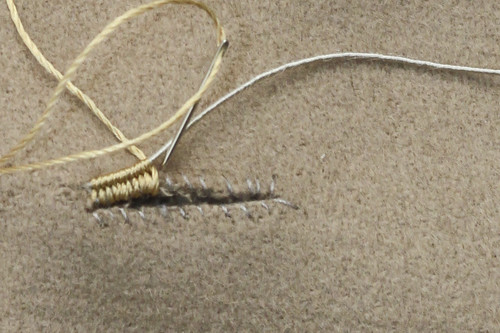
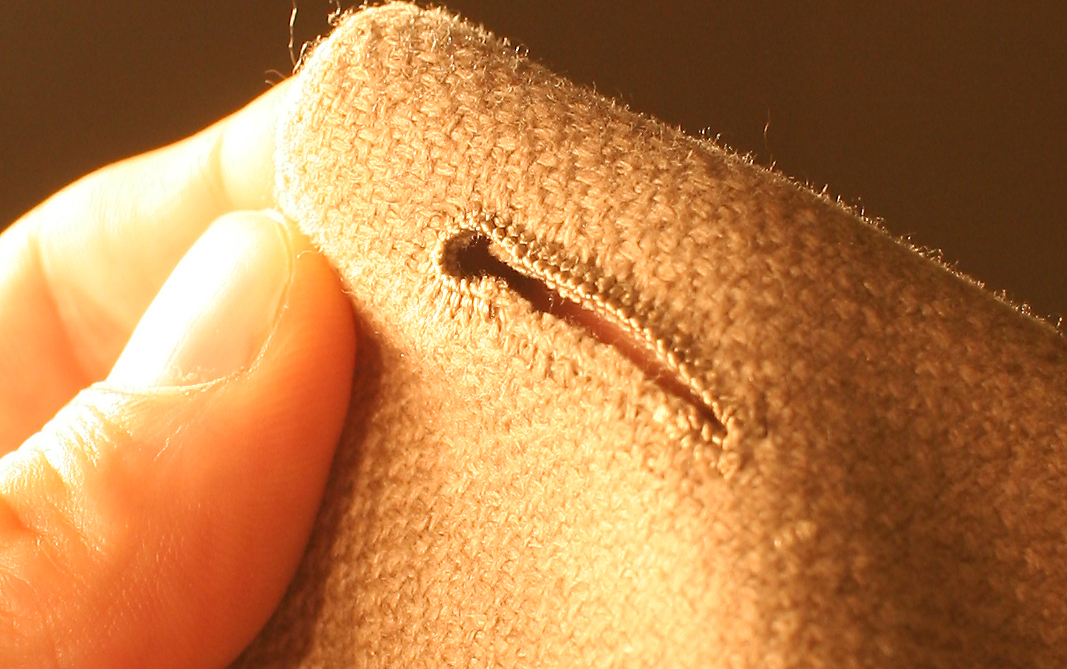
Anyway, back to Santandrea. Having seen that photo on their site I got curious so I ripped one of the (admittedly beautiful) buttonholes and found one little strand of silk twist, which is usually not nearly enough to gimp a buttonhole. Under my big magnifying glass, though, I could just make out an extremely fine thread and a distinct machine stitch (a tiny zig-zag which maybe you can make out in the photo). They had been worked and cut by machine before being remade by hand over top. My mind still rebels, but it does make sense for the longevity (no slippage in loose cloth, which is sometimes a problem) and it does make a nice buttonhole. Something to think about......

buttonhole  underneath

Anyway, back to the garment.

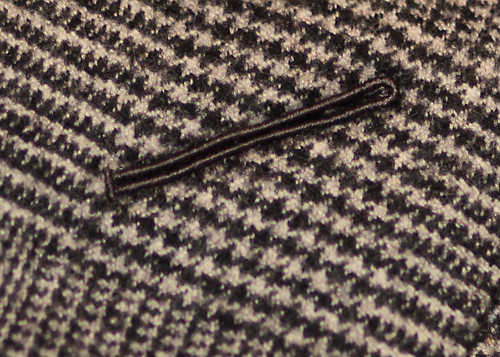
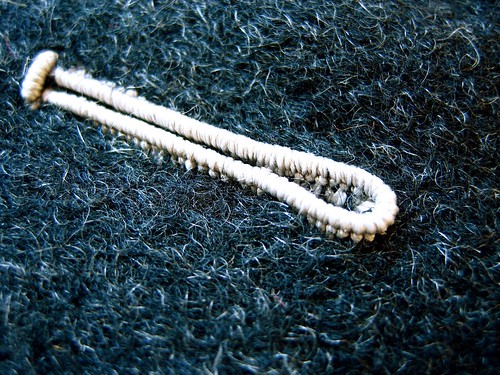
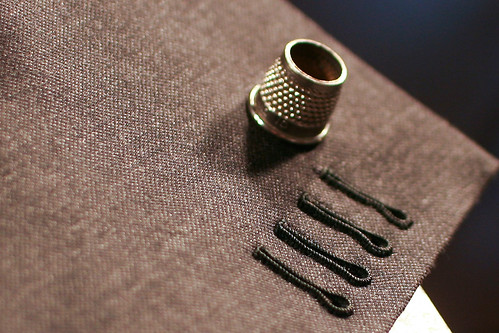
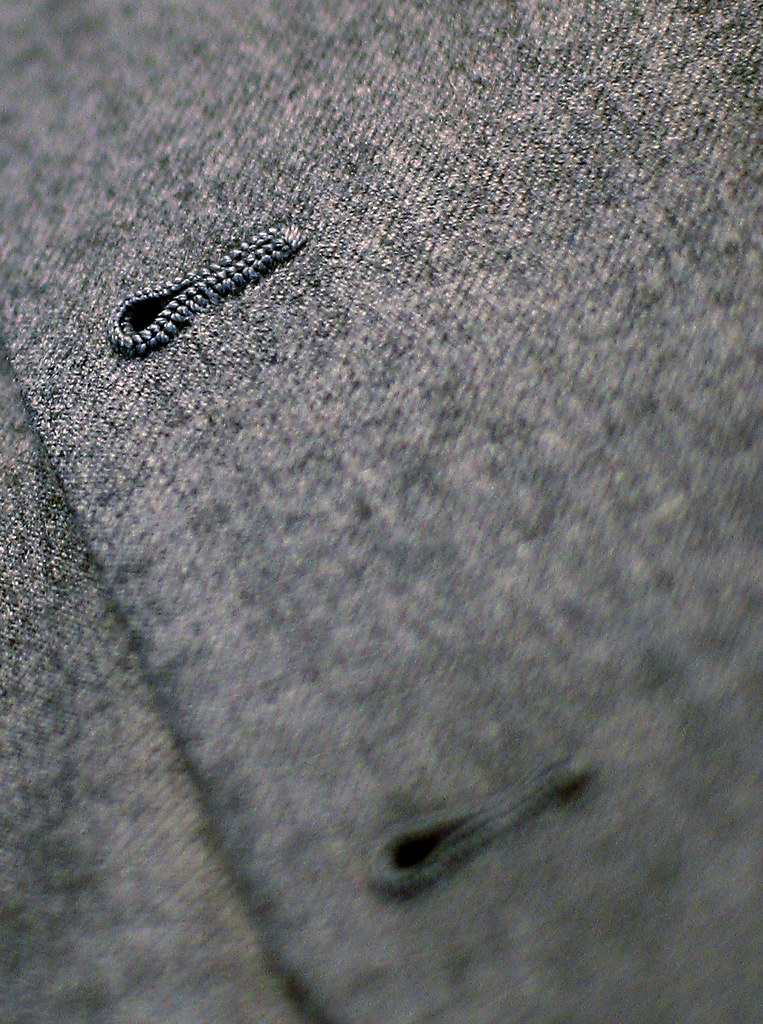
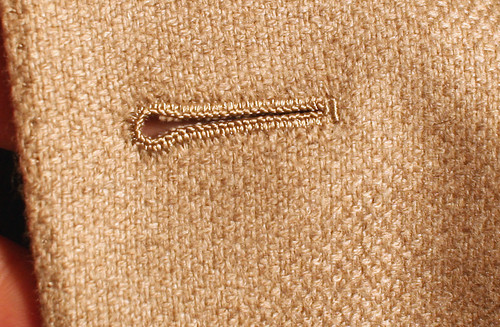
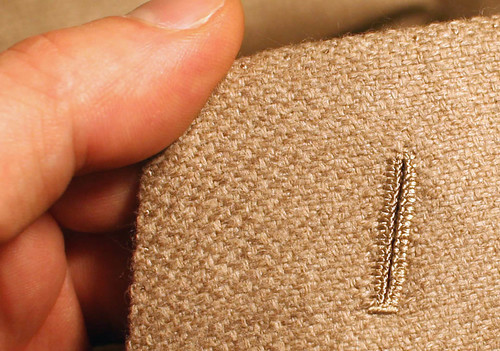
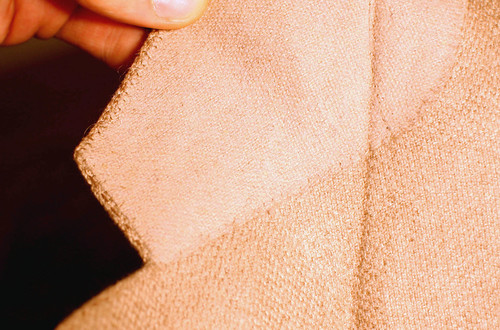
Shamholes done by hand on the sleeve

sleeve

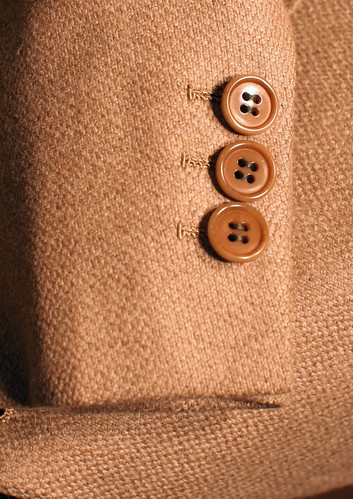
However the inside of the sleeve has been finished for functional buttonholes.

sleeve inside

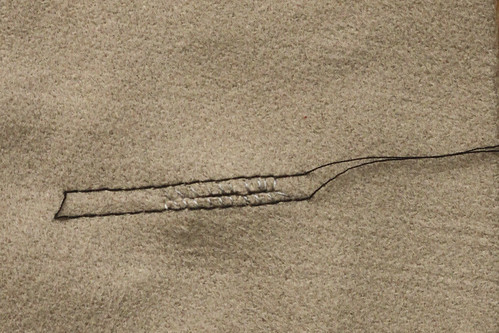
The underside of the flap shows that the pick stitching was done by hand in a slightly heavier silk thread than the English use- the English use a very fine thread so that it is very discreet whereas the Italians like it to be a little more showy. But not much. The little prick marks about 1/4" form the edge are from an edge baster- instead os basting edges by hand which is actually a little uneven and can produce a slightly wobbly looking edge, we use a single-thread chainstitch machine to baste the edges during production. The chainstitch is very easy to remove before final pressing.

flap

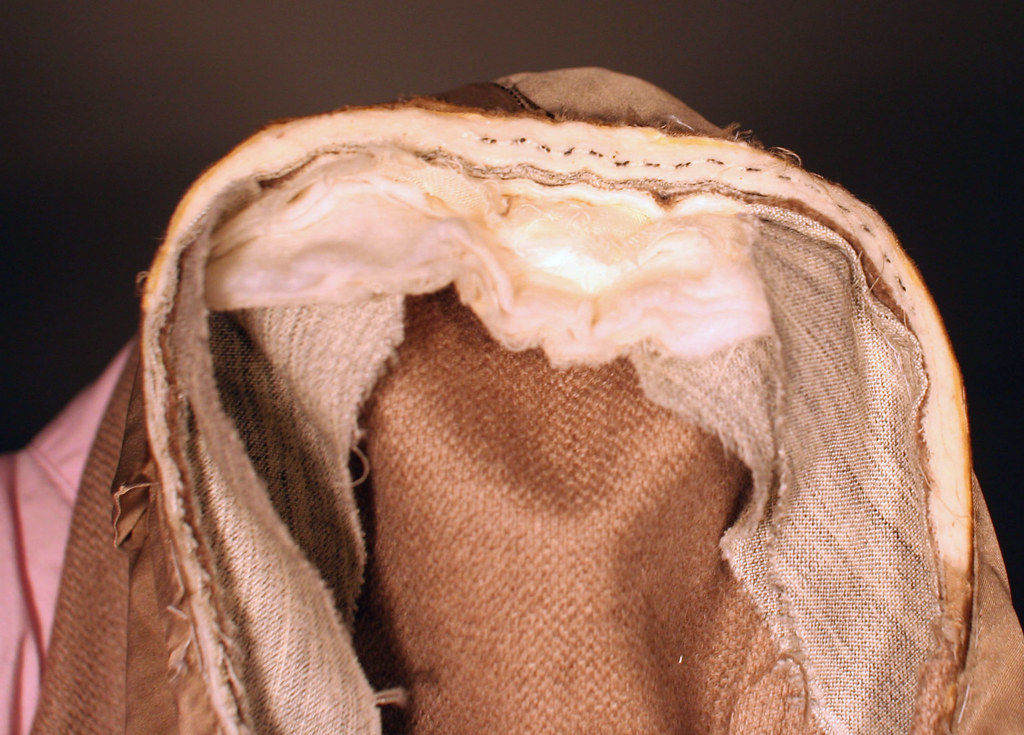
The neck has all been finished by hand and the top collar has been drawn on completely by hand.

neck

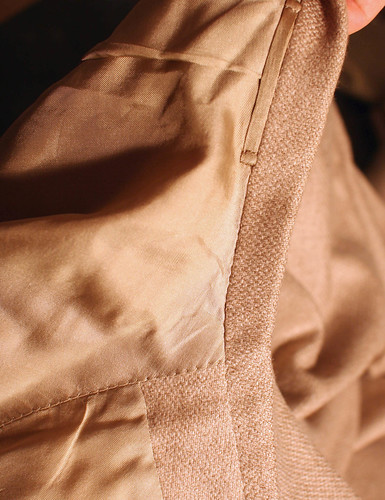
The collar itself has been constructed by hand (though padded by machine) note that there is no turnback at the end of the collar.
undercollar

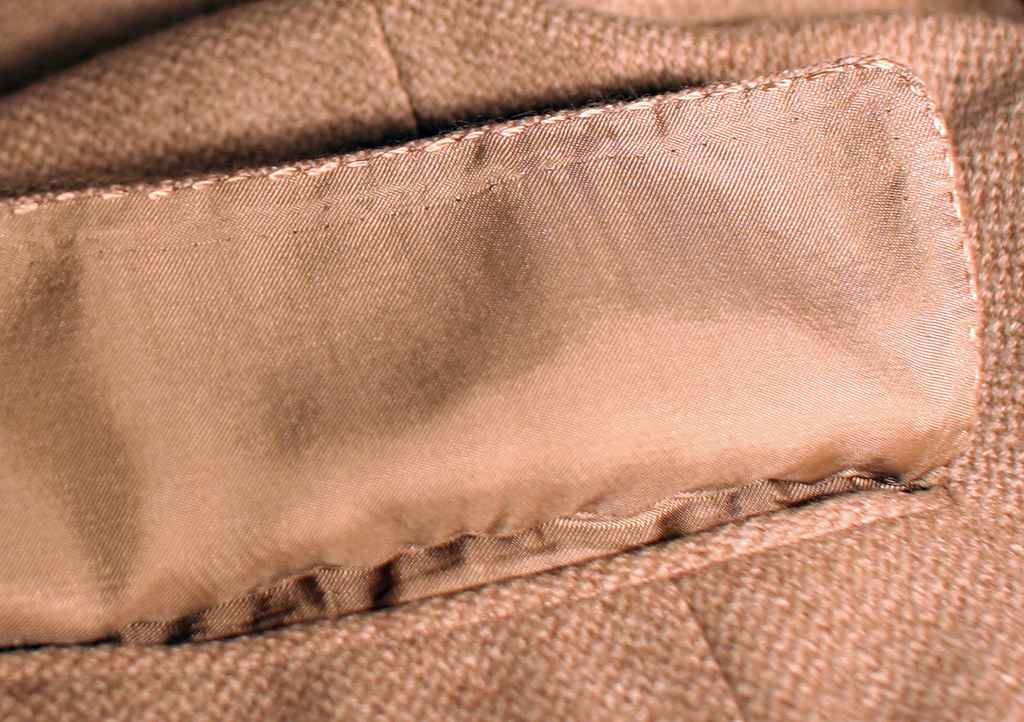
The breast pocket is the curved "barchetta" type and is done by hand, the same way I learned to do them, as opposed to the way I recently learned to do them thanks to Huntsman and Jukes.

barchetta

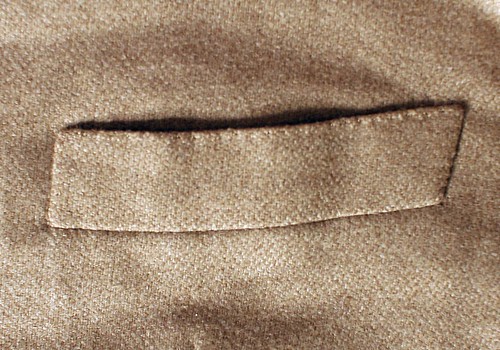
Notice there is no exposed seam allowance inside the breast pocket and it has been felled by hand, not by machine.

inside barchetta

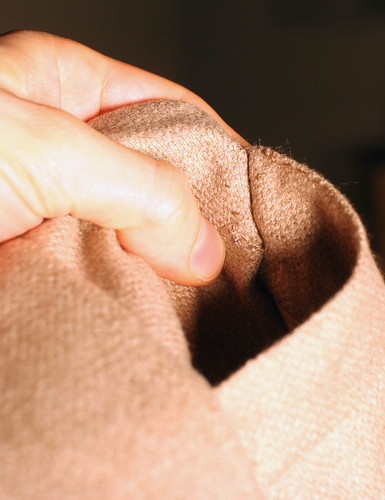
A moderate amount of wadding in the sleeve head and a moderate pad- more than Poole, about the same as Huntsman, a little less than Brioni.

sleeve wadding

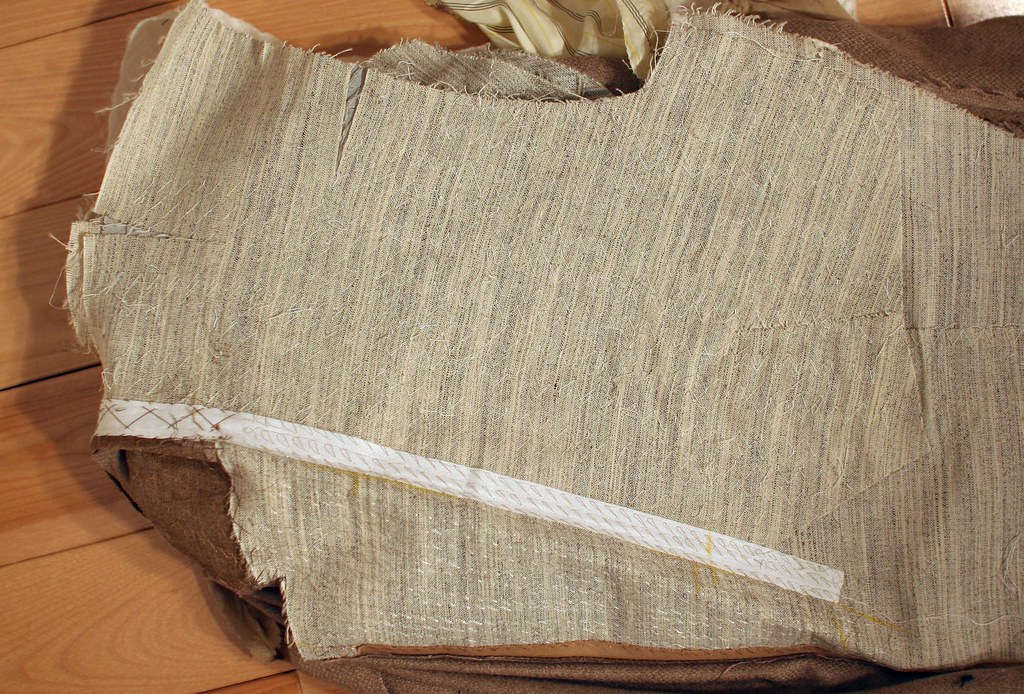
The canvas holds no surprises, though it has been made with a zig-zag machine as opposed to the twin-needle jumpstitch machine that I prefer.

canvas full

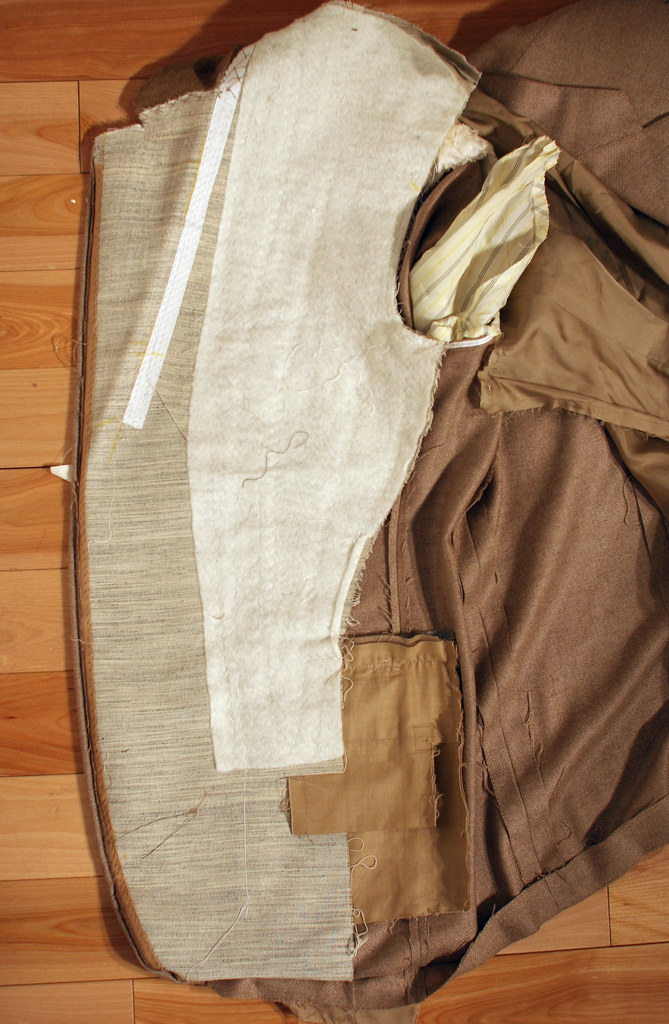
Removing the felt, we can see that instead of haircloth, which is firm and expensive, there is another piece of the same type of canvas as is used on the front. It's been machine padded to within an inch of its life, which makes it a bit firmer but still softer than haircloth, so I'm not going to bother ripping the stitches to open it up.

canvas chest

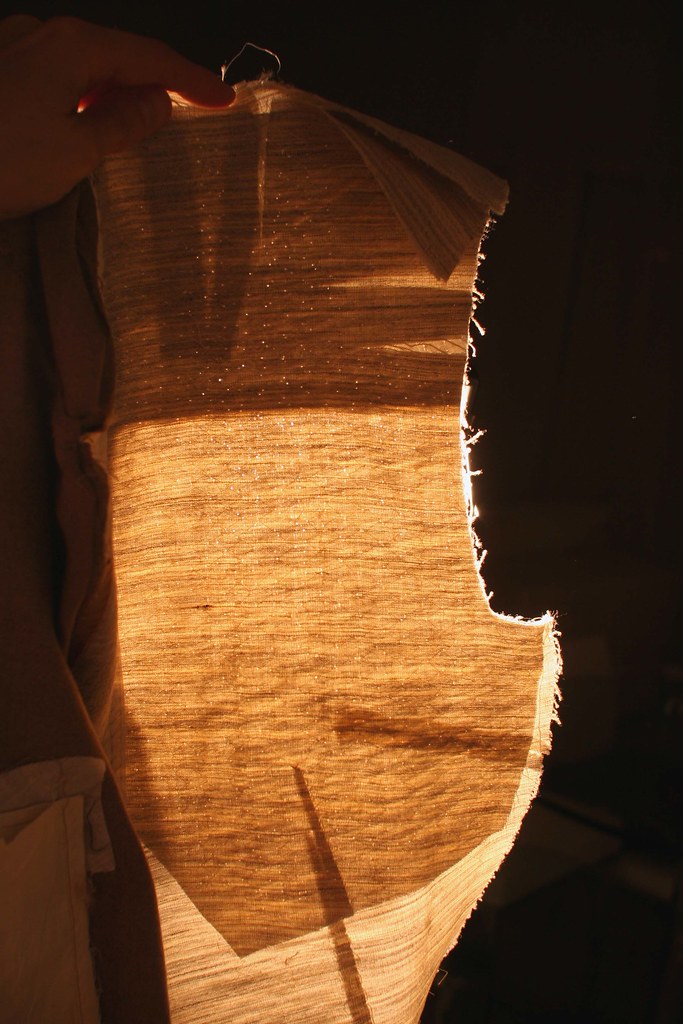
Instead, I hold it up to a strong light to see what's inside. There is a haircloth shoulder reinforcement and you can see the series of vees, or cuts, to give the shoulder some shape.

chest see through

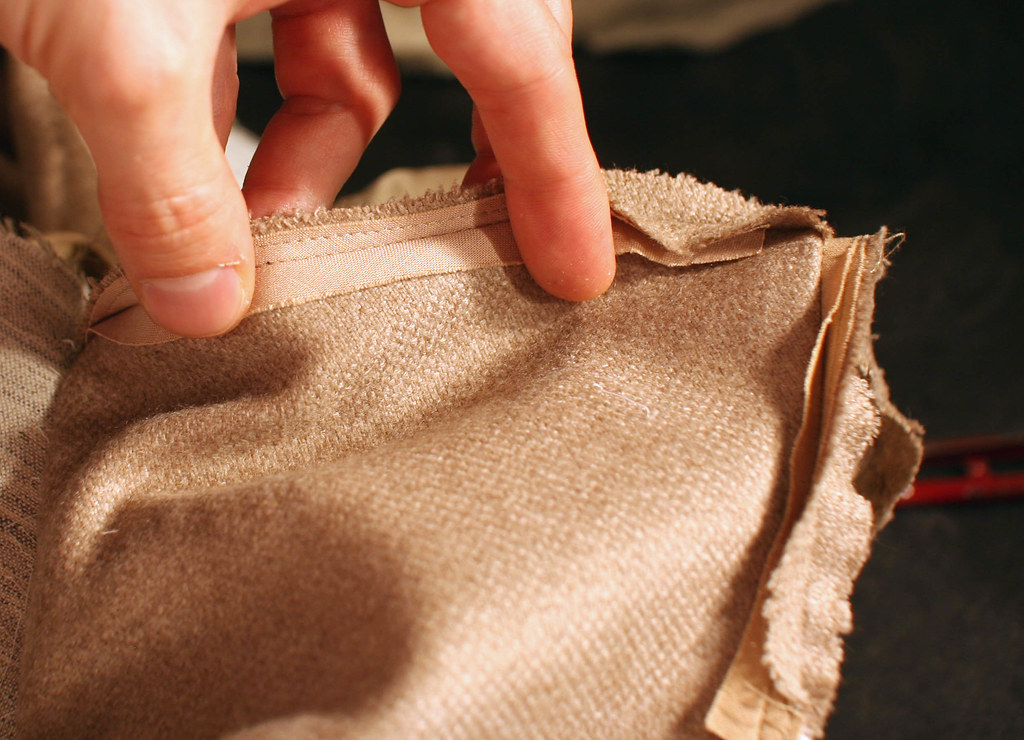
Finally, a look at the shoulder seam, which is machine-sewn and stayed with a piece of bias-cut silesia. If you read the Poole dissection you will remember that Poole stayed the shoulder with a straight-cut piece of lining which had no give- this silesia will stabilize the shoulder but still give. I will soon be conducting some experiments concerning elasticity in the shoulder so stay tuned......

shoulder seam

In response to Jordan's questions and comments about the curved barchetta pocket, I agree, when well done it can be quite nice, though sometimes it is overdone and looks affected. It is the default shape in southern Italy and is catching on in the North too, so I doubt any of them would think it would clash with a straight-cut lower pocket, so long as it was subtle.

The pocket welt itself is curved, not straight cut and bent into shape, and therein lies a bit of the difficulty in making the pocket (and why some curve it a lot more in order to show off a bit) so it's not an issue where stripes and plaids are concerned.

barchetta plaid

StumbleUpon.com

Saturday, December 5, 2009

Hand Made Buttonholes- UPDATE

threads


I got an email from my Gutermann rep; Germany, it seems, has relented and will now allow me to order my gimp by the spool instead of by the box per colour- a box containing 5 spools of 100m of gimp which would make, I guess, about thirteen thousand buttonholes. That's too much. Now if only they would relent on the silk twist as well.

UPDATE If you are located in North America and are interested in the Agreman gimp, a group buy is being organized on the C&T forum. Or you can contact me directly at jeffery_d at ymail dot com for more info.

In the photo above, on the far left, the large spool is my gimp of choice. I have always used this type of gimp but when Gutermann made it hard to get I tried a few different varieties and none even came close. Made in Spain, the article is called Agreman and is a wrapped core gimp which comes in spools of 100 meters. Richard James Weldon stocks this but shipping gimp from London to North America can be very expensive.

To the right of the gimp is my buttonhole twist of choice, Gutermann's silk R753, which is a size 40/3 long staple thread. More on this in a bit. It comes in 400m spools (like the one with the orange cob) and can be found at Ely Yawitz or Bergen Tailor Supply in the US. The box standing behind it is the same thread but in small cobs of 10m each; this is the retail format which is available from RJW (they told me they didn't have the bigger format) and is not really worth the money; a cone of 400m from Bergen is about $15 US, while the box of 10 cobs of 10m costs around $20 from RJW. Yawitz sells the individual cobs for about $2 or $3 so if you have a weird colour to do and don't want 400m of it, then the individual cobs are good for a two piece suit.

Second from the right is a one ounce spool of size F (Mara 30) long staple thread that I got from Bergen for about the same price a the 400m of R753. To far right is Gutermann's S1003 wihch is the same size but is a spun thread. Again, more on this in a second. This cone came from Dugdale and I haven't seen any of it in North America but is fairly common in Europe and comes in 300m spools; it is also available in size 40/3 (like the R753 but Dugdlae does not have it. Despite its being spun, it is about the same price as the long filament thread.

Not pictured is some continuous filament thread from Amann which Schneidergott sent me- it is the same size (40/3) but a shade more lustrous than the R753. He says it's hard to find over there (it's impossible to find over here). Maybe someone knows of a good source?

So which one to use?

First the difference between the spun thread and the long staple. When the silk cocoons are soaked to separate the fibers, the beginning and ends are shorter in length and are spun together to create the thread. Because they are shorter, the are more fiber ends which makes a fuzzier, duller texture. The long staple threads are made from the longer silk fibers from the middle part of the cocoon- the longer fiber means less ends and thus a shinier, stronger, and more lustrous thread.

The advantage of using a heavier thread, like the size F or the S1003 is that less stitches are required to cover the buttonhole, meaning less time and less thread. It is also easier to do a neat job using heavier thread. The buttonholes look a bit chunky compared to those using finer thread, so I prefer the finer. This is personal preference and one is not better than the other.

Examples of both size can be seen below; in each case I used the Agreman gimp.

This is the Gutermann S1003- the heavy spun silk. The size F thread would look the same, only shinier. This is a small buttonhole for a 24L button on a vest.

S1003


This is Gutermann R753 with the contrast punched up a bit so you can see some detail. This is also a small buttonhole for a 24L button on a vest.

R753

And finally, the Amann 40/3 thread.

Amann

For details on how to make hand made buttonholes, see this thread

StumbleUpon.com