Friday, June 12, 2009

Pattern Drafting 101
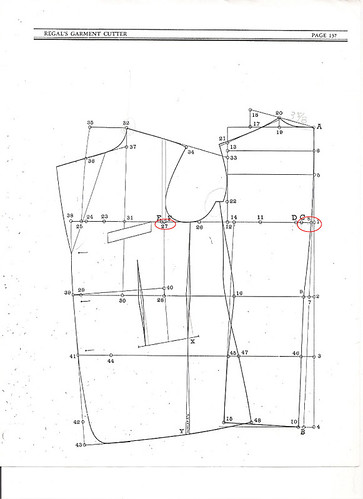
Pattern Drafting 101

Web

There are a number of people who have expressed interest in learning how to draft suit patterns and are looking for a good text. While there are a number of (mostly out of print) texts on cutting (or drafting, I use these terms interchangeably) they all assume that the reader has spent the usual 8 years apprenticeship and is familiar with the rudiments. Of course, the best way to learn is to be taught, but there are those for whom this may not be easy so I will try to condense some of the basics in order to get you started.

DRAFTING SQUARE
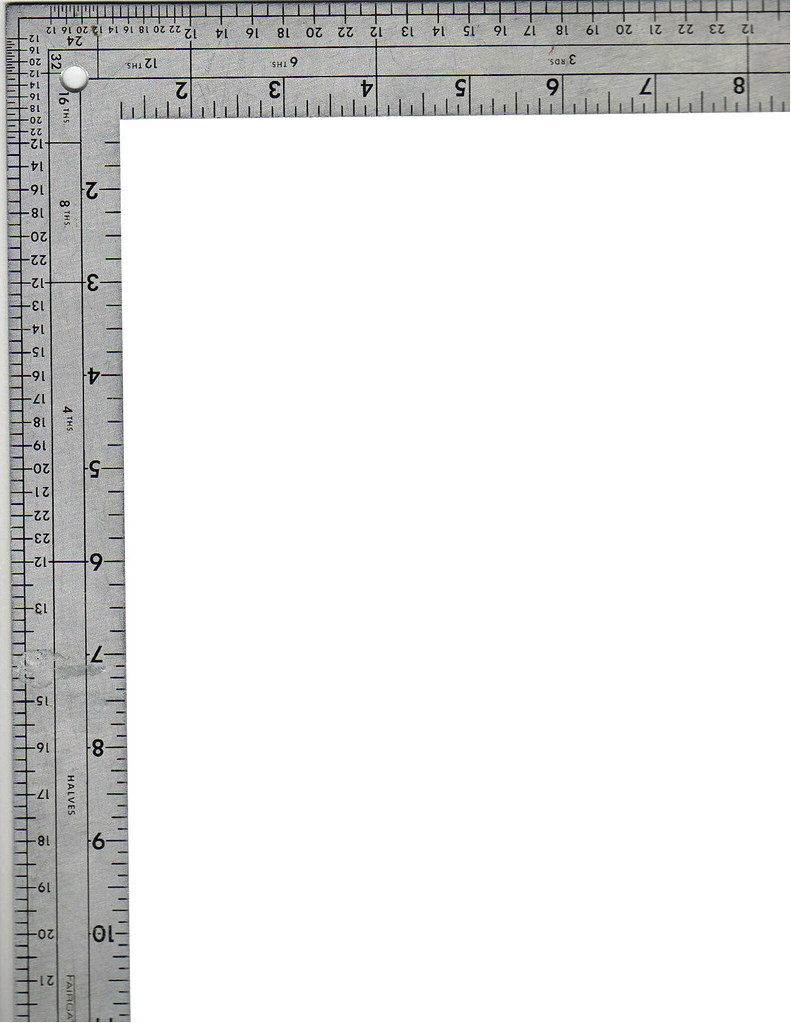
Drafting Square

The first thing you need is a drafting square. There are enough things to get your head around at first; don’t get tripped up by fractional divisions- get yourself a drafting square which will do part of the work for you. A list of sources can be found here.

The squares are available in centimeters or in inches and the one you choose should reflect the sizing norms that you are used to and will use. Most English language cutting manuals use inches as a basic unit so even though you may find the system archaic (we tailors love archaic stuff) you will probably be best off using a ruler set in inches. French, Italian and German manuals tend to be in centimeters, which is more civilized.

On one side of the square you will see boxes with numbers on them- they are grouped into divisions such as thirds, fourths, sixths, eighths, etc. More on this later, though this is very important, especially when you are starting out.

THE SYSTEM

There are a number of drafting systems published and you should choose one to learn at first, and choose carefully. Some systems were developed with the individual cutter in mind, that is to say, the bespoke cutter who would be cutting one at a time for individual customers, and others which were more geared toward wholesale (these are more rare). The bespoke systems had only side seam allowances included since inlays were added at the time of cutting , whereas wholesale systems have all seam allowances included. When starting out, it is important to find a complete text, not just individual draft instruction pages, since the instructions will not give important details such as which, if any, seams have been allowed. If you are unable to find the complete text, find out from someone familiar with it what seams were included and what inlays, if any, must be added.

Another thing to take into consideration is the type of construction lines. Some systems, like the one pictured above which is from Regal’s American Garment Cutter, will have you draft you pieces in such a manner which will require straightening after drafting- bespoke systems were usually such that you could draft directly onto the cloth and as such the basic construction lines will be the same as the grain lines and are easier for the beginner to grasp. Regal’s, Rundschau, the Modern Mitchell System are all excellent systems but a little complex for the starting cutter. The Cutter’s Practical Guide system as published by A. Whife, is a good system for beginners, however it is out of print and sometimes hard to find complete copies. The Tailor and Cutter magazine and the Modern Tailor Outfitter and Clothier (a rare and expensive 3-volume manual) are good sources. Many individual drafts can also be found at the Cutter and Tailor forum, as well as people who may be able to help you start out.


Most seam allowances at the time were of ¼”- today 3/8” is more common, and home sewing patterns allow 5/8”.

THE SCALE

Drafting and grading were based on the premise that one could predict the dimensions of the various parts of the body based on certain landmarks, a premise which is now under scrutiny and debate. It was also important that the system be easy to remember by the cutter so system of proportional cutting were devised around a scale.

Usually the scale is equal to half the breast measure; for a breast measuring 40 inches around, the scale would be 20 inches. In European systems, the size is equal to the scale; a person with a 100 cm breast wears a size 50 jacket and the working scale is 50 cm. Some systems use a “scale” and a “working scale”, which may be something like one third of the breast plus 3 or six inches. The instructions will always indicate the scale. They will also indicate the base size used for the draft- for example they may state the scale is half the breast, in this instance 20”. Some direct measures will be used, such as waist length and full length, perhaps armscye depth and front shoulder measurements; the instructions will also state what these are FOR THE SIZE BEING USED IN THE INSTRUCTIONS. If you are drafting in the same size as the instructions, you can use these direct measures. If you are drafting in another size you must use the corresponding direct measures which can be found in the book’s table of standard measurements (if it includes one) or from the client. Since you will not be cutting for clients for a good while, I suggest you stick with the numbers in the book. It is easier to check your mistakes if you do (and you WILL make many mistakes, at first).


The points of the grid of the draft are located using divisions of the scale- for example, the first neck point is usually somewhere around one sixth of the scale from the first point of the draft. This is where the drafting square becomes useful- if you are required to start calculating one sixth of 19 5/8” you are very likely to make mistakes. Instead, locate the scale amount on the sixths divisions of the square. In other words, if your breast circumference is 40, the scale is 20 (half the breast). You will locate 20 in the sixths division portion of the drafting square and locate your point this way without having to do any math. Suddenly the expense seems worth it, no?

THE INSTRUCTIONS

I have found that many instructions are a little loose in their wording (and sometimes include mistakes) so you need to use some common sense at times. While normally we are working with the half breast and half waist measures (or breast on division, as some state) they will sometimes refer to the “breast” or “waist”, not being entirely clear whether it is the full breast or the half breast. You must use a little common sense before applying the measurement to be sure which one they meant.

Many systems also take for granted that you know how to “sweep” a measure, how to apply a measure, and they maddeningly refer to “and develop in the usual way” without mention of what that usual way is.

To sweep a measure, usually when locating the neck point on the forepart, place one end of the square at the pivot point which will be indicated, place a pencil at the indicated measurement, and draw an arc. If you have a very large compass, this would be more precise. For example, if using a strap measurement to find the neck point, you place one end of the ruler at the front breast line near the armhole, find your strap measurement (say 12”) on the ruler, and keeping your pencil at 12” you sweep an arc. You will then place your ruler at the center front and sweep another arc, perhaps this time at 13” (the instructions will indicate what measurement to use)- the intersection of these points is your neck point.

Darts, vees and fishes are usually pretty loosely indicated in the drafts as it is assumed that you know how to locate and deal with them; some are more precise than others and you will eventually come to realize that it is largely a stylistic issue that is open to a lot of personal interpretation.

Many systems include (sometimes cryptic) references to making up, such as the need to full in, hold short, or stretch certain areas, or to the manipulations required, and in these cases, a good understanding of making up is really required to completely grasp the meaning. Keep in mind that before one started an apprenticeship as a cutter one had to have completed one’s tailoring apprenticeship.

LATHER, RINSE, REPEAT

AKA Practice, practice, practice.

This is a page from a student’s half-scale practice book from the Scuola Artistica di Taglio, Napoli. It is a good idea to start working in half-scale since you waste less paper and is easier to see your entire draft at once. Half scale drafting rulers are available for this purpose.
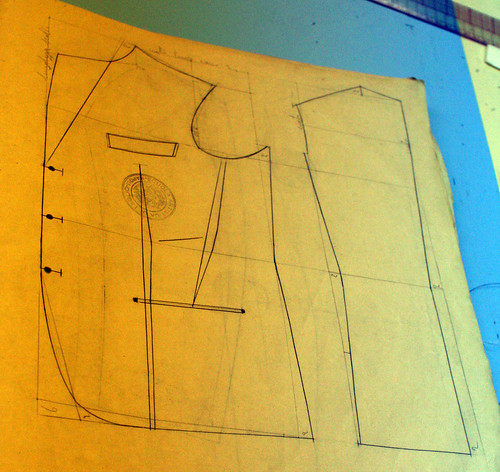
fronts 033a

Most of the draft will seem cryptic at first to you. Some may seem like rocket science or advanced trigonometry and you will miss a lot of the subtleties of certain points and calculations at first. You will also make a lot of mistakes. Keep your work to refer back to later. Practice, practice, practice. If you can, work through all the drafts in the manual, then come back and start over again. Many of the little points you missed at first may be more clear now. I will keep updating this page as things occur to me (as the coffee kicks in) so check back here from time to time as well.

Good luck!

EDIT

Thank you for your comments, Kathleen. I agree that the proportional systems are very limited, particularly where oversizes are concerned. The drafting systems that I refer to are all older systems but are still in use in men's tailored clothing, both in bespoke and in RTW. I have included pages from three different publications which explain that the scales being used are half the chest and a working scale of half chest plus a certain amount. Length measures in tailored clothing are usually done with direct measure instead of scale, which is why the height is not incorporated into the scale for these systems, only the chest width. In Italy, the drafting systems for men most often use the size as the scale, and we know that the size is equal to half the breast measure.
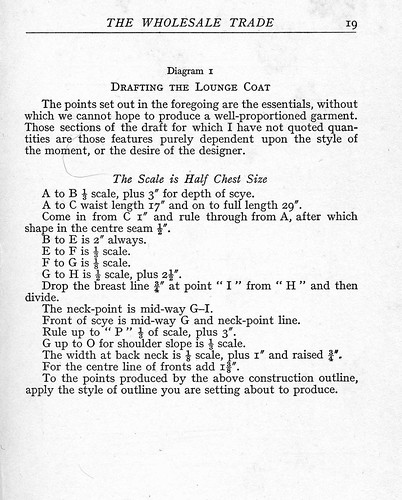
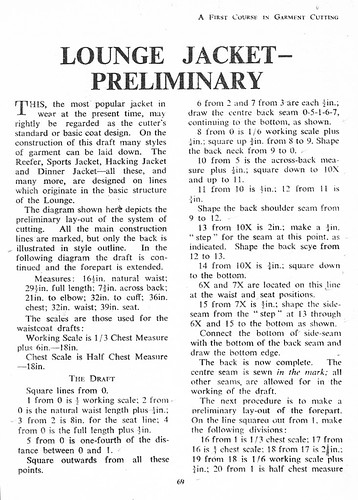
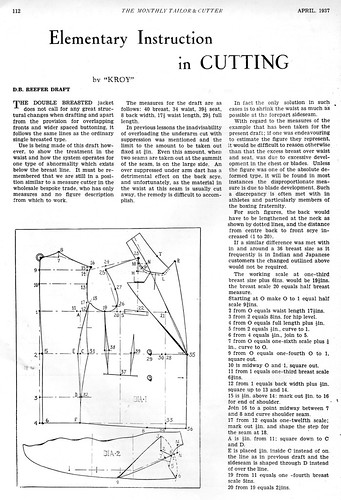
draft

LoungeWhife_preliminary

ElementaryCutting001

StumbleUpon.com

Saturday, May 2, 2009

A look under the hood- Oxxford Clothes

There are only a few factory-produced, hand-made suits available. Oxxford is one of them. Located in Chicago, Illinois, this factory produces one of the most labor-intensive suits available under their own label, Oxxford, and they now produce most, if not all, of Thom Browne’s suits.

I recently put my hands on a not-recent Oxxford jacket. Many garments can be dated, at least to within half a decade, by looking at the shape of the collar and lapel. Not so with Oxxford, which is a good thing. If you were to spend that kind of money on a garment, you don’t want it looking dated in a few years, so I am not able to place an approximate date on this garment. It has been repaired at least once, and the discoloration of the linen stays inside tell me it’s not recent, but two telling details inside may be able to narrow it down if I were to call the factory. More on that later.

The garment is half-lined, with a center vent, flap pockets, and a breast welt, and edges are pic stitched by hand.

inside.1

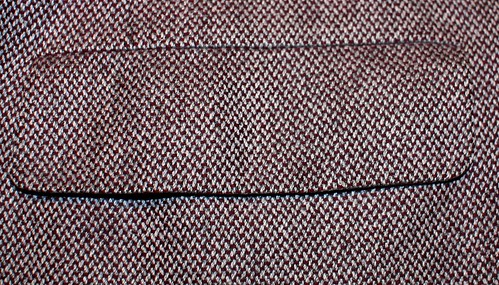
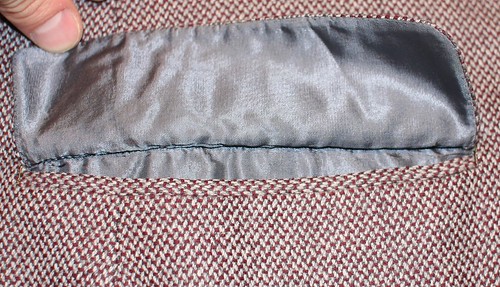
The flap pocket is not the typical double-jet and flap configuration but a single-welt and flap which is typical of Oxxford. It is done with a plain machine rather than an automated machine and has little bar tacks at each end, sewn by hand with silk thread.
pocket.1
pocket jet.1

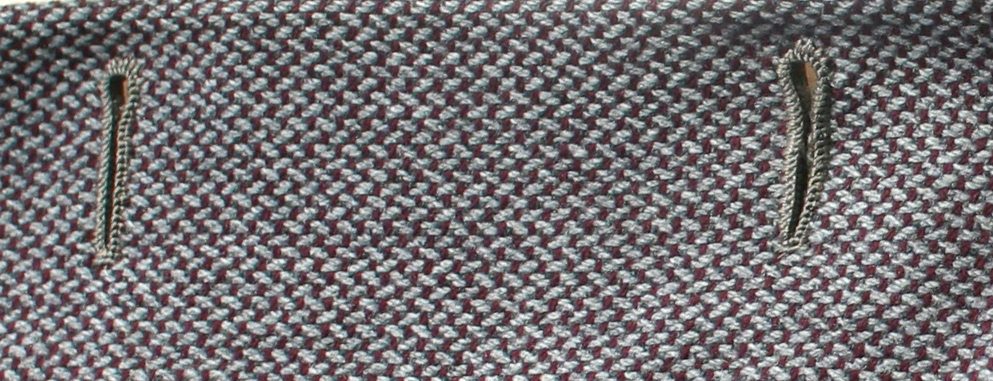
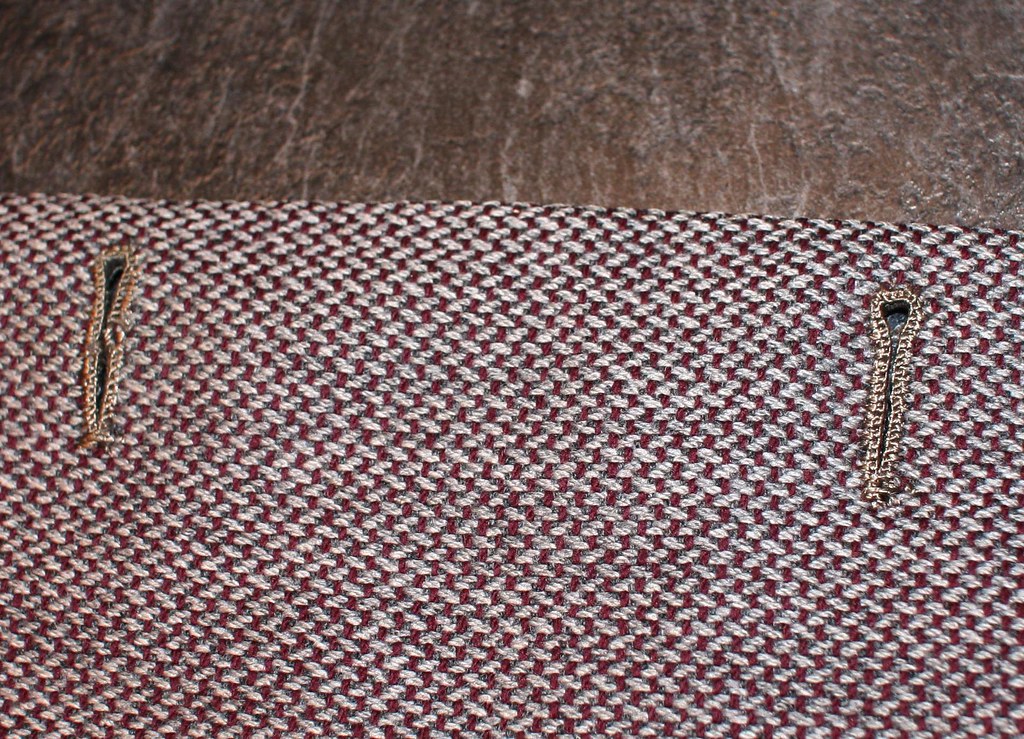
Buttonholes are worked by hand, using three strands of silk twist as gimp

bh1.1.jpg

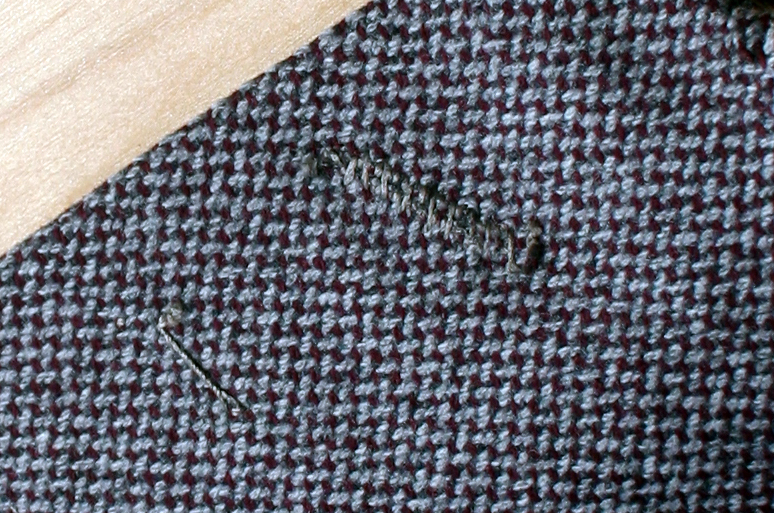
They are also re-worked on the wrong side since hand-made buttonholes are usually pretty ugly from the wrong side. One of these buttonholes has started coming apart on the wrong side. Nothing lasts forever.
bh back.1.jpg

The lapel buttonhole has not been double-worked, and is still lashed shut. There is a flower loop just below it.
flower hole.1.jpg

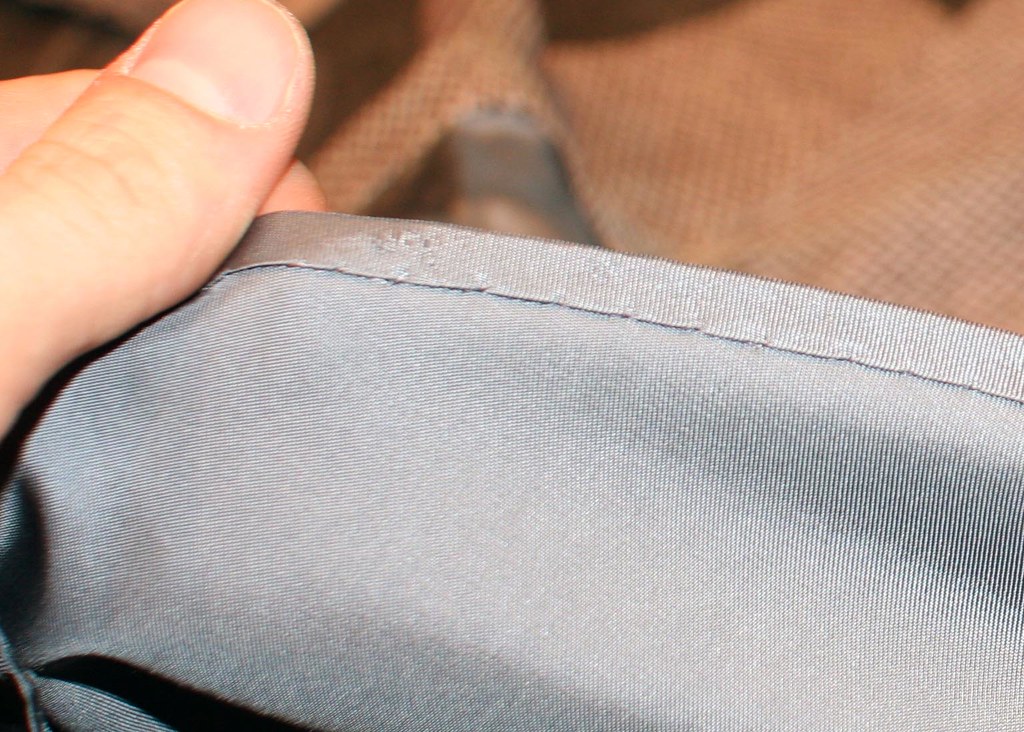
The back yoke of the lining has been hand-rolled and finished.
yoke.1

The center vent has been lined and the lining is felled to the garment by hand.
vent.1

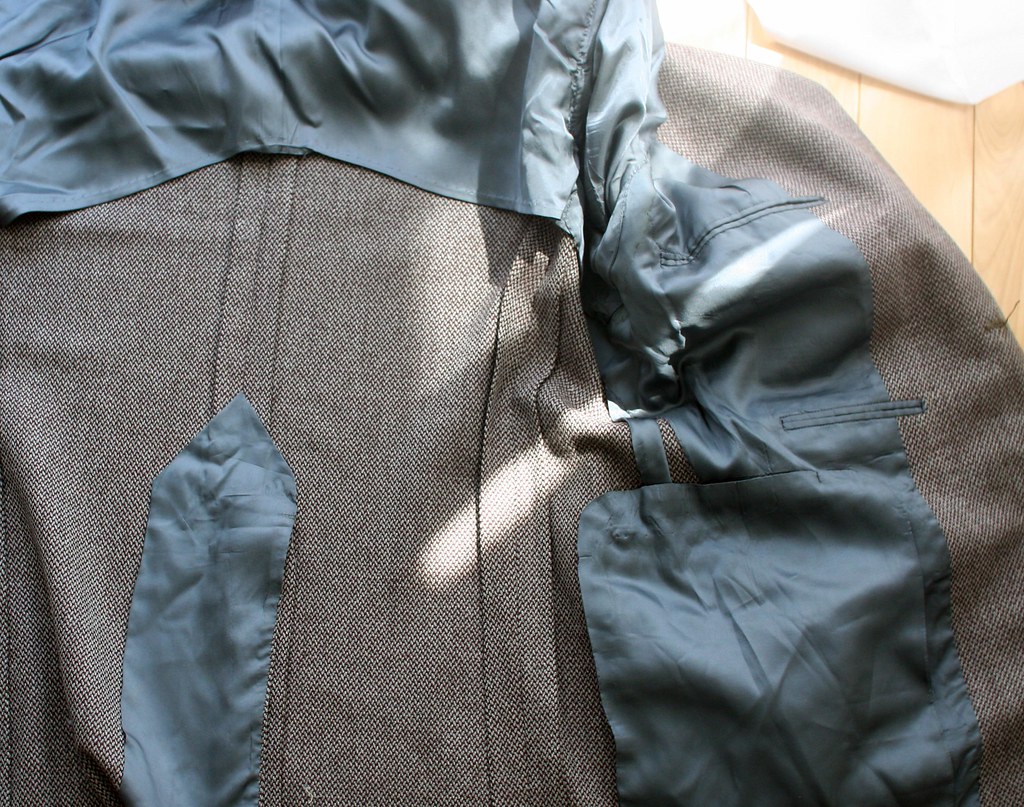
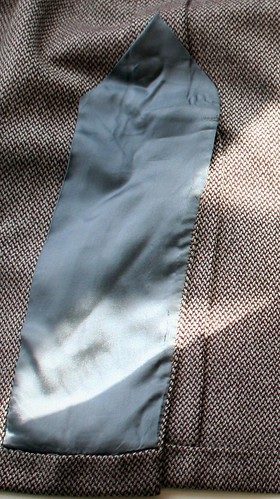
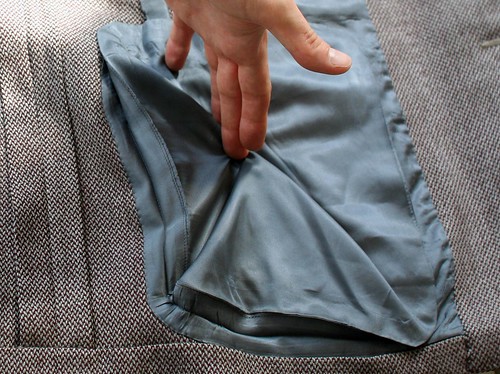
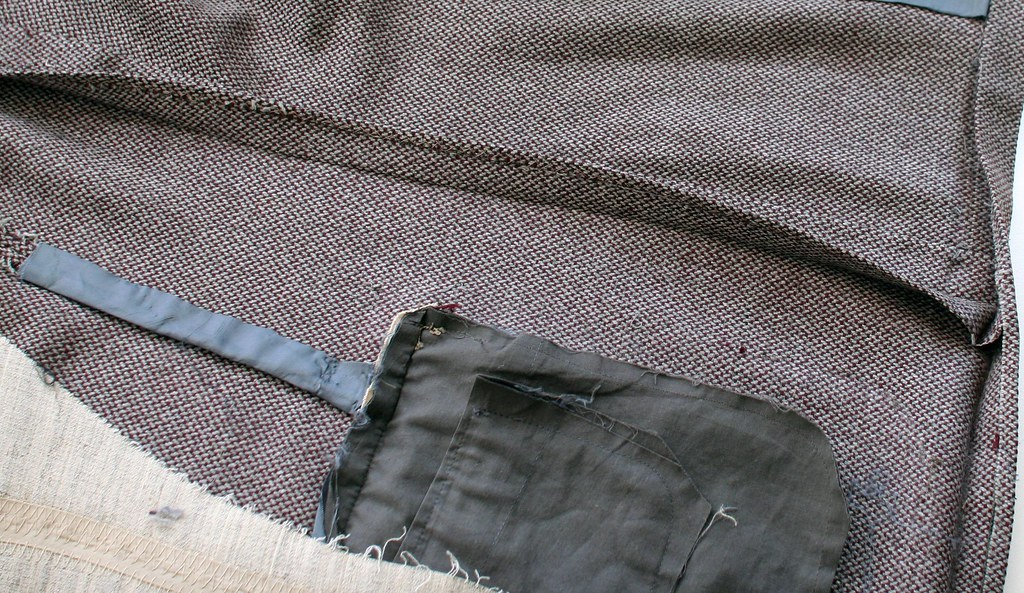
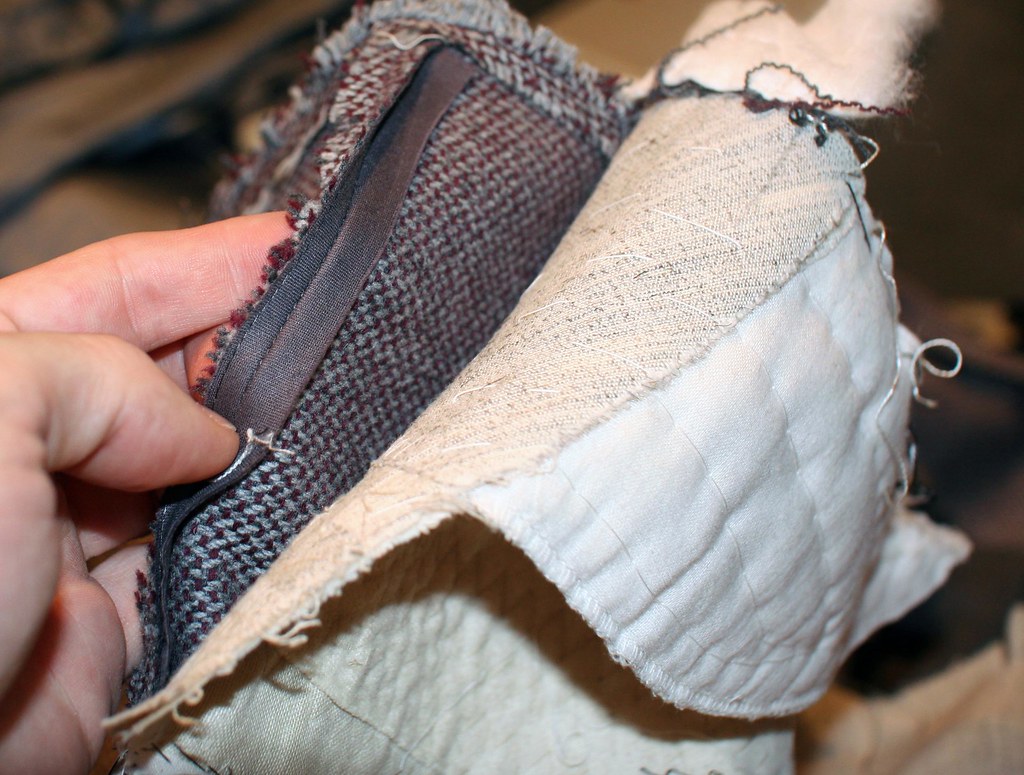
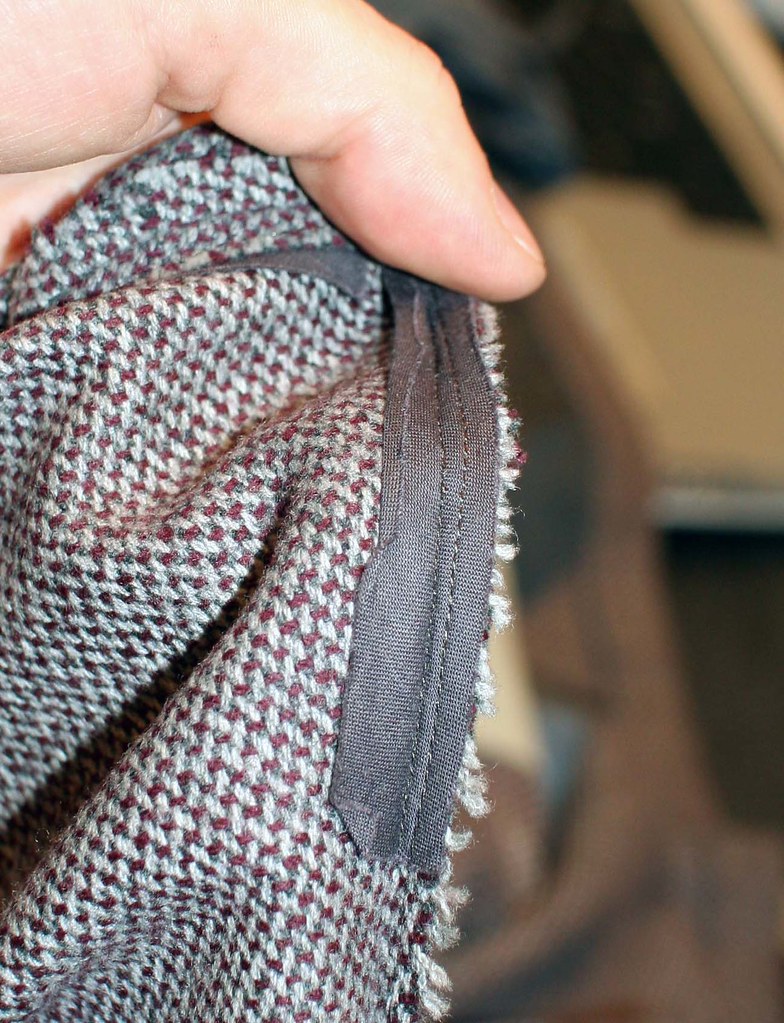
The back of the pockets are lined with a bellows lining, which is also completely felled to the garment by hand. The front and side body are cut in one piece, with an underarm dart running just below the pocket, which has been finished with a strip of lining, felled to the garment by hand.
bel pocket.1

Seams are finished with what we call “book seams”-
under.1

The edges of the seam are turned and catch-stitched by hand.
book seams.1.jpg

The hems are all felled by hand. Note the absence of interfacing in the hem.
hems.1.jpg

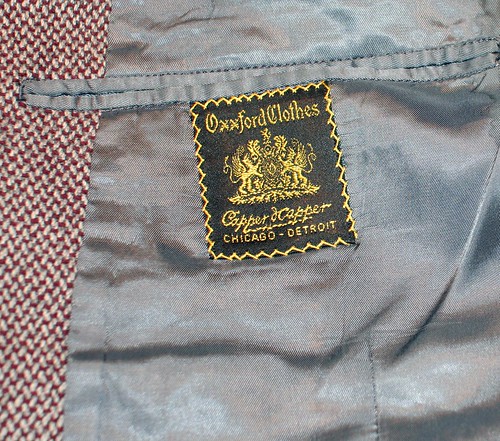
This is the label, hand sewn with silk thread, fixed below a hand-made pocket. I call this hand made, even though it was actually made by a plain machine, because in factories these pockets are almost always made with an automated pocket-making machine which executes the pocket in seconds (see early blog post on pockets). This, on the other hand, was made by sewing a lining facing to a piece of pocketing, laying the pocketing on the garment lining and a linen stay underneath, sewing a rectangle which is then clipped, the pocket turned but keeping the seam allowances as interfacing. This is similar to the hand-made pocket I described in the earlier post, but instead of opening the seam allowance as we would do on the outside of the jacket, they are all contained in the pocket jet. This is a stronger finish; the only thing I don’t like about this kind of pocket is that the corners are never very neat.
label.1


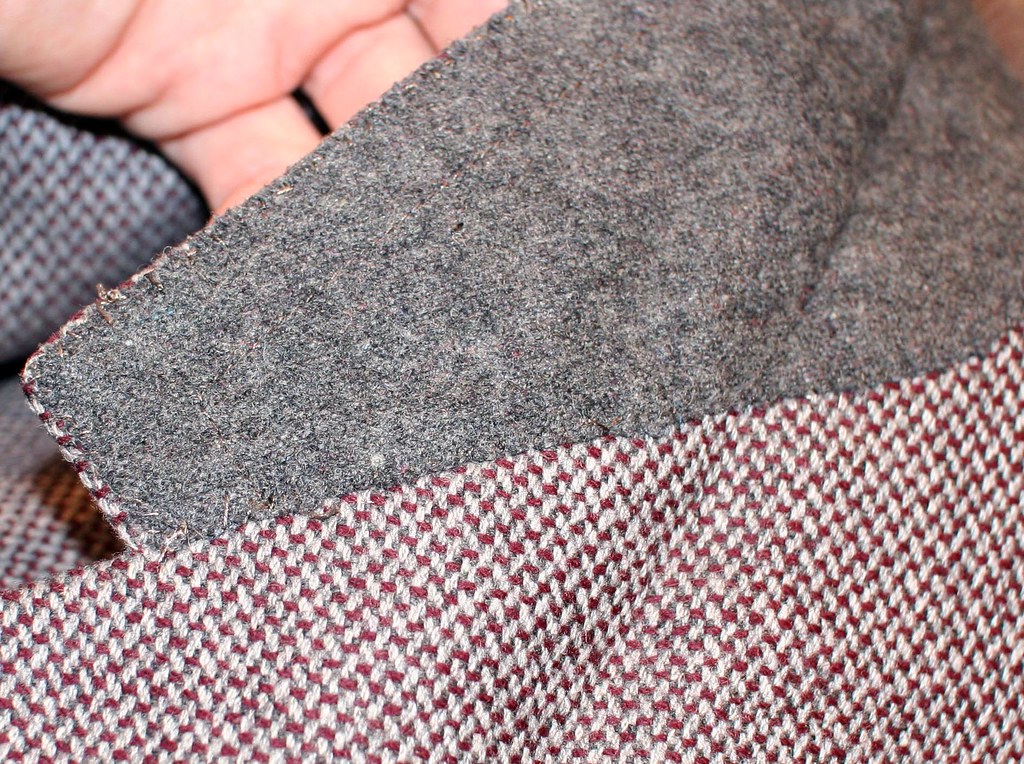
This is the undercollar, and it is one sign that this jacket is not very recent. More recent jackets are done with a turn-under (see post on collars). You can see now that the presence or absence of the turn-under is not a clear indication of the level of construction or quality, although the absence of zig-zag stitching is. If I were to call the factory, they would be able to tell me when they changed their method of doing the collars and this would help date the garment, at least tell us when the most recent date it possibly could have been made.
under collar.1

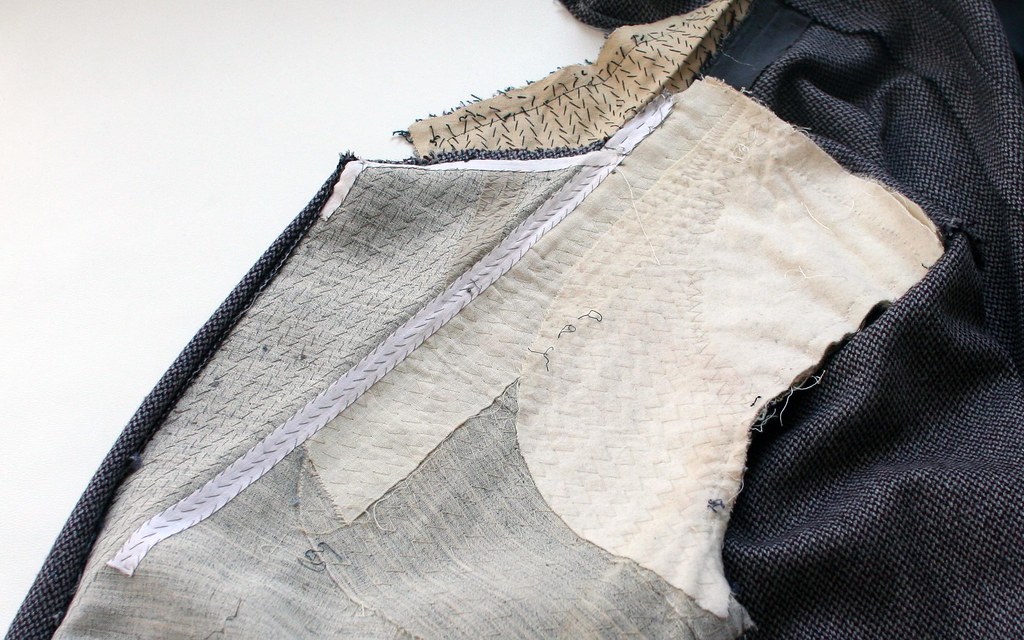
Here we clearly see that the lapel and the collar have been padded by hand. Oxxford is among the very few (only?) RTW makers who do this. The canvas front has been made by machine and padded with a large zig-zag machine (they are now made with a double-needle jumpstitch machine (see post on canvas fronts). The edge and the bridle have been taped with ½” straight-grain cotton tape- note the absence of tae along the lapel edge. The canvas has been cross-stitched to the cloth along this edge.
lapel.1

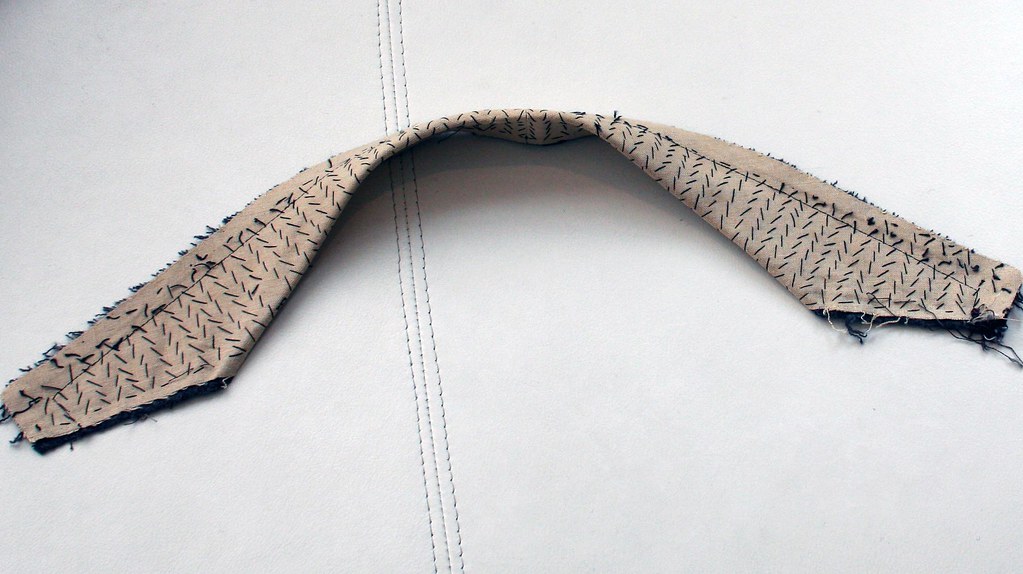
Here is the collar which has been removed from the garment. The linen is quite soft and the wool undercollar is not felt, but a plainweave.
collar.1

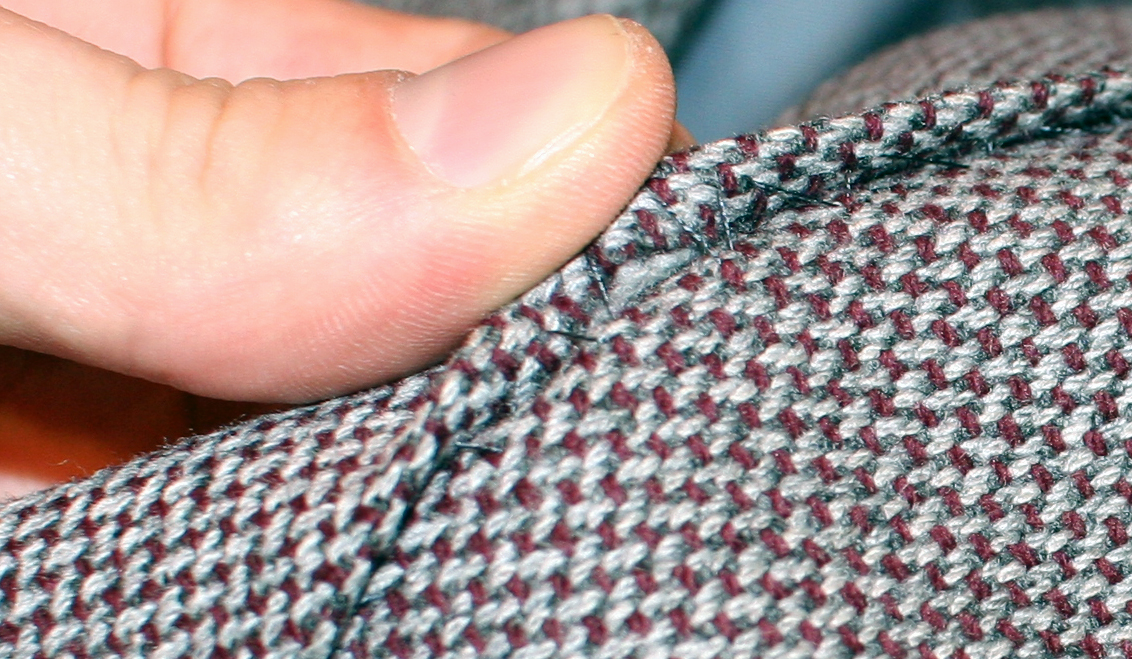
This is the shoulder seam- it has been clearly done by machine, one of the few seams to have been done by machine.
shoulder seam.1

This is the armhole seam, and another indication of the garment’s age. Oxxford now sets their sleeves by hand, while this sleeve has been set by machine. We could use this information to help date the garment.
armhole seam.1

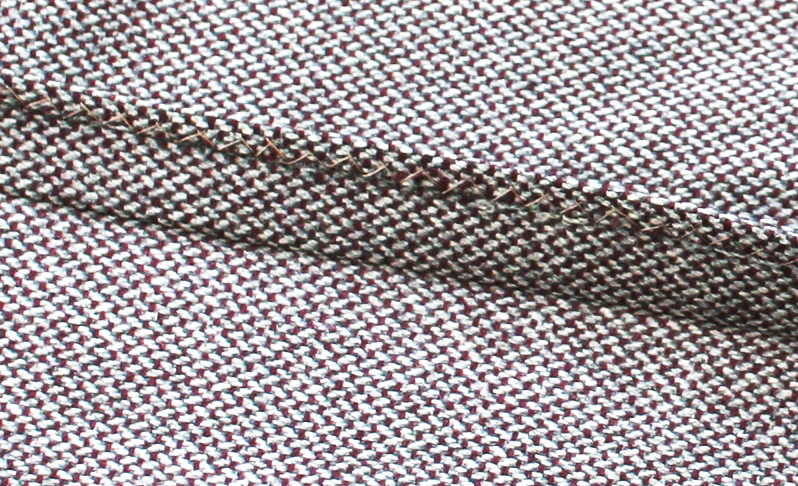
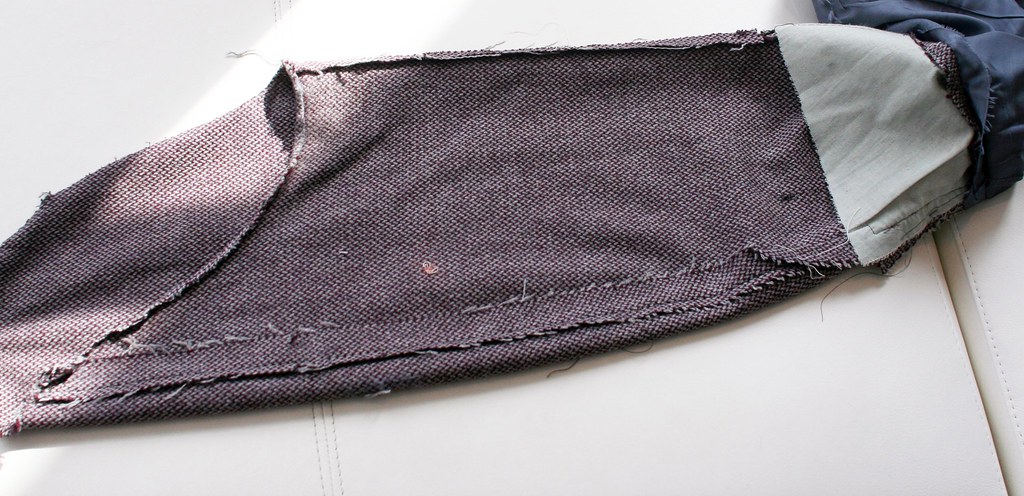
With the sleeve removed, we can see that instead of taping the armhole, it has been stayed with a large chainstitch, done by hand. The principle is to prevent stretching but maintain elasticity.
chainstitch.1

Lastly, there is an outlet on the undersleeve, to allow for future alterations, and a good, large wiggan at the hem.

sleeve.1

StumbleUpon.com

Thursday, April 30, 2009

Sharpening your shears

Photobucket


There is an old guy who goes around town on his bicycle, stopping at all the garment factories, who uses his bike to sharpen all of our shears. He is in his eighties so I fear that my shears will outlast his services. Sator comes to the rescue with this tutorial on hand-sharpening. It'll come in use in the kitchen, too!

StumbleUpon.com

Tuesday, April 28, 2009

Two interesting videos

Chatolufsen posted this interesting video showing Smalto's process- a few interesting tidbits in there.


Here's another one from Kiton.

StumbleUpon.com

Thursday, April 16, 2009

New stuff on the Net!

Perhaps there will be a rebirth of interest in the trade after all!

I'd like to announce the launch of two new sites dedicated to the discussion of the craft of tailoring-

Jeunes Tailleurs

and

The Cutter and Tailor

The former being geared toward students of the craft and the latter more a meeting place for working cutters and tailors to talk shop.

I'd also like to give a shout out for an upcoming book by a friend of mine. David Page Coffin, of Threads and Shirtmaking lore, has a new book coming out on trouser making; geared toward the amateur tailor but full of incredible photos which could be of interest even to the pros, you can check out the preview for the DVD which accompanies the book on his blog, as well as a few other interesting projects.

JUST FOUND A NEW ONE!

A great blog on women's tailoring in Mayfair, London.

StumbleUpon.com

Tuesday, April 7, 2009

A look under the hood- Zegna Couture

I have always loved looking inside other makers' garments, partly out of curiosity, but also because there is often a lot to be learned from each other. Caraceni was known for studying cast-off English garments and a lot of Italian tailoring of that period was due to his studies.

I recently put my hands on a coat from the new(ish) Zegna Couture line, not to be confused with the old Zegna Napoli Couture, with which I am not familiar, and I was pleasantly surprised at the level of construction. This is the factory doing the Tom Ford stuff so lovers (and haters) of the TF line may also be interested.

The first thing I notice is the curving taschino a barchetta (boat-shaped breast pocket) typical only of better makers. It is hand-finished, if not entirely hand made.

Photobucket

Flipping up the pocket flap reveals uneven pic stitching which is clearly done by hand.


Photobucket

The sleeve vent has been prepared for surgeon cuffs (they are finished in this photo) and tacked with a cross-stitch tack, all done by hand.

Photobucket

The locker loop has been sewn on by hand (1) the back shoulder seam extends beyond the front at 2 and is finished by hand, the pleat is also tacked by hand at 3

Photobucket

Nothing thrilling about the inside pockets, but they are well made.


Photobucket
It is perhaps hard to see, but a flower loop has been made by hand at 1, the collar allowance is hand-finished at 2, though the outer seam is done by machine with the t-stitch at 3, the collar felling at 4 is slightly uneven so may be done by hand but could have been done with the old AMF machine, and at 5 we see the back of a hand-made buttonhole.

Photobucket

Yes, you heard right. Hand made buttonholes. And quite splendid ones, at that.

Photobucket
The waist has silesia stays, and uncommon feature in RTW. We can see that the pic stitching along this seam (CB) is rather even and so may have been done by machine. I should add that the front darts, back side seams, center back seam and shoulder seams are all lapped and pic stitched, as are the side and sleeve vents. Being lofty cashmere it is very difficult to make it out but it is there.

Photobucket

Another fairly uncommon feature in RTW is that even the hems and vent underlays are not fused- they have silesia stays and are felled.

Photobucket


Obviously, the armhole has been finished by hand. Nothing to show there.

The facings have been felled by blindstitch machine so it is safe to assume that the lapels are also padded by machine. I can't completely open it up to show with creating a lot of work since this is a new garment, but I can say that this should not be confused with Zegna mainline, and the amount of hand work and type of finishing in it places it in the top range of RTW, although not quite at the level of Brioni, for example. But it is very neatly done and the photos of the buttonholes do not do them justice as they are some of the finest I have ever seen.

As I come across other garment which may be interesting I will post more analysis, and if anyone has old garments that they don't mind parting with I would love to do more thorough dissection, especially of SR houses and Kiton; I will be willing to pay something in return.

StumbleUpon.com

Monday, March 2, 2009

How to make a flannel flower

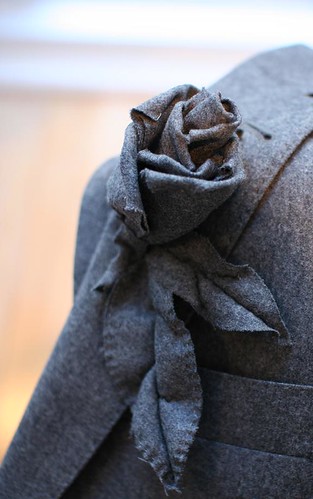
If you’re just joining us, this blog is actually about men’s tailoring; it’s just that I’ve had a few requests to show how I made the flannel flower I’m wearing on my suit. It was made from leftover scraps of the suit cloth when the suit was finished.

flower2

Start by cutting 5 to 7 rectangles twice as long as wide, on the bias (see post about grain lines if you don’t know what the bias is). 1 ½” to 2 ½” wide is a good size. These are the petals.

Cut one small square and one or two leaf shapes as shown.
Photobucket

Fold one of the petals in half, and join the open ends using a running stitch.

Photobucket

Pull the thread tight and secure with a few stitches.

Photobucket

Fold over the corners and slipstitch in place (two or three tiny invisible stitches).

Photobucket

Do all petals like this. Then take one petal and wrap it tightly and secure with a few stitches.

Photobucket

Wrap the next petal around this one, a little less tightly. Keep working around the flower until you have attached all petals

Photobucket

Fold the small square into a triangle and use it to finish the bottom of the flower, wraping it around a bit like a head scarf.

Using a running stitch, work around the edges of the leaf, holding the stitch a little bit tight. Don’t worry about getting the stitches very even- it looks better if they are a little uneven.

Photobucket

Fold the leaf in half and run a stitch right along the folded edge.

Photobucket

Working from the center outward, do the same to create a few veins. Open the leaf out and give it a shot of steam from an iron. Work it into a shape you like and let it dry. Give the flower a shot of steam and place the petals the way you like them, then let dry. Then attach the leaf (or leaves) to the flower. Use a corsage pin to pin in place.

Photobucket

StumbleUpon.com

Friday, February 27, 2009

Grainlines, fulling and stretching

(I'm trying out a new photo hosting format and I'm not sure what results I'm going to get so bear with me here)

When discussing fulling (or, the modern term, easing) and stretching as well as elasticity it is important to have an understanding of what is happening to the cloth, and to understand this one needs to understand a bit about the weave.

Cloth is made up of interlacing yarns running, in a plain weave, perpendicular to each other. Fancy weaves can be created by varying the way they are interlaced, but that is not within the scope of this discussion. The yarns running along the length of the goods are known as the warp (or the lengthwise grain), and are generally stronger than the filler yarns that are run along the weft (or, crosswise grain). This is important when cutting pieces which are subject to strain like waistbands and pockets- they will generally be cut along the warp.

If you try to stretch the goods along either grain, the amount of stretch is limited by the amount of elasticity in the yarns themselves, which is usually rather limited; imagine stretching a shoelace- not much stretch? How is it, then, that we can shape a garment by stretching parts of it? That is where the bias comes in.

Photobucket

The bias is an angle measured from the straight or crosswise grain; the true bias is a 45 degree angle. Just as the properties of the warp and weft are considered when cutting, the bias must also be considered. Madeleine Vionnet was widely (and dubiously) credited with the “invention” of the bias cut, but she is clearly the most notable champion of it; her fluid gowns of the twenties and thirties showed how the bias could be used to mold cloth and that the weave would shift, clinging to the body and draping gracefully.

The principle behind this is that tension exerted along the straight grain stresses the yarn and very little displacement occurs; tension exerted along the bias will not strain any given yarn, rather it will cause the weave itself to shift- the yarns are displacing themselves. In the images below you see two strips of canvas cut the same length but one is on the straight and one on the bias; the they are also shown stretched out- the straight has gained very little but the bias-cut strip has stretched a great deal.

Photobucket
Photobucket

Notice also that the bias-cut piece changes its dimensions- as it gets longer, it gets narrower.

Photobucket
Photobucket

The inverse is also true- when we try to ease or full parts of the garment, an area cut on the straight grain is likely to wrinkle or pucker since the yarn is being compacted (think of folding a paper into an accordion) but the weave of areas cut on the bias will compact and thus the easing will be smooth. The degree of bias will govern how much easing can be done- straighter cuts will allow less easing and cuts at 45 degrees will allow the most.

The clever cutter will keep this in mind when considering where he might need extra length, like the front of the shoulder and thus maximize the degree of bias, or areas which need to be eased in, like around the sleeve cap, and plan the distribution accordingly. The sleeve in particular, with its varying degrees of bias, is a tricky thing- the middle of the front is close to the straight grain so very little ease should be placed there, whereas the area around the front of the shoulder bone is very rounded so a lot of fullness can be placed there, but one must be careful- the area roughly ¾” to either side of the very top of the sleeve is on the straight grain so no fullness must be placed here or the sleeve will pucker. Below you see a sleeve which, by accident or by design, shows this puckering at the very top because fullness has been placed there. These days we would be careful to distribute the fullness to either side of the top where it will be eased in smoothly (as highlighted by the arrows), and place nothing at the very top. The sleeve can be just as full but a more careful distribution will give cleaner results. Of course, certain Neapolitans have different ideas about that, but I have been told stories straight from the horse’s mouth about how that kind of thing came to be accepted in Naples at the time….. Not having been there myself I won’t comment.

Photobucket

StumbleUpon.com